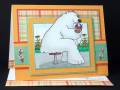
Copic markers were used to color the skin on the image; colors: E00, E02, E21, E33, E25,
Prismacolor pencils for the reminder of the image; colors: all cool greys, carmine red (meat), peacock blue, silver (button), yellowed orange, goldenrod, limepeel, dark green
TIP: when mixing the two mediums for coloring always apply the Copic markers first so it doesnÂ’t pick up the oil from the Prismacolor pencils which could damage the marker permanently.
The out of the box feature is very easy by cutting to the image with the regular paper cutter on the front, marking the image on the back while holding to a light source then use the paper cutter again to cut to that mark. Scissor cut the image out. My paper cutter is a guillotine style. If needed, I used a Coluzzle and craft knife to cut between the images. I do have a pictorial on my blog if you need photos, click here. ItÂ’s a direct link to the tutorial.
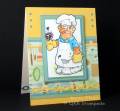
The faux brads are circles cut from a tag Cuttlebug die that I glue to the card. I use the CB die because it rounds the edges like a real brad. These are very easy to pick up with a straight/stick pin dipped in glue then touch the back of the circle and it’ll pick it up, now place it on the card and press down with the finger and pull the pin away – it will allow you to move if needed before the glue dries.
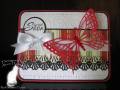
The chain embellishment is cut with an EK Success border punch and itÂ’s glued to the card.
The layers you see above and below the designer paper are strips cut at 3/32 and 3/16” widths and glued to the card base with Aleene’s tacky glue.