Splitcoaststampers.com - the world's #1 papercrafting community
You're currently viewing Splitcoaststampers as a GUEST. We pride ourselves on being great hosts, but guests have limited access to some of our incredible artwork, our lively forums and other super cool features of the site! You can join our incredible papercrafting community at NO COST. So what are you waiting for?
Last week I watched a Live tutorial with Rina K and Gina K featuring a technique they called a Reverse Stencil technique. This one is a little like Joseph's Coat in look but it is so much easier and so fun! I couldn't wait to try it and then I just couldn't wait to share it with you guys.
I took a few step by step pictures but it is so easy - you will probably not need them. They are in the first comment though as for some reason I can't get them in the body of this post...
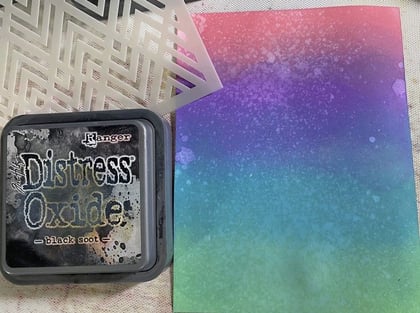
You need inks (I used Distress Oxides) and a stencil and a focal image or sentiment - that's it!
Great challenge Lyn, my first one went wrong but kept it anyway, I loved to play with this fun technique, you can really use all kinds of colored backgrounds with this technique, if you don't got black ink, use acrylic paint, or wax crayon
My own thoughts . . . . I was surprised to read the 'how to' (and good thing I did) as I have done what was called Reverse Stenciling before which involved applying ink to a stencil, misting it and then laying it on the card stock. Perhaps this really IS closer to FAUX Joseph's Coat . . .
__________________ Linda aka Bubbles
I'm not a Hoarder . . . I'm the Curator of an extensive collection of embellishments!!
Proud Fan Club Member Guest Designer Color Challenge July 2017 Favorites Notification Team
I misunderstood, I think. Mine wasn't coming out black like everyone elses. This is what I was doing. I put the stencil on a piece of CS, sponged black, then I turned it upside down on my blended bg and brayered it. Of course it was very light. Anyway, twice I did this , so I have some really black stencil on some colored cs. But here is mine on the blended cs.
Lyn, I couldn't wait to try this. I too, saw the video and wanted to try it. Thanks for the challenge. Here's my card.
__________________ My Blog- Trusting in the Lord for Everything Proverbs 3:5-6 Trust in the Lord with all your heart and lean not on your own understanding. In all your ways acknowledge Him and He will make your path straight. My Stampin' Up WebsiteMy Gallery, BRAK New Member Mentor. New Grandmother to Mia Lou. 1st Grandchild.
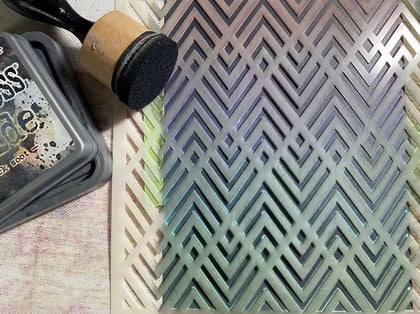
Hello Sharon, please go back to the instructions as your light black colour is due to a misinterpretation of the technique. First you do your colour blending on the cardstock.(usually white) Then you put a stencil of your choice on top of the blended colour piece and make sure it is secured. Then you apply the black ink over the stencil. Remove the stencil when you have coverage and voila - your masterpiece. Hope this helps you out.