I really enjoyed trying out this technique out for a card recently, and since I had a couple of people asking how I'd done it, I thought it would be a fun technique for the challenge this week.
I also consulted Brenda/tessaduck, knowing that both maths and quilting are her home turf, and she had a slightly different way of doing it. So - I've asked Brenda to make a sample, and I'll describe both ways of doing it and you can make your choice which suits you better.
I have attached a downloadable pdf which has all the photos and text - but with the new way of adding images to a post, I can't get it to show in the post at a size I can read the text. So I'm adding the most important photos here, along with full instructions. If you download the pdf, the instructions are added as captions to the photos.
For Brenda's method, you score first and then punch your circles, so they are already pre-scored and ready to fold.
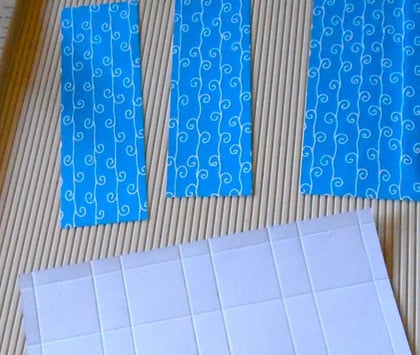
1: Cut strips from scrap paper 1 1/2" wide. One side will show as the square in the quilt block, the reverse side is folded forwards. If it's white, that's fine! But you can use double-sided paper too. Medium to light weight is fine, heavy will be difficult to score.
2: Score at 1/4" along both the long edges.
Score along the short edges at 1/4", 1 1/4", 1 3/4", 2 3/4", 3 1/4". 4 1/4" and so on. Apart from the 1/4" at the end, you are scoring at alternate intervals of 1" and 1/2".
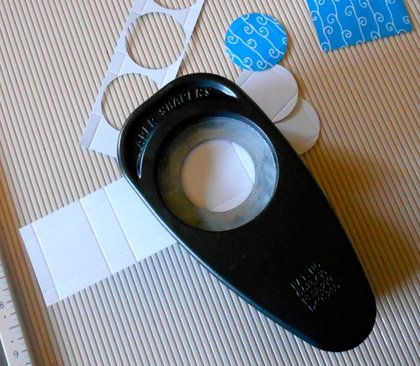
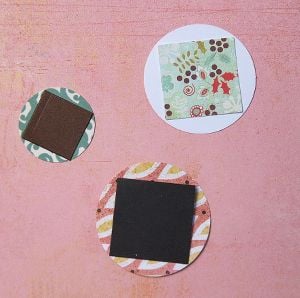
3: Using a 1 3/8" punch and working with the punch upside down so you can see what you are doing, centre it over each scored square, so the that corners of the square touch the edges of the circle. Punch all along your strips.
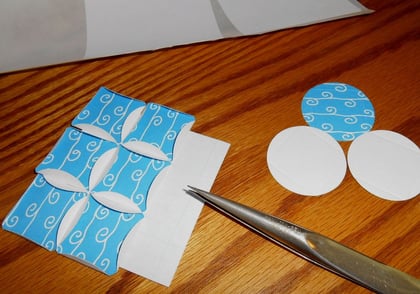
4: Fold and burnish the creases on each circle, so that you end up with neat squares.
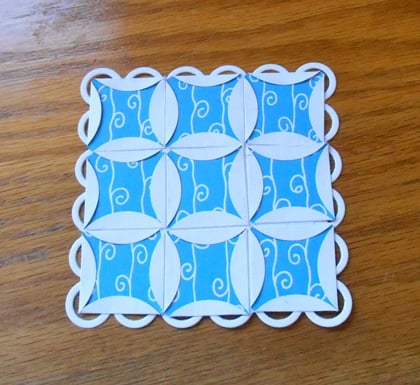
5: Position these onto some backing paper - it's probably good if it's a colour that it doesn't matter if a tiny bit shows here and there! It should be a little bit smaller than your finished quilt. Brenda and I both found that using a grid helped line the blocks up accurately, although for one of mine I just used the edge of a rule.
6: Add some sort of border, and decorate as you would like. You can add beads, or add buttons and sequins in the centres of some of the blocks.
My method called for cutting the circles first and then scoring.
You can either use circles on their own, or as Brenda suggested to me, add squares and wrap the circle round them, more like real quilting.
Either way, you need a square which has a diagonal equal to the diameter of your chosen circle! If you're only using circles and folding them, you just need one square to use as a template for scoring.
I used a 1 1/2" circle punch and a 1" square punch.
HERE is a calculator which will allow you to enter the diagonal (q) and then calculate other measurements for you, including the length of the side. Just make sure to choose the option to "calculate a, P and A, given diagonal q" from the dropdown list.
I centred the square in each circle and used a blunt darning needle to score the circle, using the edges of the square as my guide.
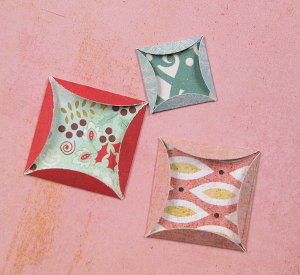
It's up to you whether you want a totally flat finish (Brenda added a drop of glue under each folded flap, and put it through the Cuttlebug to really press it down. I had beads on mine (and gems, buttons and sequins on the first one I made), so I just left them with some dimension.
Sorry for the lengthy instructions - it's much quicker to make. And a 9-patch "quilt" or even 2 rows of 3 really won't take you long.
Here's my card:
TLC544 Cathedral Window
Here are Brenda's cards:
TLC544 birthdays
TLC544 thanks
Thanks again, Brenda, for your help.
:arrow: Remember to use the keyword
TLC544 when you are uploading. It's helpful (to the hostesses for sure!) if you come back and leave a link on this thread .
If you're not sure how to link your card on the thread here, here's how:
1. Open 2 windows or tabs: one window for your card and one for this thread.
2. In this thread, click on reply and type anything you want to show before the link.
3. Go to your card window. Highlight the address for your card. (It says www. splitcoaststampers.com/gallery/showphoto..... and so on)
4. Click EDIT. Click COPY
5. Go back to this thread. Click PASTE.


