Splitcoaststampers.com - the world's #1 papercrafting community
You're currently viewing Splitcoaststampers as a GUEST. We pride ourselves on being great hosts, but guests have limited access to some of our incredible artwork, our lively forums and other super cool features of the site! You can join our incredible papercrafting community at NO COST. So what are you waiting for?
Look at my lovely Copic storage my husband made me!
This is my first post - and first photos, so I hope I've done it right!
Just thought you might like to see what my wonderful husband has made me -all in secret. The unit is made out of MDF, stained and varnished, and each layer has green baize on the bottom so I can put it on a table without scratching it.
There's grooves for each Copic, just the right size so I can "flip" it out, and each layer has little finger-grooves cut in the end to make it easy to lift out. I can spread the layers across my desk and have all my colours to hand.
He got a HUGE hug!
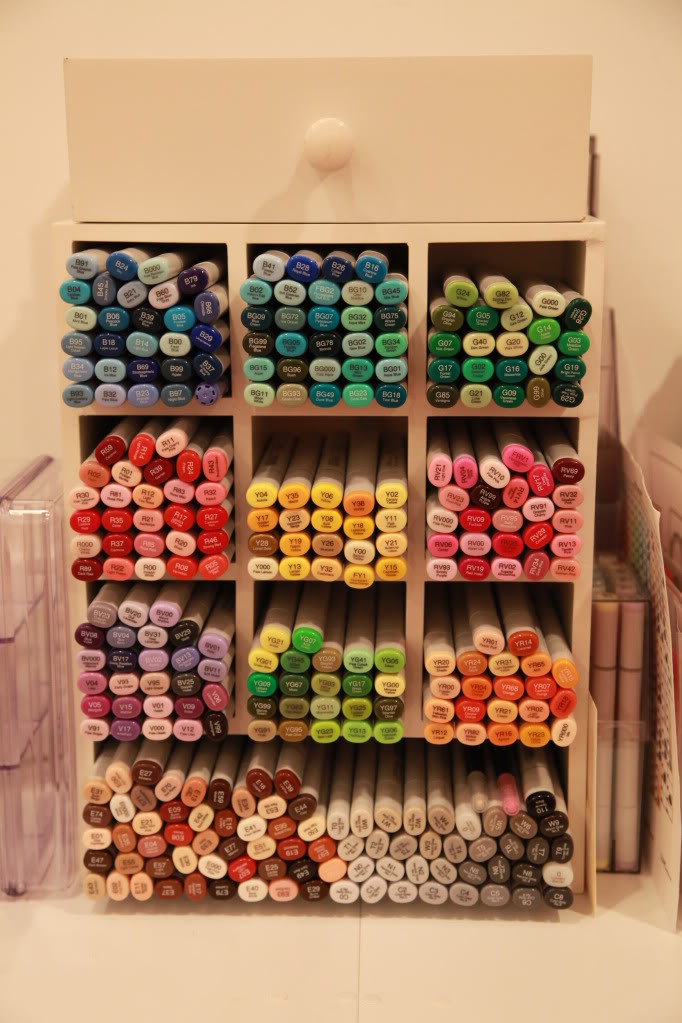
Well, ladies -- I finally found the perfect Copic storage solution (for me)! They were designed by a crafter who knew exactly what she wanted in storage for her Copics and I LOVE them!
They are called Color Cubbies and you can purchase individual "towers" as your collection grows and configure them exactly how you want! In the photo below are two units ... I've ordered two more!!
The shelves are slanted a little, so the markers don't fall out when you grab one from the bottom or middle of the cubbie. The slant also makes it easier to see the color codes on the ends of the Sketch markers. You can read more about the Color Cubbie here. Let me know if you have any questions!
Oh my goodness Sharon~
Thanks so much for the info. That is screamming my name. Can't wait to order them.
This is my first post - and first photos, so I hope I've done it right!
Just thought you might like to see what my wonderful husband has made me -all in secret. The unit is made out of MDF, stained and varnished, and each layer has green baize on the bottom so I can put it on a table without scratching it.
There's grooves for each Copic, just the right size so I can "flip" it out, and each layer has little finger-grooves cut in the end to make it easy to lift out. I can spread the layers across my desk and have all my colours to hand.
He got a HUGE hug!
wow---I hope that hug lasted a long time. What a great guy!
__________________ c-mouse-If you can't say nuttin nice--don't say nuttin at all. Thumper. Pansy
Card Sketch Challenge 1-227 done only 396+ to go to be caught up!!!!!
This is my first post - and first photos, so I hope I've done it right!
Just thought you might like to see what my wonderful husband has made me -all in secret. The unit is made out of MDF, stained and varnished, and each layer has green baize on the bottom so I can put it on a table without scratching it.
There's grooves for each Copic, just the right size so I can "flip" it out, and each layer has little finger-grooves cut in the end to make it easy to lift out. I can spread the layers across my desk and have all my colours to hand.
He got a HUGE hug!
Wow he really thought of everything!!! I like to sort by color families and you can still do that with the separate drawers and then the vertical storage makes it space saving!!! When is he taking orders!! ;)
Look at the wonderful Copic Cubbie my dad built for me. I am so lucky to be the daughter of a member of the woodworking association who is retired. I showed him a picture of the magpie storage unit and this is what he built. I absolutely love it!
Look at the wonderful Copic Cubbie my dad built for me. I am so lucky to be the daughter of a member of the woodworking association who is retired. I showed him a picture of the magpie storage unit and this is what he built. I absolutely love it!
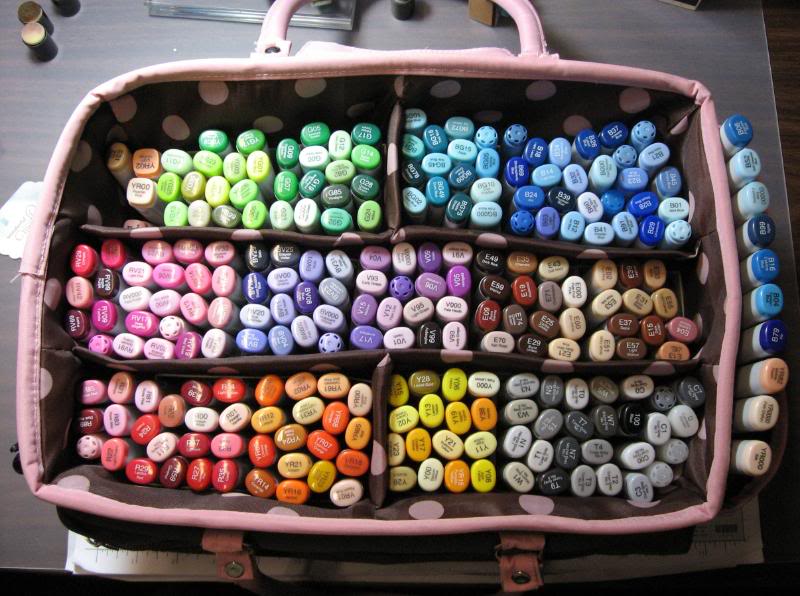
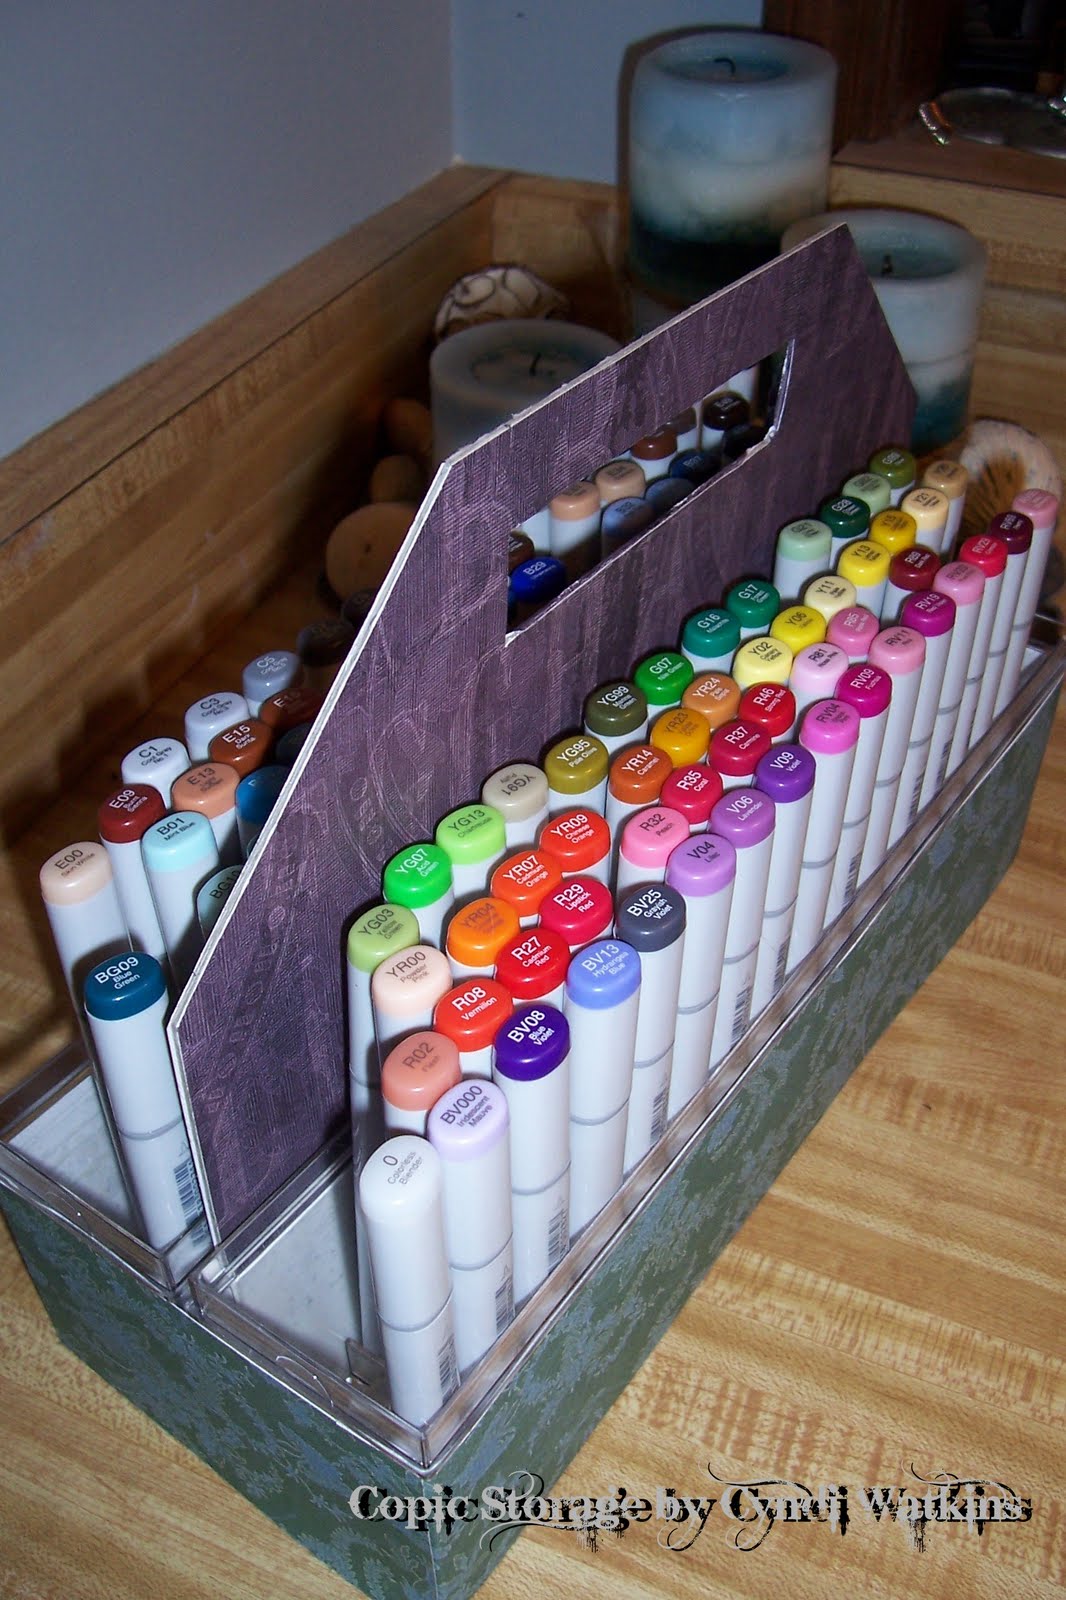
ok, all this sharing about Copic portable storage made me go take pics of mine to share with you. I have to have something to take to the classes I teach and I need to take all of my markers with me. Why? I don't know because I could just take what I need for my class (but that would be way toooo easy!! haha).
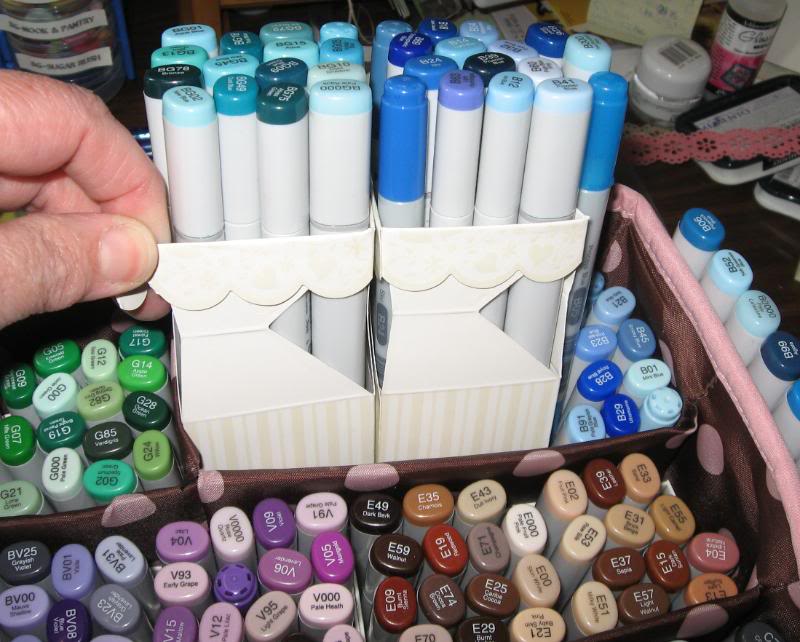
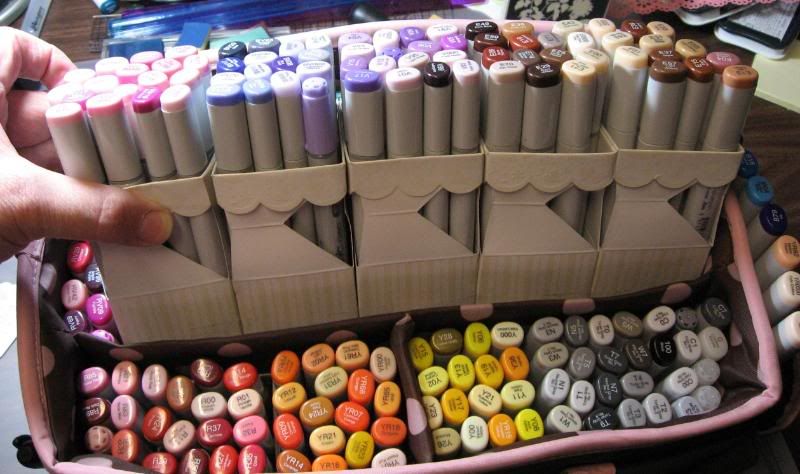
Anyway, I will post the pics of what I use. It is a tote. Once I got it I wanted something to keep my colors seperate and upright. So off to the dollar store I went to search....and I found these little boxes. They are supposed to fold down into a self-contained box with a lid built in. I just did not fold them down and I taped them together. Works great!! I have 244 markers in here (and as you can see from the 10 on the end, I have outgrown this!! So, I am seriously considering a desktop storage and just take the markers I need for classes....but who knows!!)
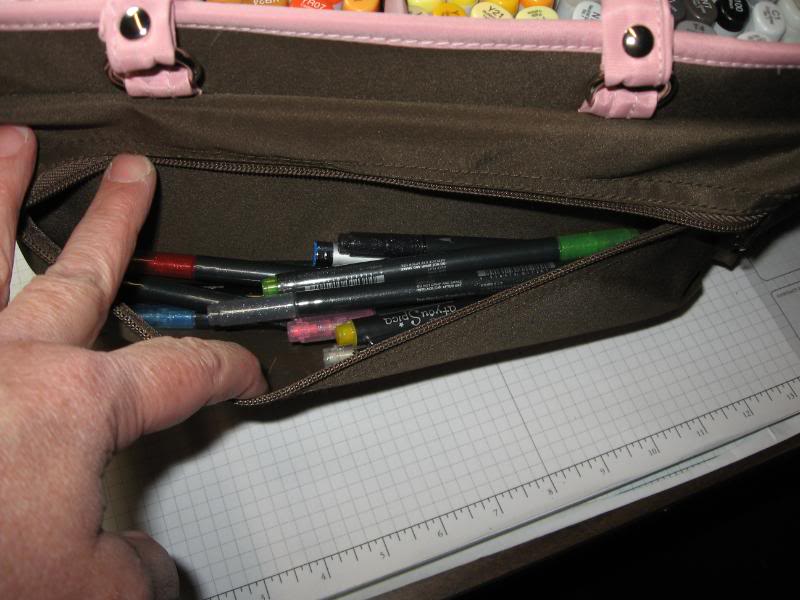
I also have my Spica glitter pens and my multiliners in the big zippered pocket.
(sorry pics are so big...I am not sure how to do thumbnails on here anymore....been a long time since I posted pics).
Well, ladies -- I finally found the perfect Copic storage solution (for me)! They were designed by a crafter who knew exactly what she wanted in storage for her Copics and I LOVE them!
They are called Color Cubbies and you can purchase individual "towers" as your collection grows and configure them exactly how you want! In the photo below are two units ... I've ordered two more!!
The shelves are slanted a little, so the markers don't fall out when you grab one from the bottom or middle of the cubbie. The slant also makes it easier to see the color codes on the ends of the Sketch markers. You can read more about the Color Cubbie here. Let me know if you have any questions!
I bought these and they were shipped to me in Canada...they are wonderful!
Got this bucket TJ Maxx for $7.99, I like that it has 6 compartments instead of the 4 I've seen on this kind of caddies before. I plan on tying a bunch of ribbon scraps to the handle and may "bling" it a bit w/ some random colors of rhinestones.
I finally took mine out of the mess of a bag and organized them my color family. A few of the blues had to go into the blue green cubby as I ran out of room. And I still need to get a few of the grays and flourescents to finish out my collection. It's not portable for short (6hr) crops, but I could easily take it to a weekend crop. For now, this is it for me. (pardon the bad lighting, I was too lazy to drag out my Speedlite flash, LOL~)
I love to be able to take my Copic markers with me. I am lucky enough to be able to color at work if it's slow, and it's also good to be able to carry them to a friends or stamp camp. I've finally found the best solution for me, and it's cheap! I currently have over 100 markers stored in one basket and there's room for more! You can see the storage system on my blog HERE
Got this bucket TJ Maxx for $7.99, I like that it has 6 compartments instead of the 4 I've seen on this kind of caddies before. I plan on tying a bunch of ribbon scraps to the handle and may "bling" it a bit w/ some random colors of rhinestones.
About how many do you think you could fit into this?
Well, ladies -- I finally found the perfect Copic storage solution (for me)! They were designed by a crafter who knew exactly what she wanted in storage for her Copics and I LOVE them!
They are called Color Cubbies and you can purchase individual "towers" as your collection grows and configure them exactly how you want! In the photo below are two units ... I've ordered two more!!
The shelves are slanted a little, so the markers don't fall out when you grab one from the bottom or middle of the cubbie. The slant also makes it easier to see the color codes on the ends of the Sketch markers. You can read more about the Color Cubbie here. Let me know if you have any questions!
I love these Color Cubbies! I ordered 3 after reading what you wrote about them and viewing them. They are perfect for me! Very handy and already sorted out by color group so I don't have to go digging through my plastic tub anymore! Makes life a lot happier in my little crafting world! Thank you for posting this!
__________________ Susan
Save a life. Adopt a pet!
To label my ciaos, I printed the box charts onto a full sheet label sheet and then punched them out with 1/4" circle punch. I've attached the pdf file of the Ciao colors (they are 2-up on the page). I just used a label sheet, but you could also attach them with small glue dots.
__________________ ~Jana~ My Blog
I design For:
Karen's Doodles, DogGone Stamps, Pixie Dust Studio, I {Heart} Copics, The Stamping Boutique, Shirleys2girls, KLM Designs
Last edited by stampgeek; 04-18-2010 at 01:10 PM..
About how many do you think you could fit into this?
Jennifer, I currently have about 130 in there and it's about full for me (loosely, I don't like them tightly packed to where I can't pick them out easily).
Jennifer, I currently have about 130 in there and it's about full for me (loosely, I don't like them tightly packed to where I can't pick them out easily).
I counted and I have (gulp) almost 240 Copic Sketch markers. I am a bit **** and so I like them stored in the Copic containers by the colour chart. I got tired of carrying the four of them, one at a time, to the other room and I checked in on this topic.
I immediately went to Michaels and started looking for wooden storage boxes and I came across a wicker basket, trimmed in leather, with two handles and perfectly fits all four Copic containers for $22.99 and I had a 40% coupon! As soon as I get a chance I will post a picture.
Well, ladies -- I finally found the perfect Copic storage solution (for me)! They were designed by a crafter who knew exactly what she wanted in storage for her Copics and I LOVE them!
They are called Color Cubbies and you can purchase individual "towers" as your collection grows and configure them exactly how you want! In the photo below are two units ... I've ordered two more!!
The shelves are slanted a little, so the markers don't fall out when you grab one from the bottom or middle of the cubbie. The slant also makes it easier to see the color codes on the ends of the Sketch markers. You can read more about the Color Cubbie here. Let me know if you have any questions!
I ordered one last night after being inspired by your post. I'm so excited! Currently, I only have 36 Ciao markers, but I plan on organizing my PrismaColor pencils with them (I have 120 of those!) - Thanks Sharon!
__________________ Sharon S. "A child is not a vase to be filled, but a fire to be lit." - Rabelais My Gallery
This is something I pondered for a while. I finally decided I wanted horizontal storage because I can see the ends better (I'm a little short on one end, LOL) so it's easier than having to look down on vertical pens.
Also, didn't want to spend a ton of $$ because I'd rather spend it on supplies. I saw where another poster had used round ABS pipe and was going to go that way but then I thought of downspout. It's more rectangular (with round corners), so there wouldn't be so much wasted space, and it's thinner so it wouldn't be so heavy.
A 10' length cost just under $10. I had DH cut it into lengths about 5.5 inches long, so the ends of the markers would stick out, making them easier to pull out. That gave us 23 "cups". We got a piece of foam board for about $3 or so, and DH cut it for a backer and a "bottomer" for want of a better word. A can of plastic adhesive (it's potent, use in a well ventilated area!)
Here's a couple pix of the finished product, there are 15 cups with room for more if I need them in the future. I've been using it for a week or so and love it more every day. I've asked DH to use the other 8 to make another unit for my other markers and pens.
I'll tell ya, for the money...and I think it looks nice too, doesn't take up too much room and could be painted or otherwise dressed up pretty easily. I sure can't take all the credit, though. I saw somewhere on here where someone had used the round ABS pipe and was actually going to go that route, but was in the home improvement store with DH and a neighbor, waiting while they picked up something out and we happened to be standing near the gutters and downspouts...and it was like someone hit me over the head, LOL
Then DH did the actual construction and figured out how to "plug" the ends so the markers wouldn't side out the back. He took one of the pieces and pressed them into the foamcore. Then took a craft knife and cut out 15 of them and glued them into the ends, then took a piece measured and cut to fit the whole back and glued it all on. Wasn't really hard, but sort of finicky. Bless his heart, he's a gem.
Can I ask, empty without any markers in it.. is it pretty lightweight or does all that metal make it heavy? We move frequently so I am always on the lookout for things to organize that arent to heavy..lol