Splitcoaststampers.com - the world's #1 papercrafting community
You're currently viewing Splitcoaststampers as a GUEST. We pride ourselves on being great hosts, but guests have limited access to some of our incredible artwork, our lively forums and other super cool features of the site! You can join our incredible papercrafting community at NO COST. So what are you waiting for?
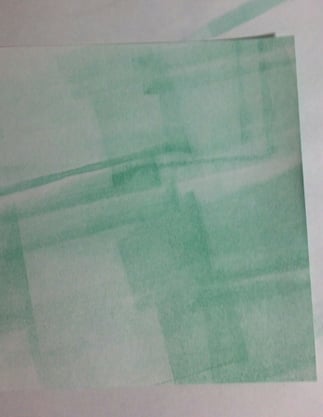
I'm trying todays technique from the tutorial section. I've done the water color ombre effect but I'm having difficulty with using the brayer. I can't get smooth inking no matter what I do. Any tips? Is it my paper or maybe the surface of my table or what? I start off the paper but still get lines.
My guess is that it's your brayer. I remember hearing that the soft rubber of your brayer can flatten out on one side if not stored properly. When that happens, you get the problem that you are experiencing with lines appearing. You can buy replacement brayers for the handle, and you can even find the hard acrylic style brayer.
I have two brayers. They are stored upright and don't lay against anything. I will try the second one too, but my brayering has been like this from the time the brayers were new so I would think they are ok. I was thinking more in the way of maybe I'm using the wrong paper?
are you moving the brayer back and forth on the paper? I think we are supposed to move it one way, lift up and then go back and move it again, starting and ending OFF the paper.
Does this make sense?
__________________ Dear Paperlicious is my blog...with a series on how I'm learning to improve my cardmaking by studying others.
I'll give my Tim holtz glossy card stock a try. I tried SU whisper white and its a little better but still shows lines. I think I need a zindorf class! Wish she were doing classes in my area!
are you moving the brayer back and forth on the paper? I think we are supposed to move it one way, lift up and then go back and move it again, starting and ending OFF the paper.
Does this make sense?
Yes, and that does make sense! Watching videos, it looks like they are going back and forth but it could be the camera angle! I'll try this too! Thanks!
loading the brayer - don't spin the brayer when you run it over the pad (don't do it like your running a toy car KWIM?); run the brayer over the ink pad, lift and repeat several times to make sure you don't have a line on the brayer where the ink stops and starts
run the brayer back and forth from one edge to the other of the paper; do not stop in the middle or you'll get a line of ink where you stop the brayer and you will have to work to smooth out the line
It takes several passes of the brayer to blend the lines; it's not a one and done kind of process
Glossy paper works the easiest but you can do it with any smooth finished paper
I just happened to watch a Carolyn Dube video this morning where she explains that in order to avoid lines, you have to put almost no pressure on the brayer. She demonstrated with high flow and thicker paints.
__________________ Debbie "Make it work, people." - Tim Gunn My Gallery
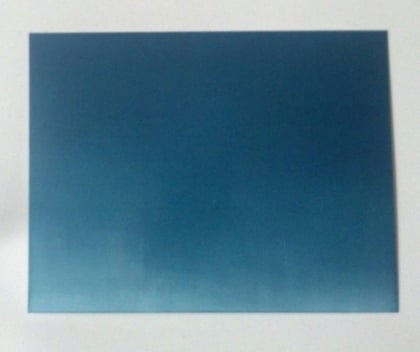
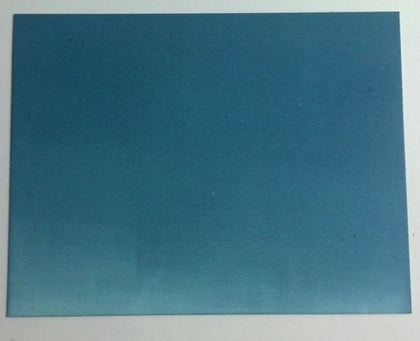
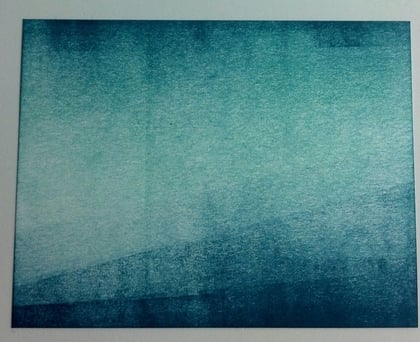
Thanks for the tips! I'm getting better! I think Pauline was right in that I was expecting to run the brayer across once or twice and have smooth lines. I switched to Tim Holt glossy card stock, which made a huge difference to start with. Then I inked up the brayer as suggested, lifting it each time I got to the other side of the ink pad. I should have allowed more light space because the ombre effect is mostly dark. I used soft sky, marina mist, island iniho and midnight muse. I'm really excited that your tips have helped me. Now....where can I buy bigger sheets of the glossy cardstock? I don't shop online so I'll need big box stores or my LSS could order but she orders by phone and catalog. I know glossy photo paper does not work from past experience. It grabs the ink immediately and won't let it blend.
I just happened to watch a Carolyn Dube video this morning where she explains that in order to avoid lines, you have to put almost no pressure on the brayer. She demonstrated with high flow and thicker paints.
I'll keep that in mind. I thought I needed more pressure so I was using two hands because I have a bad shoulder.
You can do this! If I can, anybody can!! I have not looked at the demo yet.
Yes-I find glossy paper is the easiest but you can do it on any paper. Textured will give you a textured finish.
Try it with pigment inks which stay wet longer for blending. Just to see if you can do it with no lines. Dont bother with the glossy paper for this ink.
Yes...you start off the paper and end off the paper and dont stop in the middle for anything!
You can also run it in the opposite direction (but not for ombre effect)
Dont use a rubber mat under it. Go on a hard surface. The brayer could actually curl paper on a rubber stamping mat a little.
No dont go hard, just a steady pressure. You can go back and forth but again, not picking up the brayer. Watch the ends-they leave lines. I usually start light just to get the ink on and then spread it by rollering back and forth.
If you mess up-you can save it by just adding more ink. You wont get the color you wanted but it will be usable.
Brayers are rubber so I use the stamp cleaner on it which conditions it like a rubber stamp.
I had not heard that about storage. I will have to keep that in mind!
Did you try to brayer watercolor paper? That was the first paper she used. She didnt mention it but I am think she changed papers to go to the brayer. In the material lists she does say 100 lb cardstock.
Rolling off a brayer is something people do to make sure they have a smoothly inked brayer with less lines or to lessen the depth of color. I find it wastes ink myself but that is personal preference.
Otherwise what I suspect is a lack of enough ink on your brayer. Lay it on thick! Yes-a juicy pad. That was a good tip.
To me, size also matters. If I was doing ombre, I would want to use the little one. If I wanted to cover the whole card, I'd use a big one because the edges are terrible for leaving lines.
Once you have the shade you want don't add more ink - just keep rolling it back and forth. The ink is slow to dry on the glossy paper so you are able to move the ink around. :p
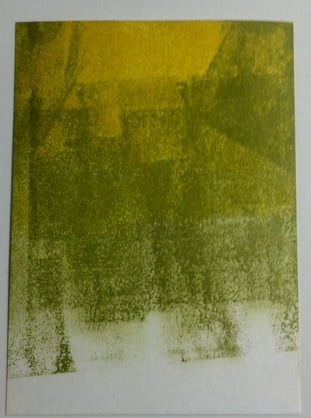
What great tips I'm getting! Yes I tried water color paper and that worked well for the watercolor technique. I tried brayering on mixed media paper but as wavejumper said the outcome was textured. I think the only pigment ink I have is black. I have mostly SU ink pads and about ten Tim Holt distress inks but I think those are all dye inks. Maybe that's part of the problem. Anyway, tomorrow I will try all suggestions and post results. Tonight my rotator cupp tendonitis is flaring from brayer pressure! LOL plus my fingers are blue!
Kathy, have your LSS owner get the Inkssentials Gloss paper for you. You get 10 sheets for $5.99, One side is glossy, the other is mat, It's by Ranger.
Does your LSS use Notions as her vendor, they carry it.
Then there's the Crafter's Companion glossy cardstock. it's listed as Spectrum Noir Ultra Smooth Premium Cardstock 8.5"X11" 20/Pkg on Notions. This one is $7.00 for 20 sheets.
Both of these are good for brayering and with Copics.
Good Luck!
I would think the TH distress inks would work quite well on the glossy.
__________________
Have fun and be creative!
Jennifer
Last edited by mother's daughter; 07-01-2015 at 06:03 PM..
Reason: additional info
You do have to keep brayering back-and-forth. It should smooth out. There were also a lot of edits to the video, so there was probably a lot more brayering that we didn't see. I've done this technique with both watercolors and Distress Inks, and they both blend well. Regular dye inks, like SU, are more difficult to blend. Glossy paper is easier to blend on with dye inks, but it can be done on matte cardstock as well. I would also use sponge daubers instead of sponges. The daubers work better in my experience. Keep practicing. I'm sure you'll get the hang of it.
The best thing I learned from Michelle Z was not to put ANY pressure on the brayer - barely hold the handle and that makes a huge difference. Before her class I was smashing it like there was a spider under there and I got horrid results.
The best thing I learned from Michelle Z was not to put ANY pressure on the brayer - barely hold the handle and that makes a huge difference. Before her class I was smashing it like there was a spider under there and I got horrid results.
I took Zindorf's class too, beginner and advanced. The main trick was to roll the brayer VERY LIGHTLY! Barely even touching the paper, and roll back and forth starting off the paper. It was hard to go so lightly but once I did, I got the smooth line-free look she does so easily.
I've tried about everything and the only time I get decent results is on the Tim holtz glossy card stock. I tried two different brayers, different card stock but still not getting smooth results. Do you know how hard it is to press lightly after being used to using two hands and steam rolling it? LOL
I've learned a lot reading this too. I have brayered, but not enough to worry if I was doing it wrong or right. LOL Now I will know! Thank you Kathy for asking, and the rest of you for your tips!
I also have taken Michelle Zinforf's classes. She used Whisper White cardstock and we worked on top of a full pad of Stampin'Up grid paper, so there was a cushion. I always use a stamp mat that's about 1/2" thick when I brayer backgrounds.
Another tip Michelle gave us was to work quickly. She was using SU dye inkpads and those inks will dry quicker than Distress inks. So, start and end off your cardstock, use a light touch and work quickly, going back and forth with a well -inked brayer. And as was mentioned in this thread, you have to continue to ink your brayer and work the ink in to get a smooth look.
__________________ Claudia Splitcoast Fan Club Member