Splitcoaststampers.com - the world's #1 papercrafting community
You're currently viewing Splitcoaststampers as a GUEST. We pride ourselves on being great hosts, but guests have limited access to some of our incredible artwork, our lively forums and other super cool features of the site! You can join our incredible papercrafting community at NO COST. So what are you waiting for?
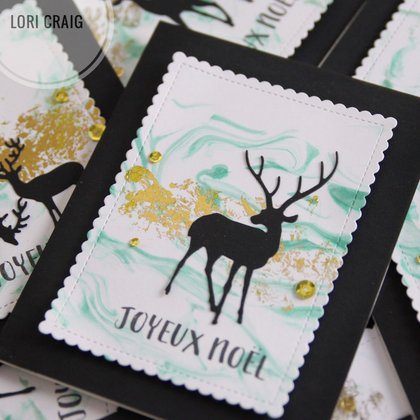
In a new take on the Serendipity technique, this foiled collage is perfect for die cutting into ornament shapes or just smaller geometric shapes for colorful holiday cards. The hardest part is ripping up your monoprint! If you don't have a Gel Press, use patterned paper, a watercolor wash, ink blending or anything colorful!
Here's my video on the technique:
FIND THE INSTRUCTIONS HERE
VIEW OTHER TUTORIAL ENTRIES HERE
Find more holiday tutorials HERE
UPLOADING INSTRUCTIONS:
Add your tutorial sample to the Gel Impressionism Foiled Collage gallery.
On the upload screen select Technique Spotlight> Holiday Blitz Gallery > Gel Impressionism Foiled Collage
Thank you for playing along with us! Happy Holidays!
I have loved getting crafty for the Holiday Blitz this year and revisiting some of our most favorited tutorials through the years! I've enjoyed getting ahead of the game with my Christmas cards. I found it really relaxing in August and September... alas, I've still got a few to make, and I'm thrilled we are featuring favorites this year in the Holiday Tutorial Blitz.
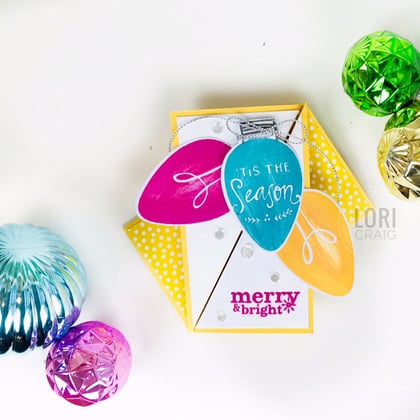
Today, I had the honor of revisiting Dawn Olchefske's awesome Twist Gate Fold tutorial. I paired it with non-traditional holiday colors and a darling set of Christmas bulbs from Reverse Confetti. It will be perfect to tuck a family photo on the inside.
I hope you'll give this one a try! Super fun and easy with Dawn's awesome directions and step-out measurements!
FIND THE INSTRUCTIONS HERE
VIEW OTHER TUTORIAL ENTRIES HERE
Find more holiday tutorials HERE
UPLOADING INSTRUCTIONS:
Add your tutorial sample to the Twist Gate Fold gallery.
On the upload screen select Technique Spotlight> Holiday Blitz Gallery > Twist Gate Fold
Thank you for playing along with us! Happy Holidays!
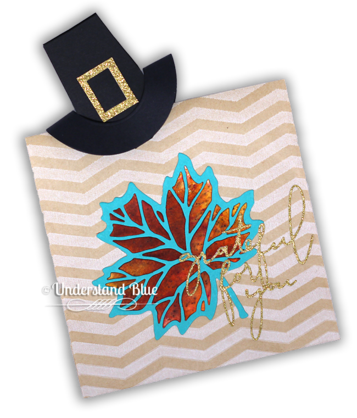
Today's tutorial: Witch Hat Clip - Transmogrified into a Pilgrim Hat
Author: Kelly Acheson (Technique_Freak)
Gallery: Technique Spotlight >> Holiday Blitz Gallery >> Witch Hat Clip
Keyword: 2018BLITZ3
Date: Nov. 8, 2018
I loved Kelly's tutorial, and I've updated it for Thanksgiving into an adorable Pilgrim Hat for place cards, treat bags and more. For my hat I used the Hero Arts Circle Infinity Dies - the 2.75" circle and the 1.5" circle. Then the top pieces that form the pipe of the hat I just slightly tapered, so that the bottom part is wider and what the circle rests on.
FIND THE INSTRUCTIONS HERE
VIEW OTHER TUTORIAL ENTRIES HERE
Find more holiday tutorials HERE
UPLOADING INSTRUCTIONS:
Add your tutorial sample to the Witch Hat Clip gallery.
On the upload screen select Technique Spotlight> Holiday Blitz Gallery > Witch Hat Clip
Thank you for playing along with us! Happy Holidays!
Author: Diana Gibbs (Stampin Di)
Gallery: Technique Spotlight >> Holiday Blitz Gallery >> Box in a Bag
Keyword: 2018BLITZ4
Date: Nov. 9, 2018
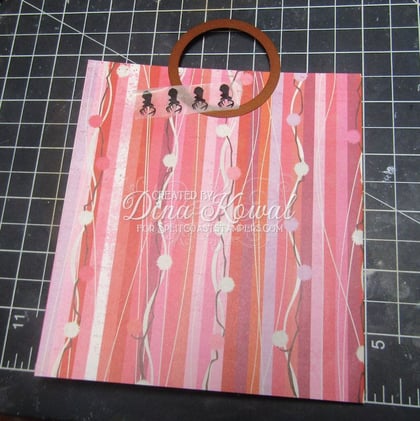
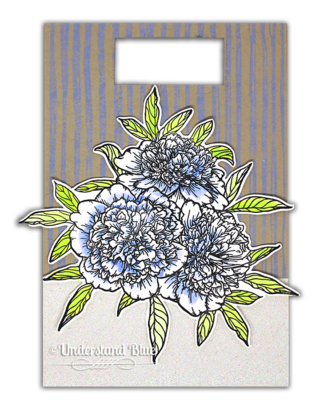
This is such an easy project, and a great size for a small gift! I updated Diana's design with some cute die cut handles.
I scored my paper at 5" and 10" along the long side and folded both sides in. Choosing 2 circle dies for the handles, I centered the smaller one at the top of the folded piece and cut through both layers.
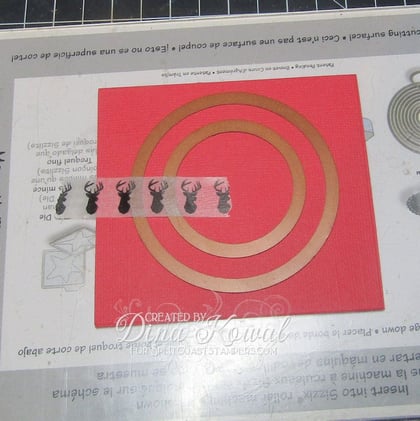
Next I lined up both circle dies together on 2 pieces of cardstock to cut 2 handles at once.
I lined the cut pieces up with my first cuts on the designer paper and glued them in place, then followed the rest of Diana's instructions to assemble the bag, lining up the fold lines in my paper with the corners of the box base.
Bonus tips: -- I used small staples to hold my box corners together. --Use the cut out from the handle to make a gift tag!
FIND THE INSTRUCTIONS HERE
VIEW OTHER TUTORIAL ENTRIES HERE
Find more holiday tutorials HERE
UPLOADING INSTRUCTIONS:
Add your tutorial sample to the Box in a Bag gallery.
On the upload screen select Technique Spotlight> Holiday Blitz Gallery > Box in a Bag
Thank you for playing along with us! Happy Holidays!
One idea that puts a blitz in my holidays is to have card ideas that are fun and easy to execute in multiples. Today I share a fun opportunity with a twist on a Splitcoast favorite that makes it a snap for mass production.
Kim Jolley originally brought us the Shaving Cream Sparkle technique. I'm usually one to refrain from messy, and I *loved* this. One plate and two re-inkers, and I was able to quickly and easily make a dozen background panels.
Kim's results were gorgeous with metallic heat embossing over the top of the shaving cream, and I opted for deco foil. Much faster execution that allows you to work on many pieces at one time and loads of shine.
1. Squirt liquid glue onto scrap of paper 2. Use a piece of wadded up plastic wrap to dip into glue and "sponge" across card swirled background. Allow glue to "rest" a minute or two so that it becomes tacky. 3. Press foil over glued areas. Let set for a moment so that glue "grabs" the foil and then peel foil sheet away, revealing sparkle across the glued area.
Are you ready to give it a whirl? I can't wait to see your creations!
FIND THE ORIGINAL INSTRUCTIONS HERE
VIEW OTHER TUTORIAL ENTRIES HERE
Find more holiday tutorials HERE
UPLOADING INSTRUCTIONS:
Add your tutorial sample to the Shaving Cream Sparkle gallery.
On the upload screen select Technique Spotlight> Holiday Blitz Gallery > Shaving Cream Sparkle
Thank you for playing along with us! Happy Holidays!
I took Becca's beautiful ornament and turned it into a pumpkin for some Thanksgiving decor! I used 9 3 1/8" ovals for mine and did the glue dots in the same position - if you were looking at a clock I did 9 o'clock, 6 o'clock and 3 o'clock for the first layer, and then like between 7 &8 and between 4 & 5 for the second layer and then back to the first pattern - basically the same as she shows in the video.
FIND THE INSTRUCTIONS HERE
VIEW OTHER TUTORIAL ENTRIES HERE
Find more holiday tutorials HERE
UPLOADING INSTRUCTIONS:
Add your tutorial sample to the Honeycomb Ornament gallery.
On the upload screen select Technique Spotlight> Holiday Blitz Gallery > Honeycomb Ornament
Thank you for playing along with us! Happy Holidays!
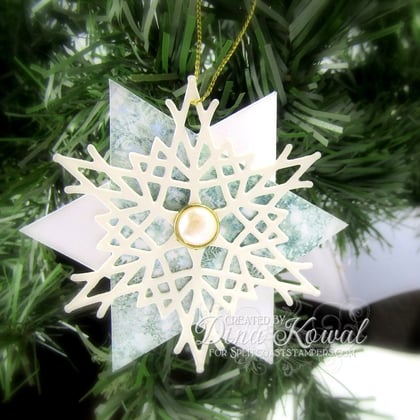
This beautiful star-shaped card would make a beautiful Hanukkah card or tag, and also is a perfect fit for a snowflake die cut!
I used different measurements to make a smaller sized star - the finished size is 3" by 3-1/2". I started with a piece of paper that was 6" wide by 5-1/4". I cut from the center point of the long side down to the corners, then scored as shown in the tutorial at 2-5/8" and 3-1/2".
FIND THE INSTRUCTIONS HERE
VIEW OTHER TUTORIAL ENTRIES HERE
Find more holiday tutorials HERE
UPLOADING INSTRUCTIONS:
Add your tutorial sample to the Star Fold Card gallery.
On the upload screen select Technique Spotlight> Holiday Blitz Gallery > Star Fold Card
Thank you for playing along with us! Happy Holidays!
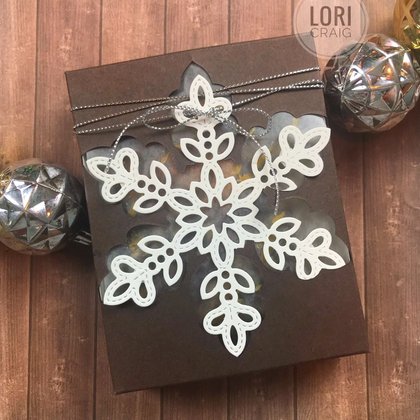
One of my favorite gifts is handcrafted cards for friends and family, and I am thrilled to share one of my favorite tutorials today, Beate's A2 Card Box. It's perfect for gifting specially crafted cards, and with Beate's tips to try, it is easily adjustable to any size you need!
Another gift I love to give to neighbors and friends over the holidays are homemade goodies, and many of you know the tin or box to give the treats in can be pretty pricey. Not to mention, they can be so big that it takes 3 recipes of the treat to fill the tin. Can you say, 'expensive'?
I love making my own little gift box for a few decadent 7-layer bars. Here I've created a box that is 4" x 5" to hold homemade bars. I've cut a "window" on top of the box with a beautiful snowflake die. I simply wrap my bars in waxed paper.
I hope you'll try this fun project. Minutes to execute and perfect for quick, easy and inexpensive gift presentation! FIND THE INSTRUCTIONS HERE VIEW OTHER TUTORIAL ENTRIES HERE Find more holiday tutorials HERE
UPLOADING INSTRUCTIONS:
Add your tutorial sample to the A2 Card Box gallery. On the upload screen select Technique Spotlight> Holiday Blitz Gallery > A2 Card Box
Thank you for playing along with us! Happy Holidays!
Hey! I am updating Cindy Lawrence's adorable card pouch tutorial with an A2 version I think you'll like.
To make my larger giftable card and envelope holder, I did the following:
Cut the pockets to 5.75 x 3.75 and score as shown in the tutorial.
Cut two pieces for the outside of the bag to 8.5 x 5 and score each piece at 1" on the short side of both. Attach these scored 1" sections together to form the bottom of the pouch. Assemble the pockets as shown in the tutorial and decorate as desired.
FIND THE INSTRUCTIONS HERE
VIEW OTHER TUTORIAL ENTRIES HERE
Find more holiday tutorials HERE
UPLOADING INSTRUCTIONS:
Add your tutorial sample to the Card Pouch gallery.
On the upload screen select Technique Spotlight> Holiday Blitz Gallery > Card Pouch
Thank you for playing along with us! Happy Holidays!
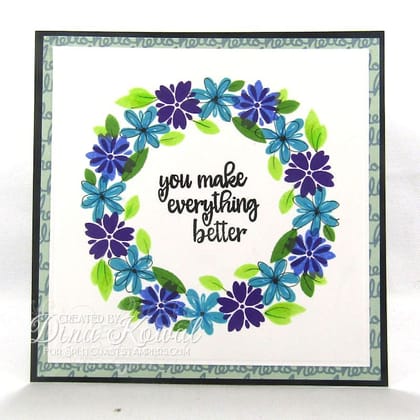
In today's tutorial, I share several ways that you can turn stamp images into kaleidoscoped wonders! Warm up your stamp positioner and get ready to have some fun! There are also some great tools and templates that can help as well - you'll find more information about those in the photo tutorial - the link is below!
FIND THE INSTRUCTIONS HERE
VIEW OTHER TUTORIAL ENTRIES HERE
Find more holiday tutorials HERE
UPLOADING INSTRUCTIONS:
Add your tutorial sample to the Wreath Stamping gallery.
On the upload screen select Technique Spotlight> Holiday Blitz Gallery > Wreath Stamping
Thank you for playing along with us! Happy Holidays!