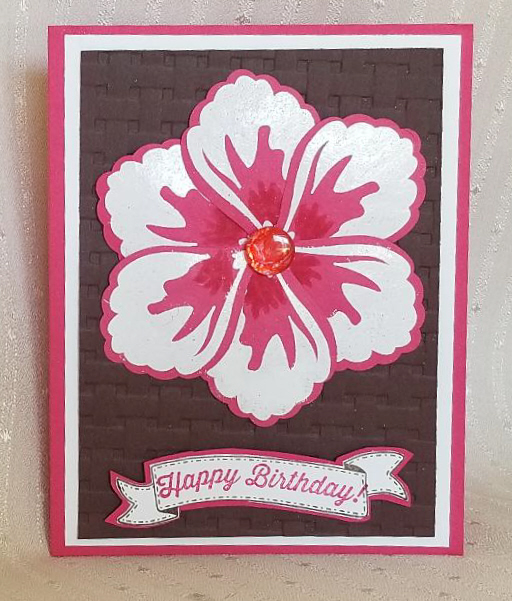
This feminine birthday card was made using both retired and new Stampin' Up! (SU) products. The challenge was a feminine "anything goes" card.
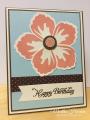
My card base is SU Melon Mambo with a 4"x 5.25" SU Whisper White mat layer. I then cut a 3.75" x 5" SU Chocolate Chip layer which I embossed with the SU Basketweave Dynamic Embossing Folder. With these dynamic folders, you need to either mist the cardstock before running through your embossing machine, or do like I did, which is to put a piece of thin plastic on top of the cardstock in the folder before running it through. If you don't do this, you are likely to get tears or "breaks" in your embossed cardstock. For plastic, I used a deflated packing air chamber that came with one of my online orders to protect the product inside.
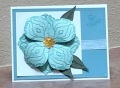
I created the large blossom by stamping with Versamark ink onto SU Melon Mambo cardstock. Be sure to "dust" your cardstock first so you don't get stray embossing powder stuck to areas you don't want white. Also, to ensure a more even coverage of white, I used my MISTI to stamp the Versamark 2 or 3 times. I then dusted the petal with white embossing powder and heat set it with my heat tool. Since it's such a large area to cover with embossing, I used a small paintbrush to "paint" Versamark onto the spots where the pink cardstock showed through, and re-dusted and heat set again.
I then used SU's "Blossom Petals" punch and punched out each of the six petals. NOTE: this punch punches out several petals of different sizes each time you use it, so you need to heat emboss the punch out each blossom one-by-one so you don't accidentally ruin one of your embossed petals, or strategically stamp your petals along a long strip that allows you to punch your embossed petal on the left end of your strip one-by-one after stamping and heat setting all six.
Once my petals were punched out, I used an SU Melon Mambo marker to darken the small tip of each petal to make it look more "3D". I then used the rounded end of a paper piercer (any rounded end will work, even your bone folder) to "cup" the back side of each blossom WHERE THERE IS NO HEAT EMBOSSED AREA ON THE FRONT. If you do too much "cupping" where there is white embossing, it will crack the embossing.
I placed a "rounded square" of adhesive foam strip into the on the back of each petal in the "cupped" area to keep the petal's shape. I then attached each petal to the front of the basketweave embossed panel, being carefully to center the tips, and leave enough room so they don't extend over the top or sides of the brown panel.
I used a flat pearl button as the center of the flower. I colored it with a pink alcohol ink marker. If you have a pink Stazon ink pad, that would be even better. The button was attached using a piece of the super sticky red double-sided tape to ensure it doesn't fall off.
The birthday banner was created by stamping the banner itself from the SU "Birthday Banners" stamp set, using SU Early Espresso ink. Then, arcing the photopolymer greeting on an acrylic block to fit the curvature of the banner. I stamped the greeting onto the banner using SU Melon Mambo ink. Since I don't have the matching die set for these banners, I fussy cut it out, then using repositional tape temporarily attached the banner to a scrap piece of SU Melon Mambo cardstock, and fussy cut a pink mat around the banner. The banner was permanently glued to the mat using Tombow glue, then mounted to the card front using adhesive foam strips to raise it up like the blossom itself was raised.
I am rating the difficulty of this card as a "3" out of a possible "5" due mostly to the need to do solid heat embossing of such large areas, and fussy cut the mat for the banner.
Date: Monday, November 19, 2018 GMT Views: 860
Favorited:2
Paper: SU Melon Mambo, Whisper White, Chocolate Chip
Paper Size: A2
Ink: SU Melon Mambo, Versamark, SU Early Espresso
Accessories: SU Blossom Petals Punch, SU Basketweave Dynamic Embossing Folder, Paper Snips, Flat Pearl Button, Artfully Scribed Detail White Embossing Powder, Tombow Multi Liquid Glue, Red Double-Sided Tape, Adhesive Foam Strips, MISTI