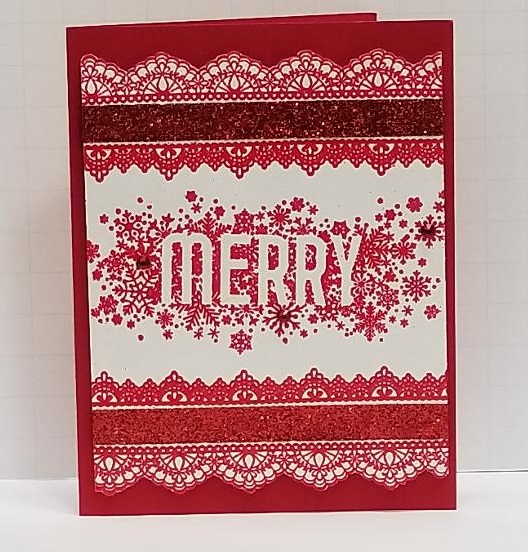
I started with a standard A2 (8-1/2"x 5-1/2") sized Stampin' Up Real Red card base folded in half. I then cut a panel of SU Whisper White to 4"x 5-1/4" as my main card panel.
On this main card panel I afixed two of the SU "Delicate Details" photopolymer lace stamps on an acrylic stamping block, making sure there was just enough space between them to accomodate the 3/8" ribbon I planned to use. I then inked the two mounted stamps with Versamark clear ink, and stamped them at the short ends of the panel (be careful to make sure you switch the stamp around on the second end so that the larger lace pattern is nearest the edge. This also makes it easier to cut with paper snips later on. The inked areas were each dusted with InkExpressions red embossing powder and heat set with a heat tool until the lace was glossy. I would recommend stamping, dusting and heat embossing one end at a time.
I then "fussy cut" both ends using paper snips to make the lace look more real (I discarded the trimmed off white piece).
Next, I inked up the "MERRY" sentiment from SU's "Seasonally Scattered" set with Versamark clear ink, and stamped it in the center of the open space between the two lacy ends. Again, the inked image was dusted with red embossing powder and heat set with a heat tool.
Then, I used 6" strips of Michael's 3/8" Celebrate It! glittery red ribbon and glued it down across the front of both ends using Tombow glue. The ends were wrapped around the back and taped in place.
Then I placed three Swarovski red crystals around the sentiment and glue them with Tombow. Finally, the main heat embossed panel was attached to the card base using adhesive foam strips.
This card came together relatively quickly, so I am rating it at a difficulty level of "2" out of "5". With all the red, it certainly makes for a "Merry & Bright" card to send to the relatives this coming holiday!
Date: Monday, May 28, 2018 GMT Views: 483
Favorited:2