Zentangling
by Lydia Fiedler
Learn this relaxing form of advanced doodling to jazz up stamps, stencils and die cuts. The Zentangle® Method was created by Rick Roberts and Maria Thomas.
Supplies
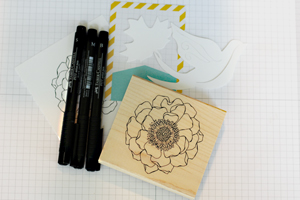
- Cardstock
- Pens (Faber-Castell Pitt Artist Pens used here)
- Stamped image (Stampin' Up!® Blended Bloom used here)
- Ruler, masking tape, stencil, die cut (optional)
Step-by-Step
-
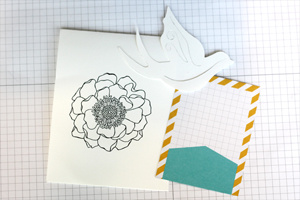
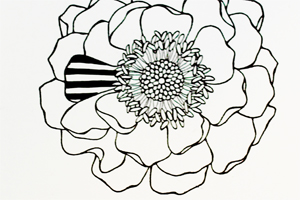
Step 1
Choose an area to work in. This can be a blank page, a stamped image, a shape that has been stenciled, a die cut, a masked area on a card, a Project Life card or graph paper.
-
Step 2
Subdivide the area into sections the size you would like to fill with patterns. In this case, the stamp image already has subdivisions perfect for tangles - look for outline images in your collection. Start with small subdivisions until you are comfortable with the technique.
-
Use rulers, stencils or other marking tools to help create interesting shapes. Here's a sample using a Dreamweaver stencil - the stencil is already divided into sections, which makes tangles easy.
-
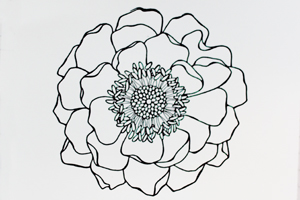
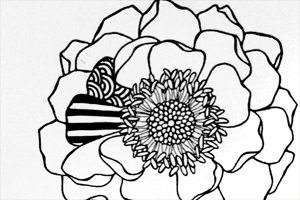
Step 3
Begin filling the subdivisions with patterns. Start with something simple, like stripes. There are many online resources for tangle patterns, including http://www.tanglepatterns.net to inspire you. The Zentangle Method can be found at http://www.zentangle.com.
-
In larger areas, such as this masked off area of the card front, experiment with larger patterns.

-
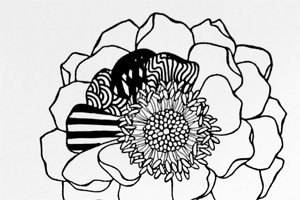
Step 4
Move to an adjacent section, and fill that with a pattern.
-
Try to alternate elements of your patterns in adjacent areas. For example, if pattern 1 was mostly white space, make pattern 2 mostly black. If pattern 1 was an organic pattern, make pattern 2 geometric. This will make the finished project more visually interesting.
-
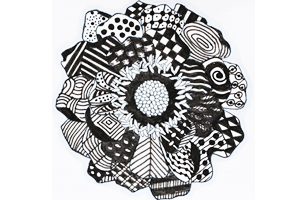
Step 5
Continue working in this manner until the image is completely filled.
-
Step 6
Add a small shadow around your design to make it pop off the page.
Color your tangles, or draw them on colored paper for additional interest.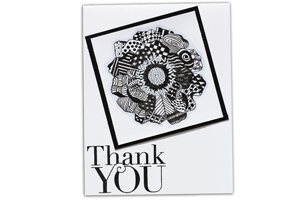
Video!
Your Turn
You've seen the tutorial, now you try it! We've got a section of the gallery set aside for Zentangling. Try this technique, then upload your artwork to the gallery. Show us your creations!
***Please note - Internet Explorer/Edge is not a supported browser, and will not allow you to see the videos. Please use Chrome, Firefox or Safari to view our tutorial videos.

Questions and Comments
We'd love to get your feedback or questions. Leave your comment below.
There is no right or wrong and this is the beauty of Zentangle, even mistakes look great!!!!!
Thank you for this tutorial Lydia, I'm sure a lot of people are going to give this fun doodling technique a try now that they've seen it, and you, in action.
Page 1 of 4 pages 1 2 3 > Last »