Z Box Pop-Up Card
by Deb Valder
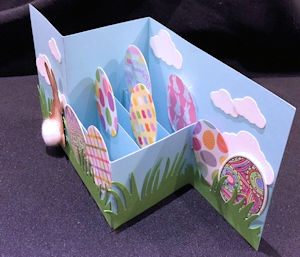
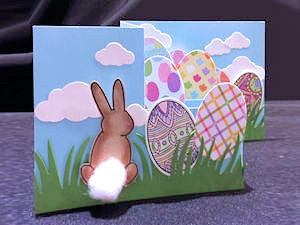
Combine elements of a z fold and pop-up box in this fun interactive card.
Supplies
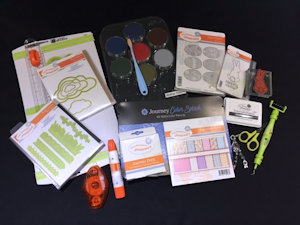
- Cardstock (Pool Play, Limeade Splash, Whip Cream, Oatmeal Cookie, and Eggcellent Prints Double Sided Designer Paper by Fun Stampers Journey used here)
- Scoring tool
- Stamps (FSJ Eggstravagant and Bunny Bum stamp sets used here)
- Ink (FSJ Black Licorice used here)
- Die cutting machine
- Dies (FSJ Cloud Dreams bundle, Border Details, and Egg Party used here)
- Trimmer
- Scissors
- Coloring medium of choice (Pan Pastels and FSJ Color Burst Pencils used here)
- Adhesive
- Other supplies as needed to complete the project
Step-by-Step
-
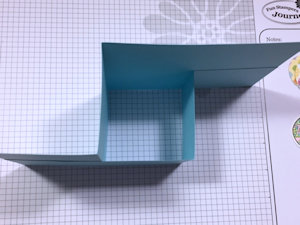
Step 1
Cut 2 pieces of cardstock, one 4 1/4" x 11” and one 2 1/8” x 11”. Score both pieces at 2 3/4" and 5 1/2". Fold as shown in opposite Z folds.

-
Adhere the narrower strip to the front of the card as shown to form a box in the card.
-
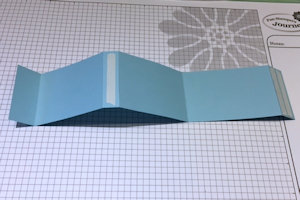
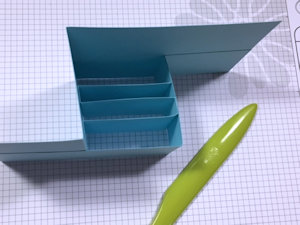
Step 2
Cut an inner layer of cardstock to 2 1/8” x 11. Score at 7/8”, 3 5/8”, 4 1/8”, 6 7/8”, 7 3/8" and 10 1/8”.
Fold as shown.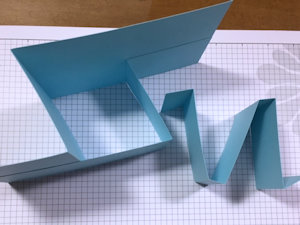
-
Step 3
Add double sided adhesive to the folds as shown, then repeat on the 1/2” sections on the opposite side.
-
Step 4
Adhere the front tab and the back tab to the inside of the “box” then press so the other two 1/2" sections adhere to the sides of the box. These are the dividers.
-
Step 5
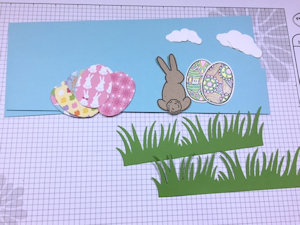
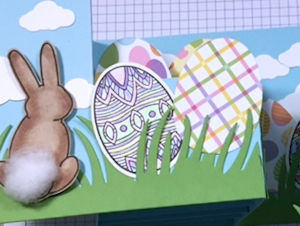
Prepare die cuts, stamped images, or other embellishments to fill the box and decorate the various panels of the card.
-
Step 6
Decorate the card, taking care to keep all the elements within the boundary of the card’s edges when closed.
-
Adhere elements to card front and inside, and to the cross pieces inside the box.
-
Step 7
Complete the card.
Video!
Your Turn
You've seen the tutorial, now you try it! We've got a section of the gallery set aside for Z Box Pop-Up Card. Try this technique, then upload your artwork to the gallery. Show us your creations!
***Please note - Internet Explorer/Edge is not a supported browser, and will not allow you to see the videos. Please use Chrome, Firefox or Safari to view our tutorial videos.

Questions and Comments
We'd love to get your feedback or questions. Leave your comment below.
When I first saw this card I thought it was going to be a difficult one to make but, after watching and listening to you create this amazing card, I'm so totally ready to give it a try.
Thank you for taking the time to make this fantastic video!!
Big Hugs,
Maria Rodriguez.
Thanks for sharing and I can see that this card base could be used for so many holidays and other occasion cards too.
You always do a fantastic tutorial.
Thanks so much!
Many blessings, Sheri
I attached most of the scenery on the base strips before assembling the Z-box. Less "fiddley." Also easier to stamp clouds in the sky, and ladybugs in the grass, and stipple some shading where needed.
Thank you Split coast stampers for all the neat projects. What I like the most is not only getting the new project, but a reminder of an old project not tried yet, new hint or a missed one - three bonuses added to your gift project.
Page 1 of 2 pages 1 2 >