Wreath Stamping
by Dina Kowal
Learn several techniques for turning your stamps into a kaleidoscope of color.
Supplies
- Cardstock
- Stamp positioner (MISTI used here)
- Stamps (listed below with each finished sample)
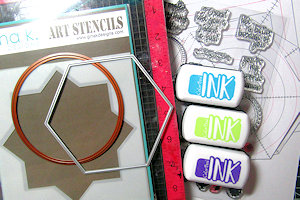
- Inks, preferably small pads (Impression Obsession hybrid inks and ColorBox® Premium Dye Mini Inkpads used here)
- Templates (Gina K. Designs Wreath Builder Template and Cyndie’s Amazing Templates used here)
- Shaped dies (Spellbinders Grand Nestabilities Circles and Quickutz Hexagon nesting dies used here)
- Other supplies as needed to complete the project (listed below with each finished sample)
Step-by-Step
-
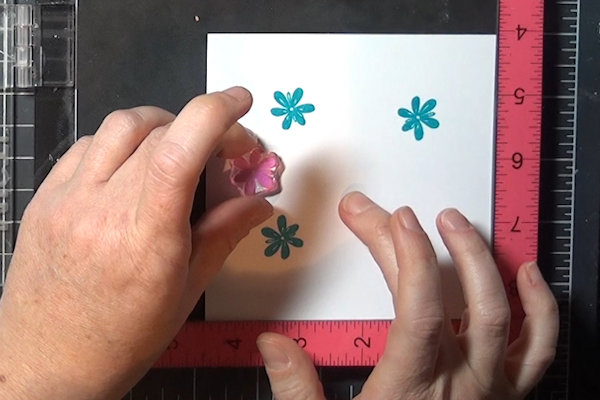
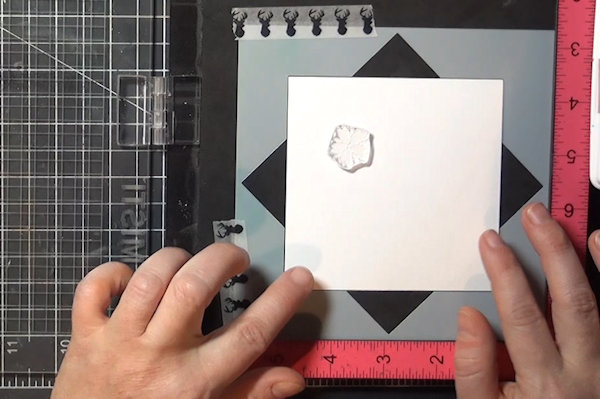
Step 1
To create a simple wreath without the use of a template, cut a cardstock square (any size – this one is 4 3/4" x 4 3/4”). Position it in the corner of your stamp positioner. Place a small stamp on the positioner, at a distance from the edge where you would like your wreath to be shaped.
-
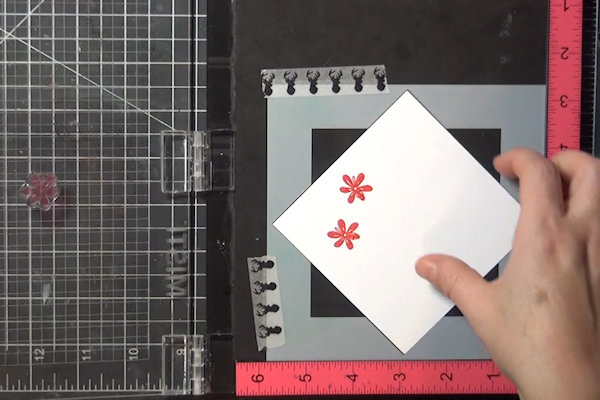
Step 2
Stamp the image. Rotate the cardstock square a quarter turn, and stamp again.
-
Repeat 2 more times so that there are 4 images stamped.
-
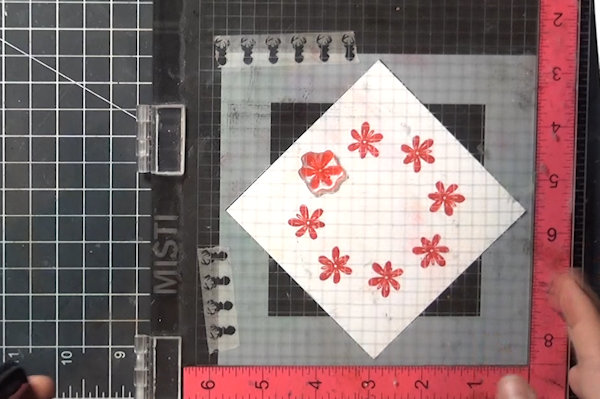
Step 3
Clean the stamp and reposition it between 2 of the stamped images and outward slightly.
-
Repeat the process in Step 2 above, so that there are 8 images stamped on the card.
-
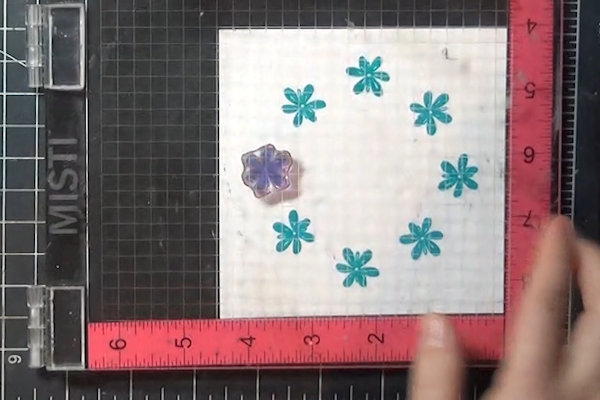
Step 4
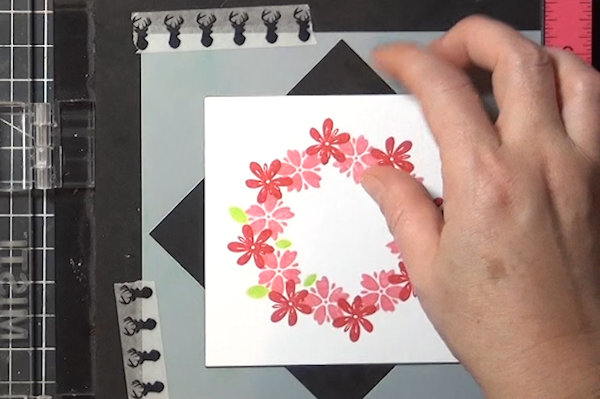
Fill in the wreath as desired in the same manner.
TIP:
Stamp more than one image together to save time! -
Add in shading or doodling to add dimension to your stamping (optional).
-
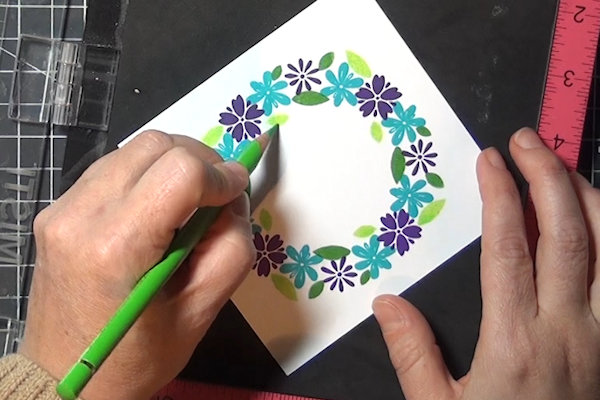
Step 5
Complete the project.
Used here: Gina K. Designs Wreath Builder Stamp Set, black liner pen -
Step 6
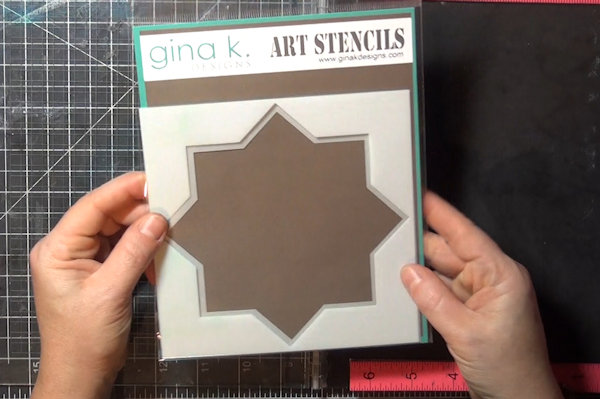
For greater ease in stamping a wreath on a cardstock square, use a specialized template.
The Gina K. Designs Wreath Builder Templates used here have openings designed for 3 3/4” and 4” cardstock squares. -
Position and secure the template in your stamp positioner. Align the cardstock square within the template opening. Place a small stamp on the positioner, at a distance from the edge where you would like your wreath to be shaped.
-
Step 7
Stamp the image.
-
Rotate the cardstock piece 45 degrees. Stamp again.
-
Step 8
Continue around the panel until 8 images have been stamped.
-
Fill in the wreath as desired in the same manner.
-
Step 9
Complete the project.
Used here: Gina K. Designs Wreath Builder Stamp Set, Spellbinders Classic Circle die -
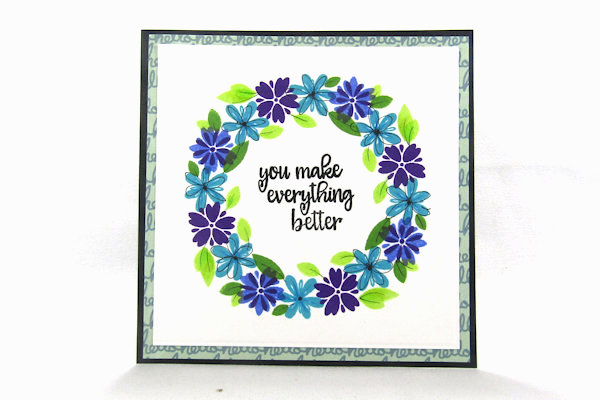
For a different look, try skipping a couple of the points when stamping. This is a nice way to frame a sentiment.
NOTE:
On this sample, a couple of extra leaves were stamped just once on the end to balance the design.
Used here: Gina K. Designs Wreath Builder Stamp Set, Impression Obsession C13706 Gentle Thoughts -
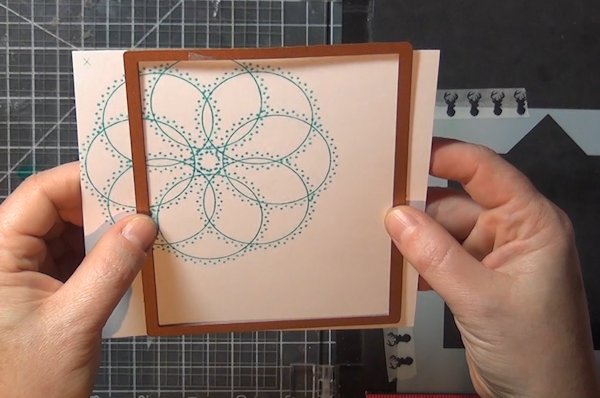
Step 10
NOTE:
Smaller or larger cardstock pieces can be used in the template. Just note that the templates are designed to center the wreath in a 3 3/4" or 4” space, so the wreath will not be centered on panels of another size. A 5 1/2" square panel was used here.
When stamping, keep the same corner of the panel aligned with the template corners as you rotate it. It is helpful to mark the corner with a pencil to avoid confusion. -
When the panel is aligned to the template corner opposite the hinges, the opposite corner of the panel will need to be tucked through the opening at the hinge side of the positioner so it will close properly.
-
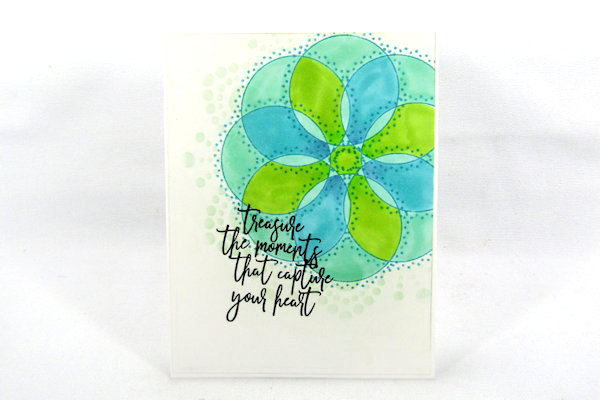
Step 11
The offset wreath on a larger panel allows for a variety of options in cropping the panel to a card front.
-
Trim the panel and complete the card.
Used here: Gina K. Designs Wreath Builder Stamp Set, Impression Obsession C13595 Treasure Moments, Copic markers -
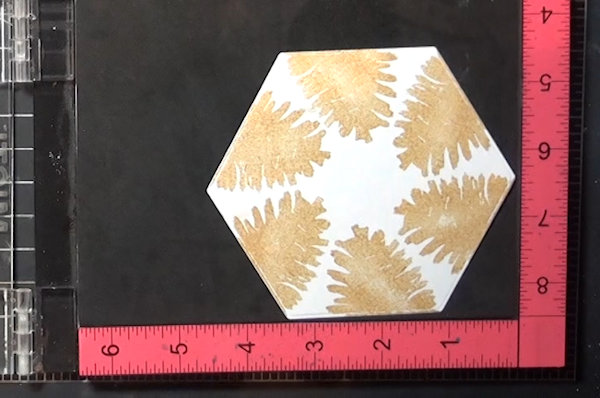
Step 12
Another option for stamping a wreath is to use a geometric die cut. Your stamped wreath can have as many repeated elements as there are sides to your die.
For this sample, a hexagon die was used. Instead of a traditional ringed wreath here, the image was aligned to hang off each side. -
For each stamped iteration, rotate the panel. Ensure that the shape is in the same position each time (in this case, a flat side along the bottom of the positioner, and a point touching at the side).
-
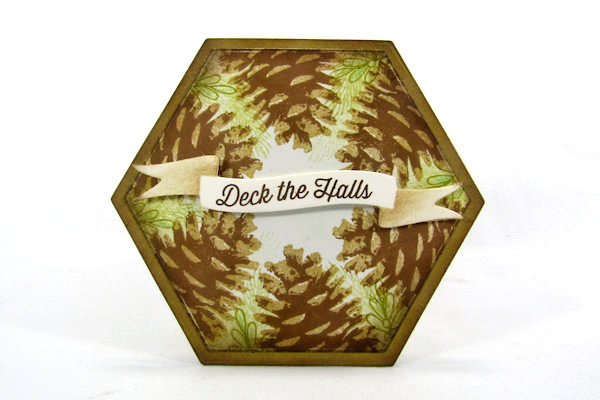
Step 13
Complete the project.
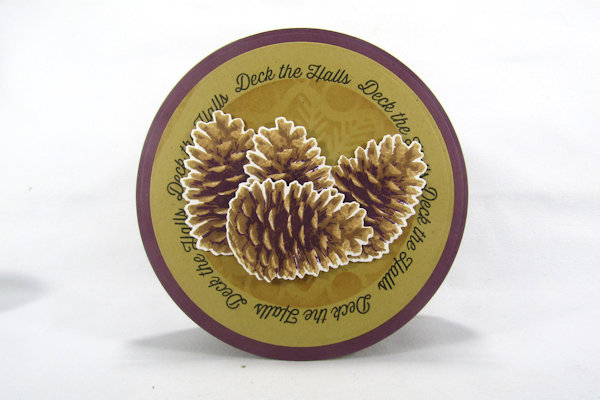
Used here: Impression Obsession CL883 Layered Pine Cone clear set, CL499 Round Ornaments 2 clear set, WP788 Festive Mini Leaf Stems clear set, Quickutz Hexagon nesting dies and banner die -
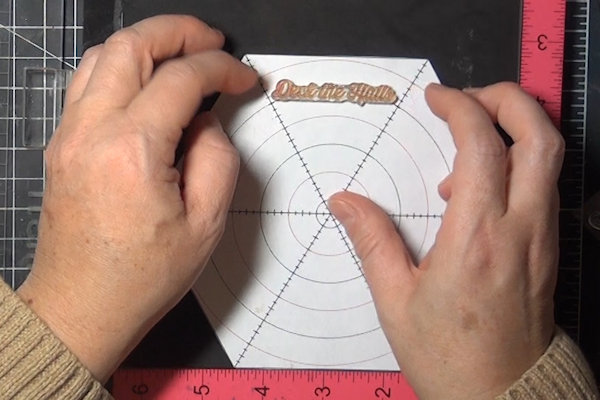
Step 14
To stamp on a circular panel, use one of Cyndie’s Amazing Templates found in the MISTI forum here on the Splitcoaststampers site. These have been designed with geometric shapes and have guides for different sizes of circles within. Instructional videos for these templates are linked in the forum as well.
-
Print and cut out the template. Place the template in your stamp positioner. Use the inner rings and section lines on the template to determine the placement of your stamp. If using a clear stamp, shape the sentiment to align to the curve of the template.
-
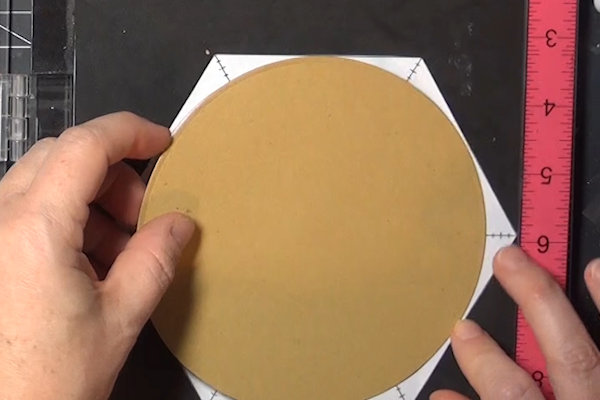
Step 15
Find a circle die that closely matches the size of the ring on the template. Die cut a panel and attach it to the template with removable adhesive, using the guides to help with centering.
Click here for a tutorial. -
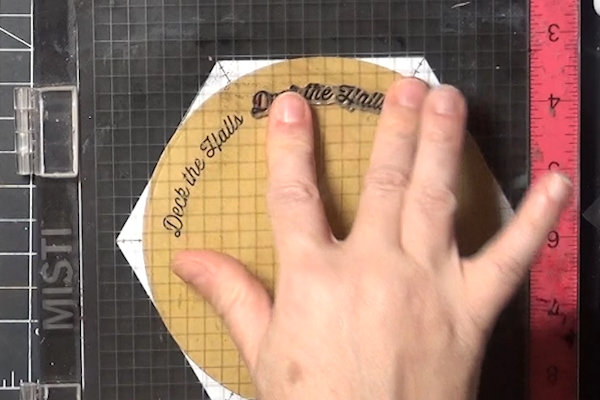
Step 16
Stamp the image. Rotate the template and continue stamping around the panel.
-
For this sample, the layered pinecone image was stamped on all 4 corners of a square panel. Once each layer was positioned for one corner, it was already set for the rest - a great strategy for mass production!
-
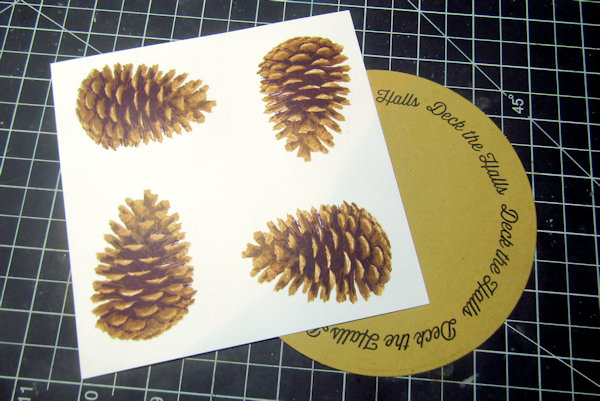
Step 17
Complete the project.
Used here: Impression Obsession CL883 Layered Pine Cone clear set and DIE710-G matching die, CL499 Round Ornaments 2 clear set, Spellbinders Grand Nestabilities Circles, A Colorful Life Designs stencils 018155 Marvelous Mask Ornaments and 018113 Pine Doily


Video!
Your Turn
You've seen the tutorial, now you try it! We've got a section of the gallery set aside for Wreath Stamping. Try this technique, then upload your artwork to the gallery. Show us your creations!
***Please note - Internet Explorer/Edge is not a supported browser, and will not allow you to see the videos. Please use Chrome, Firefox or Safari to view our tutorial videos.

Questions and Comments
We'd love to get your feedback or questions. Leave your comment below.
Page 1 of 1 pages