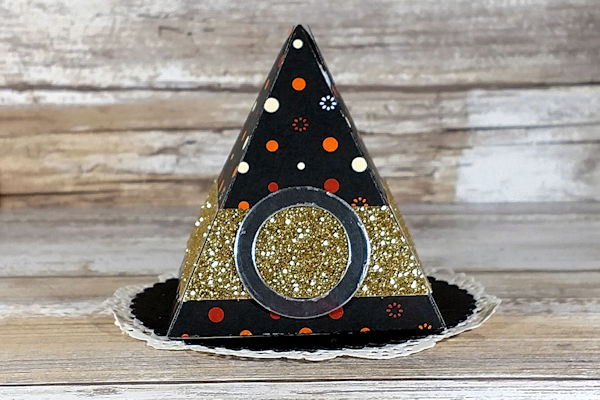
Witch Hat Treat Box
by Christy Fulk
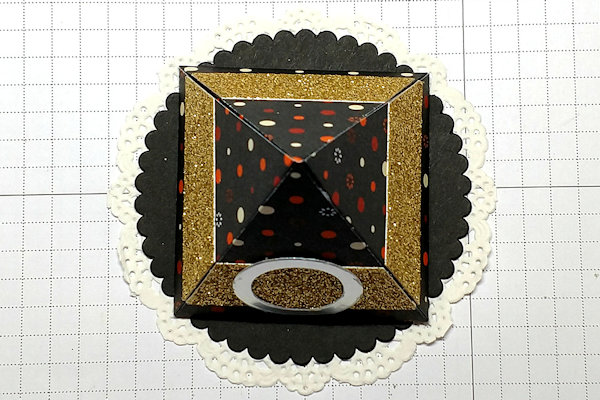
Use a pyramid template to make a cute witch's hat box.
Supplies

- Halloween patterned paper (Stampin’ Up!® Spooky Night Designer Series Paper used here)
- Gold glitter paper (SU Gold Glimmer Paper used here)
- Silver foil paper (SU Silver Foil Sheets used here)
- 3 1/2” paper doily (SU Delicate White Doilies used here)
- Black cardstock (SU Basic Black used here)
- Die-cutting machine
- Pyramid-shaped box die or free downloadable template or cut file (SU Pyramid Pals Thinlits Dies used here)
- Circle dies (SU Layering Circles Framelits Dies used here)
- Scissors
- Strong adhesive (SU Fast Fuse and Tear & Tape Adhesive used here)
Step-by-Step
-
Step 1
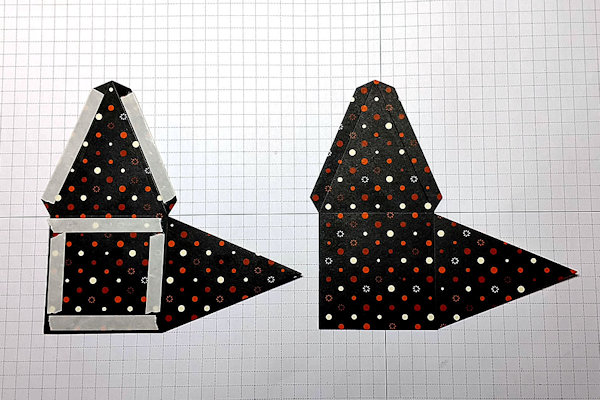
Die cut a piece of 5 1/4” x 7 1/2” Halloween patterned paper twice to make two pyramid box pieces (or print and cut out the free downloadable template). On one of the pieces, put double-sided tape along the two long tabs on the one triangle section with the tabs. Then, put the same tape around the perimeter of the square section of the same piece. The second piece shouldn’t have any tape.
-
Step 2
Cut four 2” x 3/4” pieces of gold glitter paper. Attach each piece to the bottom of the triangle sections of both pieces. The bottom corners of the glitter pieces should line up with the edges of the triangles without the tabs and the score lines of the triangles with the tabs. This should put them a tad over 1/4” above the bottom score line of each triangle.
-
Step 3
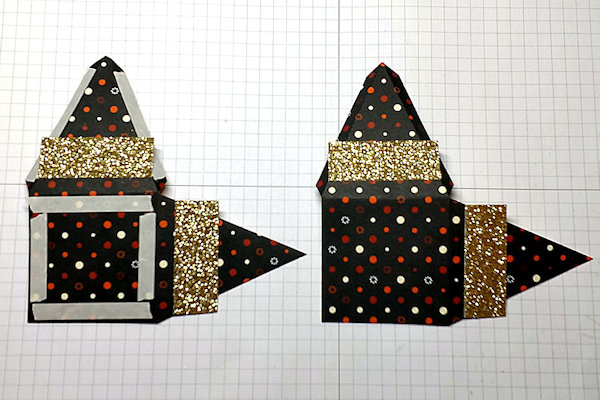
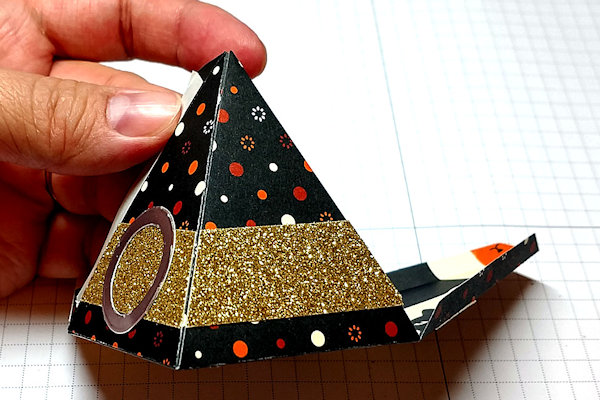
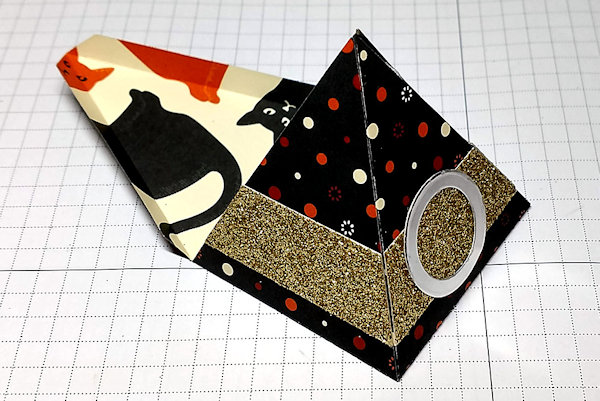
Remove the paper backing off of the tape on the square section of the first piece. Rotate the second piece, without the tape, so the triangle section with the long tabs is on the bottom, and the other triangle is on the left. Attach the square section of the second piece on top of the square section of the first piece.
Turn the piece over, and fold all of the score lines up, and then let the piece flatten out again. Trim off the ends of the glimmer paper that are hanging over the edges of the left & right triangle sections (without the tabs). Fold the long tabs of the other triangles sections down, and trim the glimmer paper hanging over the folded edge off. Turn the piece back over. -
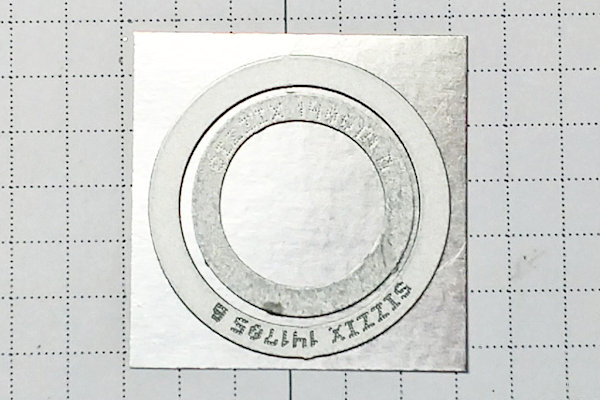
Step 4
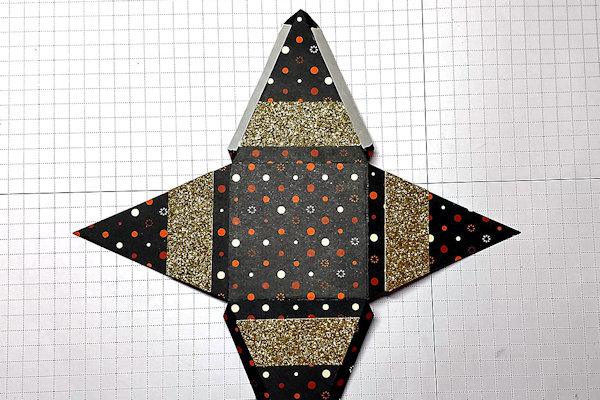
Put a 1 1/8” or similar size circle die onto the center of a 1 1/2” x 1 1/2” piece of silver foil paper. Then, lay a 3/4” circle die inside the center of the first circle die. With the dies in place, run the piece through a die cutting machine to make a buckle.
-
Attach the buckle to the center of the glimmer paper strip on the top triangle section (with the double-sided tape) using strong adhesive. Put strong, double-sided tape around the perimeter of the square section of the box.
-
Step 5
Remove the paper-backing from one of the pieces of double-sided tape on the triangle section with the buckle. Fold the tab back, and fold the triangle section next to it up. Attach the two triangle sections together, lining the edge of the side-triangle with the score line of the tab on the buckle-triangle. The long tab should be attached to the underside of the paper.
-
Attach the other side-triangle to the other long tab of the buckle-triangle the same way.
-
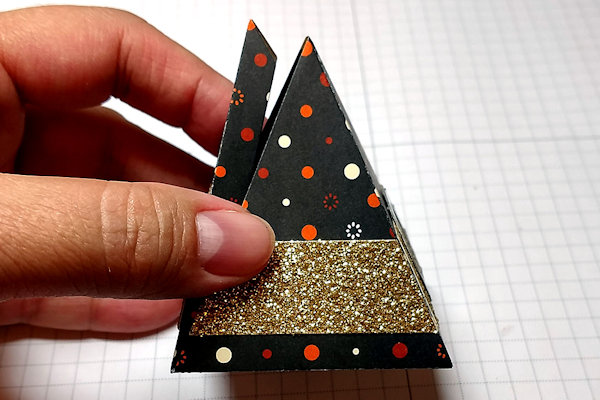
Step 6
Fold the tabs of the unattached triangle up. Fold the whole triangle section up, and insert the tabs inside of the box to close it. The bottom score line might need to be pinched a little bit to keep it closed.
-
Step 7
Put a few strips of strong double-sided tape onto the center section of the 3-1/2” doily.
-
Cut a scallop circle out of the 3-1/4” x 3-1/4” black cardstock using around a 3” scallop circle die. Remove the paper backing from the tape on the doily, and attach the scallop circle to the center of the doily.
-
Step 8
Remove the paper backing from the double-sided tape on the bottom of the hat box, and attach the hat box to the center of the scallop circle.
-
Step 9
Complete the project.


Video!
Your Turn
You've seen the tutorial, now you try it! We've got a section of the gallery set aside for Witch Hat Treat Box. Try this technique, then upload your artwork to the gallery. Show us your creations!
***Please note - Internet Explorer/Edge is not a supported browser, and will not allow you to see the videos. Please use Chrome, Firefox or Safari to view our tutorial videos.

Questions and Comments
We'd love to get your feedback or questions. Leave your comment below.
Page 1 of 1 pages