Wet Paper Watercoloring
by Dina Kowal
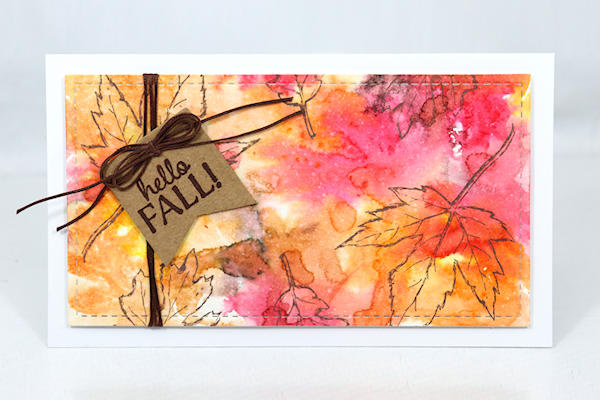
Create a stunning background with dye inks, a little water, and your choice of stamps. Thanks to Beate Johns, who first published a version of this tutorial in 2005.
Supplies
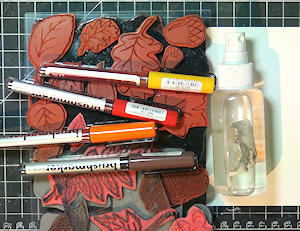
- Dye inks in marker or pad form (Karin Markers used here)
- Water mist bottle
- Watercolor paper (Fabriano Studio 140# hot press paper used here)
- Bold stamps (Biblical Impressions (StampOnIt) Solid Oak used here)
- Coordinating outline stamps (retired Crafter's Companion stamps by Sheena Douglass used here)
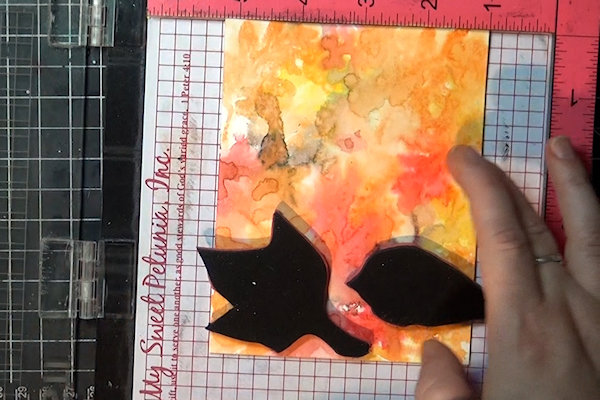
- Other supplies as needed to complete the project (used here: MISTI, waxed thread, foam sheet, acrylic block, my finger, Impression Obsession DIE1191-ZZ Stitched Slimline Layers die set, Spellbinders Banner Parade die set (retired), Impression Obsession CL1135 Eeyore Leaves clear stamp set)
Step-by-Step
-
Step 1
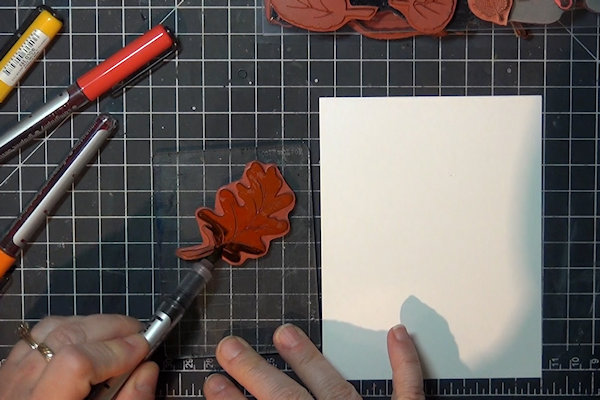
Ink up your solid stamp with a dye ink of your choice – markers are used here, but ink pads are great too. If using multiple colors, work from light to dark.
-
Step 2
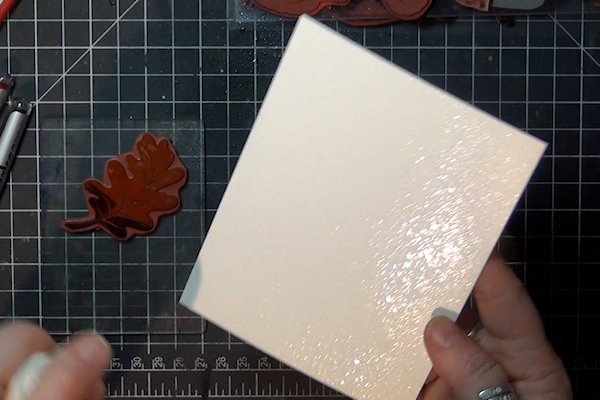
Spray water on your watercolor paper. You want enough water to soak in and also bead or stand out from the paper, but not so much that it's pooling or dripping.
-
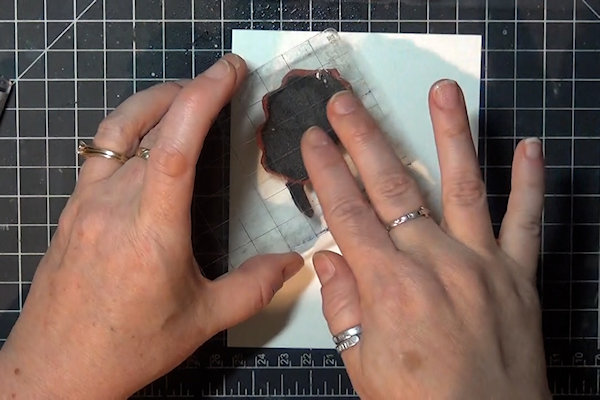
Step 3
Stamp onto the wet surface.
-
Lift the stamp to allow the ink to react with the water on the paper – misted water creates a network of water beads that will pull the ink along.
-
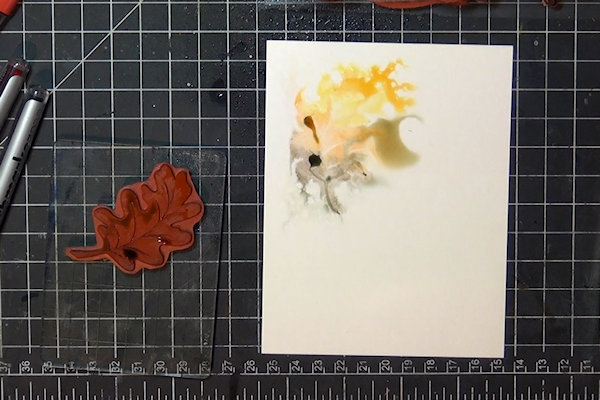
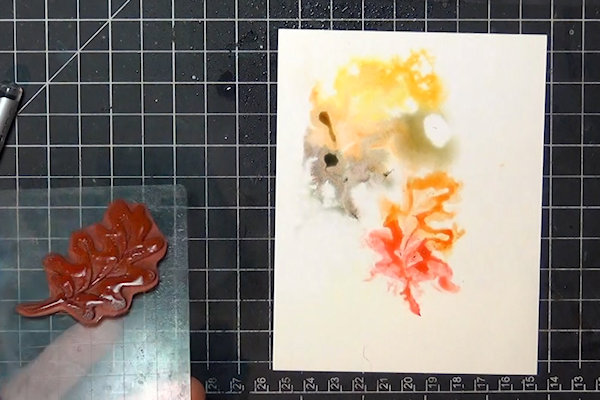
Step 4
Clean your stamp, reink, and stamp again.
-
Mist lightly as needed to refresh areas that have begun to dry.
-
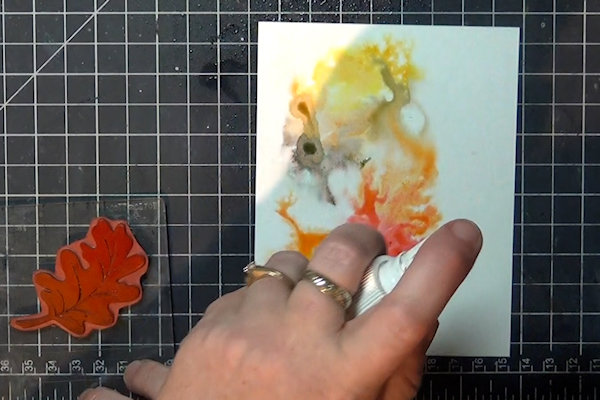
Step 5
Continue stamping until you have the look you desire.
-
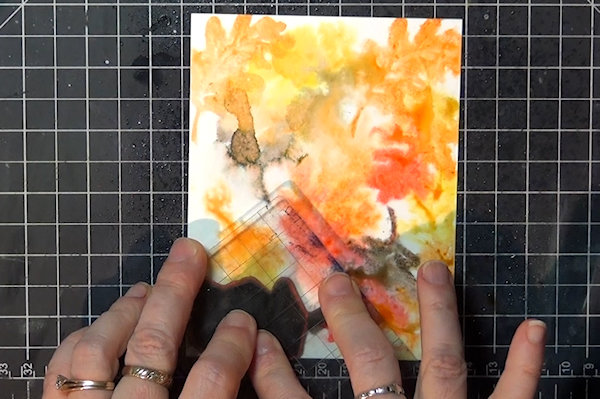
You can use your finger to tap ink from wet areas into areas that need a little color.
-
Step 6
NOTE:
Different papers will give different results. Beate used cardstock and got more defined images with color bleeding outward. Cardstock is more absorbent. Watercolor paper will give less definition. The amount of water used also affects results. -
Step 7
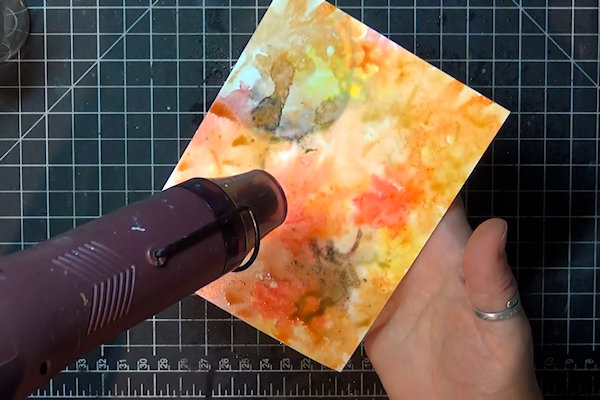
Let the panel airdry or dry it with your heat gun.
-
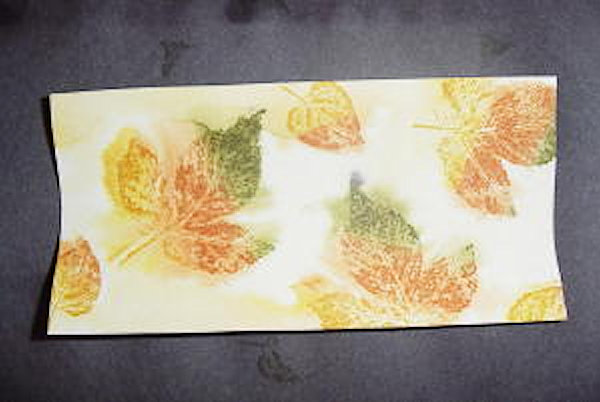
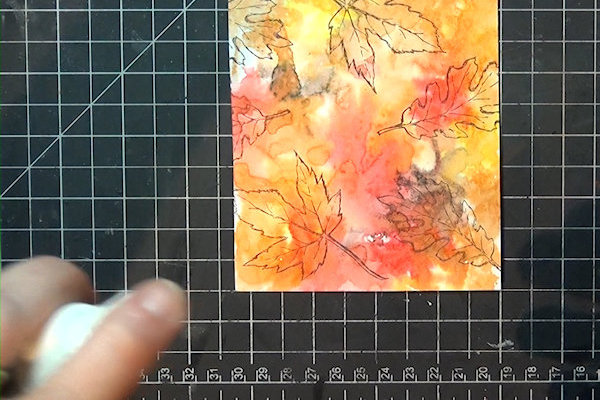
Stamp over the panel with a coordinating outline image.
-
Step 8
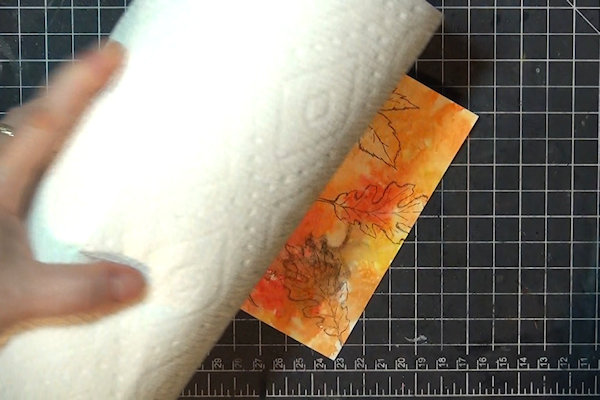
Mist lightly to soften the stamped images.
-
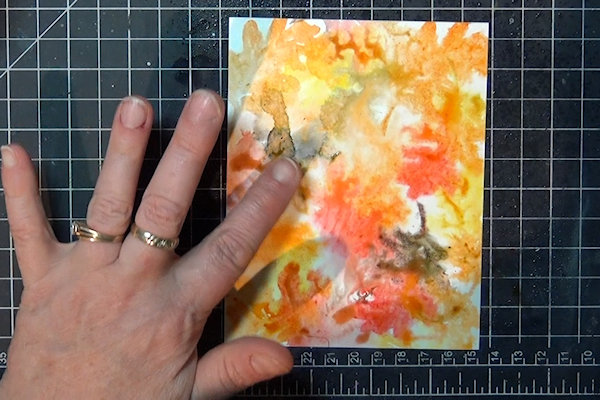
Blot with a paper towel to lift any ink that reactivated with the misted water – this creates a neat distressed texture.
-
Step 9
Use the panel to complete a card or other project.
Video!
Your Turn
You've seen the tutorial, now you try it! We've got a section of the gallery set aside for Wet Paper Watercoloring. Try this technique, then upload your artwork to the gallery. Show us your creations!
***Please note - Internet Explorer/Edge is not a supported browser, and will not allow you to see the videos. Please use Chrome, Firefox or Safari to view our tutorial videos.

Questions and Comments
We'd love to get your feedback or questions. Leave your comment below.
Love this!
Always so inspiring. Hugs, SuZ.
Page 1 of 1 pages