Watering Can

by Helen Orr

Fashion a watering can from patterned paper and fill with goodies.

Supplies

  • Patterned Paper, at least 8 1/2" x 11"

  • Cutting Mat

  • Craft Knife and Scissors

  • Steel Ruler for cutting edge

  • Scoring Tool

  • Glue or Double-sided Adhesive

  • Embellishments

Step-by-Step

  1. Step 1

    Print the template on patterned paper and cut out the four pieces: watering can body, spout, curved handle and back handle.

    Watering Can Template (Updated template without text. Thanks, Helen!)
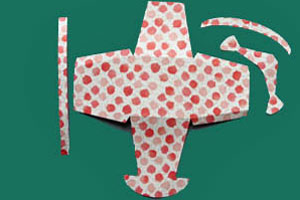
  2. Step 2

    Working on the "wrong" side of the paper, score and valley fold the dashed red lines on the main watering can body.

  3. Step 3

    Apply adhesive (glue or double-sided sticky tape) to the folds on the "right" side of the paper.

  4. Step 4

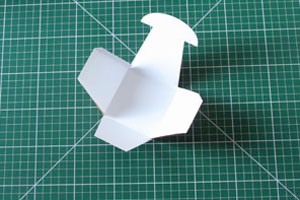
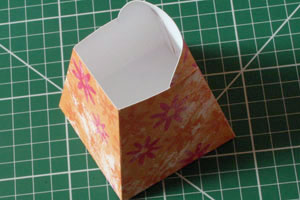
    Bring sides together to form the can body.
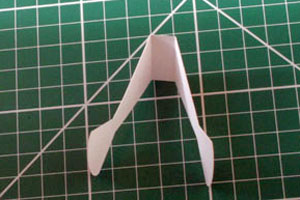
  5. Step 5

    Curve the front flaps and tuck into the sides of the watering can using a dab of glue or other fixative to keep in place.

  6. Step 6

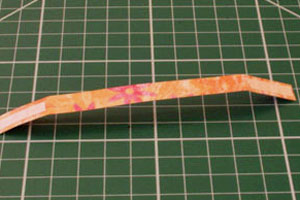
    Take the spout and fold with "wrong" sides turned to the inside as indicated by the red dashed lines in the template.

  7. Step 7

    Apply a dab of glue to the end of the spout's inner sides to fix them together.

    Apply a strip of double-sided sticky tape to the base of the spout and affix to the front of the watering can body.
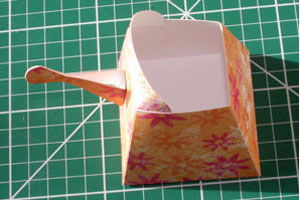
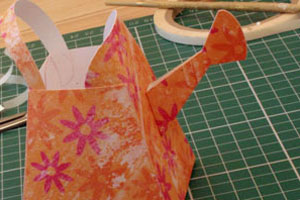
  8. Step 8

    Attach the curved top handle by placing a dab of glue on each end (right side up) and tucking inside the top of the can, ensuring that the handle curves to the back.

  9. Step 9

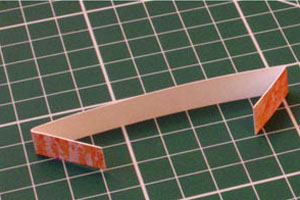
    Fold the handle for the back on the dashed red lines as indicated in the template.

  10. Step 10

    Apply glue or sticky tape to the right side of the folded ends.

  11. Step 11

    Glue to the back of the can to form a ‘D’ shape.

  12. Step 12

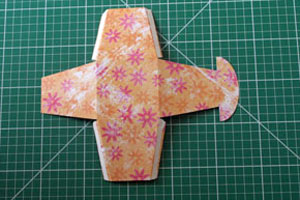
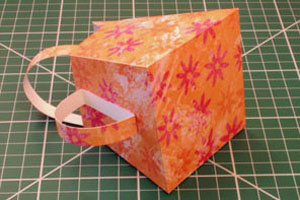
    Your watering can is now complete and ready to be decorated as you wish!

  13. Decorated watering can.

Video!

Your Turn

You've seen the tutorial, now you try it! We've got a section of the gallery set aside for Watering Can. Try this technique, then upload your artwork to the gallery. Show us your creations!

***Please note - Internet Explorer/Edge is not a supported browser, and will not allow you to see the videos. Please use Chrome, Firefox or Safari to view our tutorial videos.

Questions and Comments

We'd love to get your feedback or questions. Leave your comment below.

It is past midnight, but I had to comment on this tutorial. Very clear, and a lovely result. I've already printed the template, and can't wait to make one, or two, or a dozen when I am less sleepy, in the morning. Thanks for all the information, and a very different project. Love this site.
Angelus  |  Tue Oct 20, 2009 at 10:05 PM
Thanks, Helli, this is soooo cute! I love projects like this that don't need a ton of supplies and gadgets. This would make a fun favor for my niece's upcoming spring wedding shower!
Susan  |  Wed Oct 21, 2009 at 7:03 AM
This is ADORABLE! I see some really cute watering cans as gifts for my son's teachers. Thanks for the wonderful idea and for sharing your gifts and talents!
Dawn Stock  |  Wed Oct 21, 2009 at 8:27 AM
This is adorable!!! I have several friends that will love this :D Thanks so much for a great template and tutorial.
Susan  |  Wed Oct 21, 2009 at 9:01 AM
I can't seem to fit this template to my printer. Any possibility of having it mailed to me? If so, my address is 8245 laurie ln, lumberton, tx 77657
SHARON STARNES  |  Wed Oct 21, 2009 at 9:10 AM
What cutting mat are you using Helen. It looks as though it would be a great assist? Awesome Watering Can project. Can't wait to make it. A good May Day Basket! Thanks. Deb
Deb Krusemark  |  Wed Oct 21, 2009 at 9:18 AM
Love this - thanks for each of you for the tutorials~ Must try this one in the spring.
Wanda  |  Wed Oct 21, 2009 at 9:27 AM
I love the watering can and will use it in the spring. I also love the flowers and butterflys you used for embellishments. Can you tell me where they came from?

Thank you
Kris Blakla  |  Wed Oct 21, 2009 at 9:33 AM
Anyone have any info yet...I am also anxiously awaiting news on which dies were used for the butterflies.
They are perfect for this little adorable watering can! Thank you, thank you!
Cat22  |  Wed Oct 21, 2009 at 9:54 AM
Once again a very, very cute project. I can think of several uses for this template and your paper selection can dictate the theme.
Jan D.  |  Wed Oct 21, 2009 at 10:15 AM
This is my first visit to your site, thank you so much for the great template, I am going to make red ones for on my christmas table and fill with goodies instead of the traditional crackers we use here. Thanks again, cant wait to get started.
Sheila ldous  |  Wed Oct 21, 2009 at 10:17 AM
This is lovely! I would love it if it were big enough for using as a card box for A2 cards. I think I will try to figure it out. If you have any suggestions I'd love to hear them. I am into gardening with a passion, so this is a wonderful project! Thank you! Cherie Smith
Cherie Smith  |  Wed Oct 21, 2009 at 10:18 AM
were do I find the templet for the water can? I would like to make one
Linn Bradbury  |  Wed Oct 21, 2009 at 11:14 AM
Deb,
The cutting mat is from Scor-Pal. It fits perfectly into the scoring tool.

Cat,
I emailed Helen. I hope she will answer soon. I think she told me she cut the flowers and butterflies with her Cricut, but I am not 100% sure.

Linn,
The template for the watering can can be found in step one of the tutorial.

Hugs and smiles
Beate  |  Wed Oct 21, 2009 at 12:05 PM
I found Helen's note on the flower and butterfly:
"I added a couple of butterflies, flowers and tag that I designed in Illustrator and cut out using a Craft Robo. The border round the bottom was created using a Fiscar punch."
Beate  |  Wed Oct 21, 2009 at 12:13 PM
This is such a cute project! Thank you!
Charlene Merrick  |  Wed Oct 21, 2009 at 12:58 PM
Where do I find this adhesive? I always use the red "stickey tape" and it has to be cut with scissors and is sometimes difficult to remove the backing. Love the one you used!
Mitzi  |  Wed Oct 21, 2009 at 1:09 PM
Mitzi,
Are you talking about the Scor-Tape in the video? If so, type in Scor-Tape into your google engine. You will find a lot of online stores that carry it. Or you can go to the the Scor-Pal site directly and order it there. It's my favorite adhesive.
beate  |  Wed Oct 21, 2009 at 1:12 PM
Good question Mitzi!
I use the super tacky tape with the orange backing when necessary also and yes.. sometimes it is VERY tricky to get the backing off!
I noticed the ease of the Score tape that Helen used immediately and wondered the same thing! I hope someone can tell us where it can be found.
Cat  |  Wed Oct 21, 2009 at 1:23 PM
Thanks Beate!
Catherine  |  Wed Oct 21, 2009 at 1:25 PM

Page 1 of 4 pages  1 2 3 >  Last »

You need to be logged in to comment

GET OUR NEWSLETTER


Splitcoaststampers's privacy policy