Watercolor Pumpkins
by Dina Kowal
Watercolor a whole patch of pumpkins!
Supplies
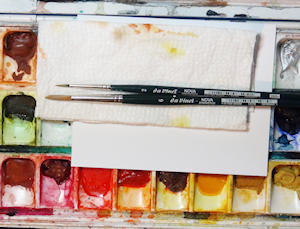
- Watercolor paper (Fabriano Studio 140# cold press paper used here)
- Watercolor brushes (DaVinci Nova #6 and #2 round brushes used here)
- Watercolor paint (QoR watercolors used here: Indian Yellow, Transparent Pyrrol Orange, Green Gold, Quinacrodone Gold Deep, Raw Umber Natural)
- Water
- Paper towel
- Other supplies as needed to complete the project (used here: Impression Obsession MC1163 Happy Thanksgiving clear stamp set and Fall Floral paper pack, Versafine Clair ink, Spellbinders A2 rectangle die, sewing machine)
Step-by-Step
-
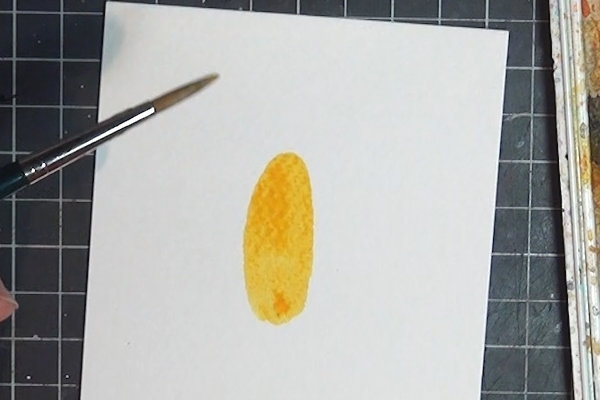
Step 1
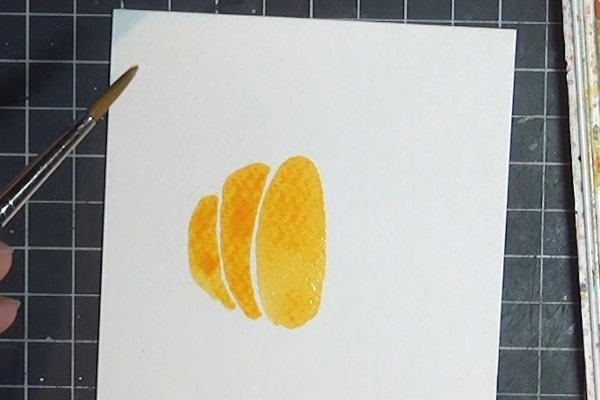
Paint a tall oval for the center of the pumpkin. You’ll want enough water and paint in your brush so that the area stays wet for a little while. Use a yellow or yellow-orange paint for this base layer.
-
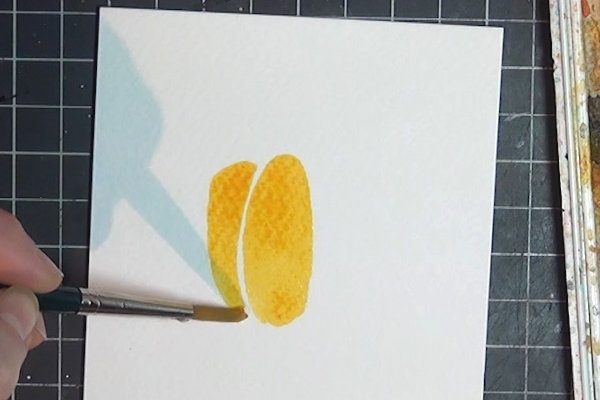
Step 2
Leaving a small space, create another section of the pumpkin to the side of the oval. The section should be about the same height or slightly shorter than the center section, and rounded on the outside. The inner edge will follow the contour of the central oval.
-
Repeat the step, creating another section to the outside.
NOTE:
Pumpkins can be any shape or size, which makes this exercise organic and fun. If you need an outline to guide the size and placement of your sections, you can lightly sketch or trace a circle or oval shape with a pencil before you paint. -
Step 3
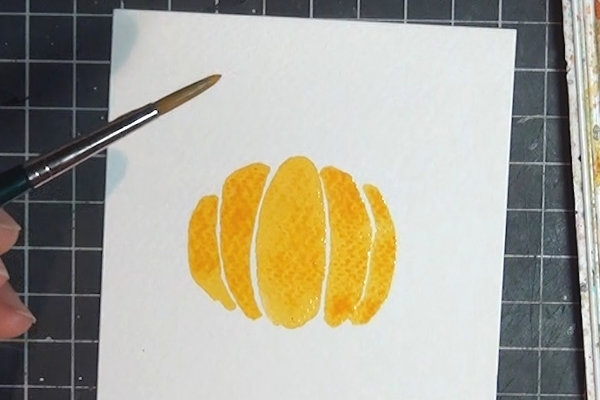
Repeat, adding sections to the other side. Try to maintain the spaces between the sections, but if they end up touching, it’s ok.
-
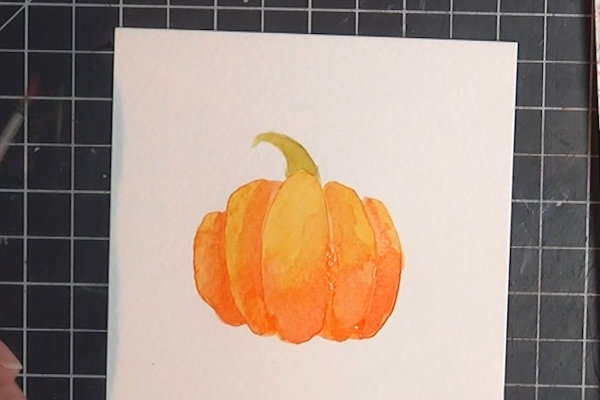
Step 4
Your paint should still be glossy and sitting on top of the paper. Brush or dot in orange watercolor paint at the bottom of each section. If the paint does not move on its own, blend with the brush or lift with the corner of a paper towel.
Allow the panel to air dry. -
Step 5
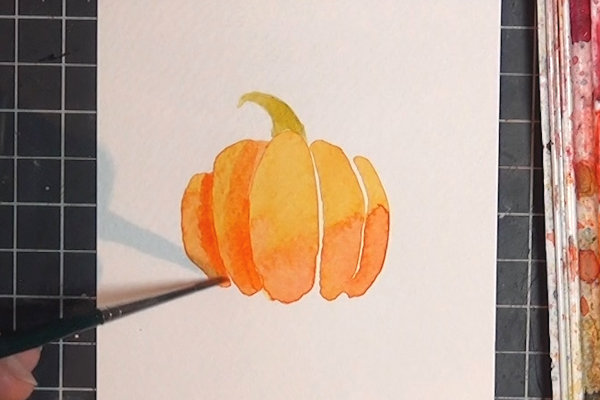
Add a stem to the pumpkin with a green-gold paint. Make it wider at the base, and pointed or flat at the end. It can be short and flat, or longer and curved. Bring the bottom right to the top edge of the center oval.
-
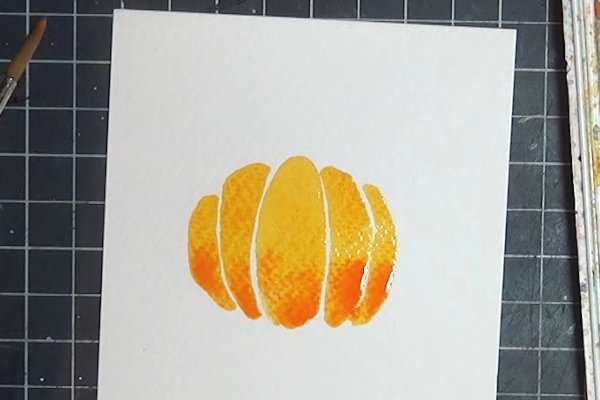
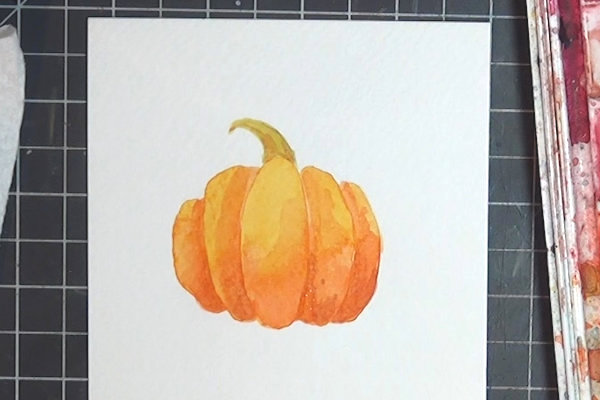
Step 6
Add shading to each section using the orange paint. Shading will be placed at the bottom and along the inside edge of each section, right up to the edge of the previous section. Use a clean, wet brush to soften the edges of your painting.
-
Fill in and/or reshape the bottom of the pumpkin as needed.
Allow each layer of paint to dry before proceeding. -
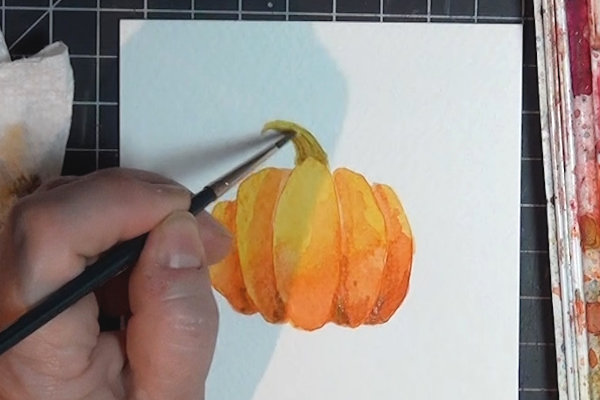
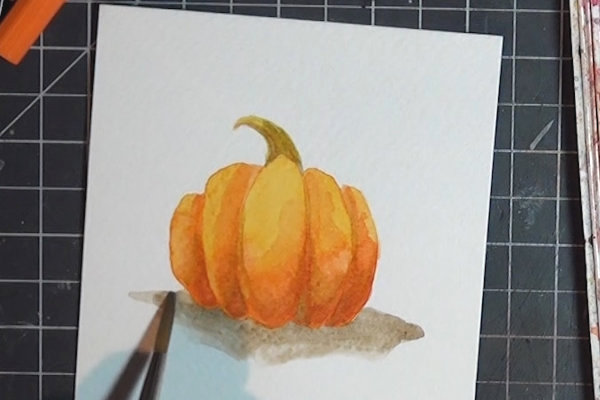
Step 7
Use a reddish-brown to add more shading between each section. These are smaller areas of shading, in sort of rounded wedges. More shading will be concentrated at the bottom of the pumpkin since natural light would be hitting the top.
Use the same color to add a light shadow to the underside and base of the stem. -
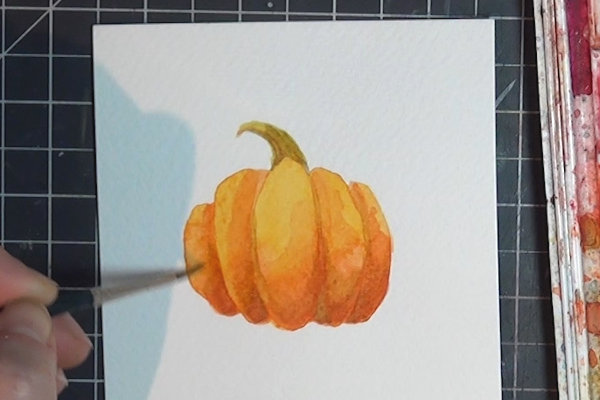
Step 8
Accent shadows with a dark brown (base of pumpkin, base of stem, lightly along section edges).
-
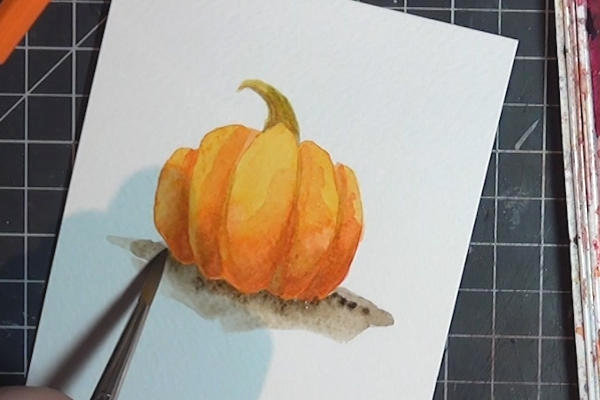
Step 9
Use the green-gold to add depth to the shaded areas.
-
Step 10
Add a shadow below the pumpkin, brushing an abstract horizontal area up to the bottom of the painted area.
-
Dot in more concentrated paint along the edge of the pumpkin and allow it to blend down.
-
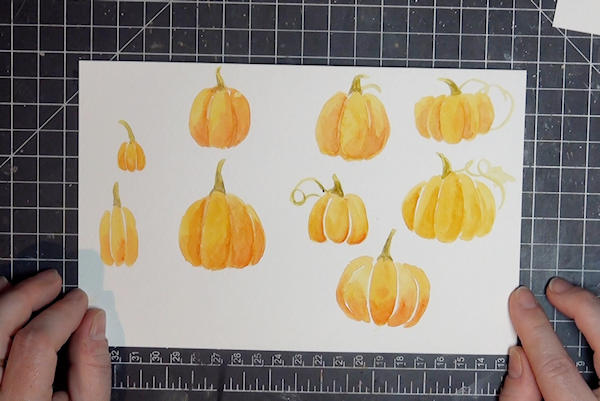
Step 11
Practice! Play around with different sizes and smaller or larger brushes. Try different amounts of shading. Stop at step 5 and enjoy the results of loose painting. Add tendrils and leaves. Paint a whole patch!
-
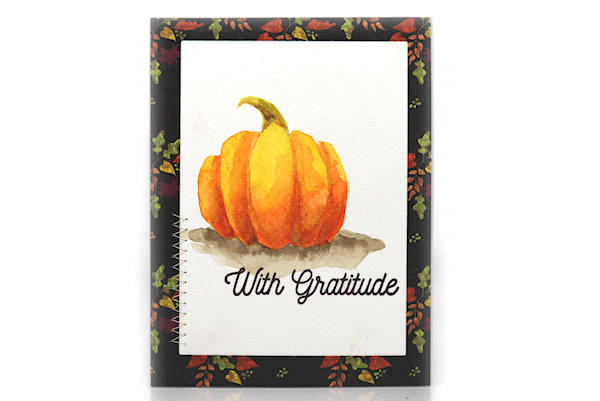
Step 12
Use your painted pumpkin to complete a card or other project.

Video!
Your Turn
You've seen the tutorial, now you try it! We've got a section of the gallery set aside for Watercolor Pumpkins. Try this technique, then upload your artwork to the gallery. Show us your creations!
***Please note - Internet Explorer/Edge is not a supported browser, and will not allow you to see the videos. Please use Chrome, Firefox or Safari to view our tutorial videos.

Questions and Comments
We'd love to get your feedback or questions. Leave your comment below.
Page 1 of 1 pages