Vintage Camper Card
by Dina Kowal
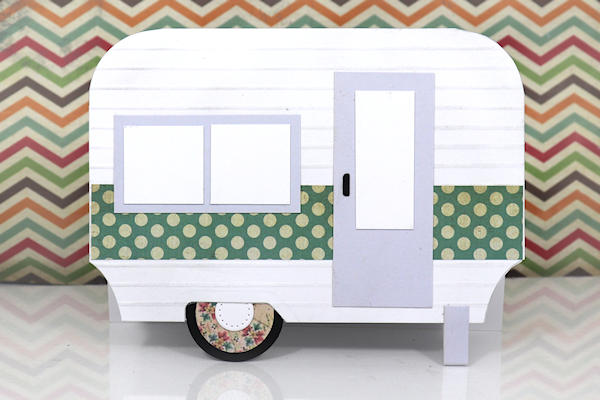
Use simple shapes to create an adorable vintage camper card, inspired by a 1973 Bell Travel Trailer.
Supplies
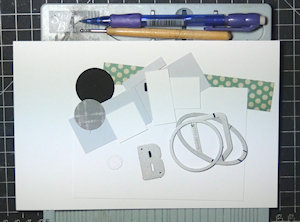
- Cardstock for base, scraps for other pieces
- Circle dies for wheel and corner template (1/2", 1", 1 1/4" and 1 1/2" sizes used here, various brands)
- Other dies for cutaways and handle - use what you have! (Quickutz oval, Sizzix tag, Whimsy Stamps letter B die used here)
- Trimmer
- Scissors
- Pencil
- Scoring board and tool
- Adhesive
- Blender brush
- Grey ink
Step-by-Step
-
Step 1
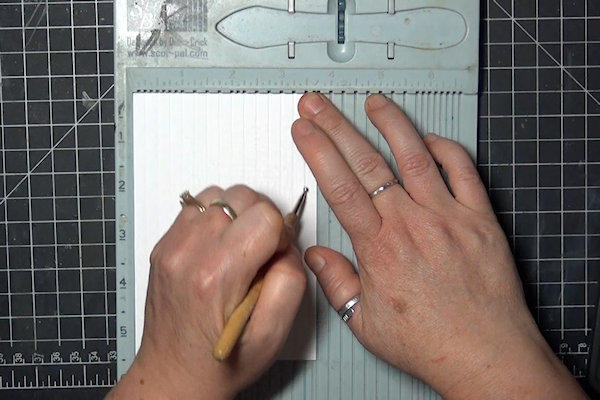
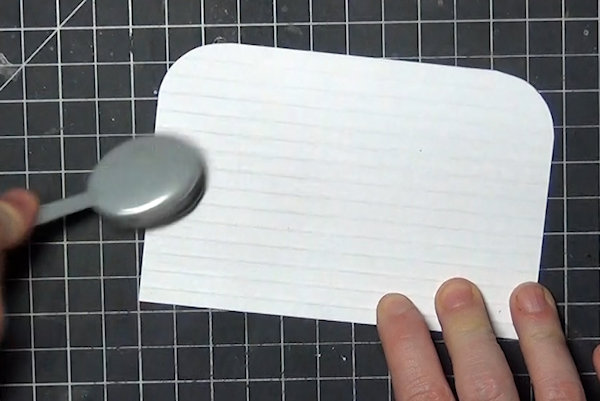
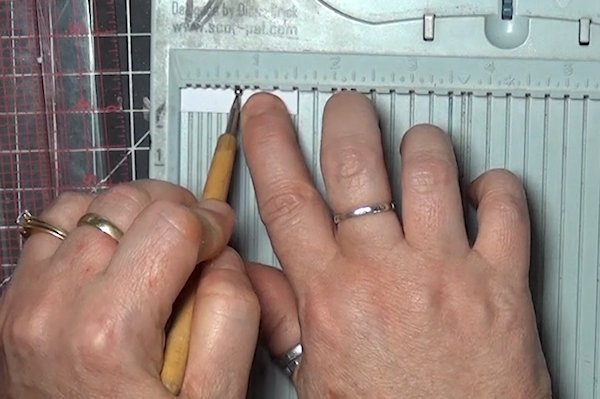
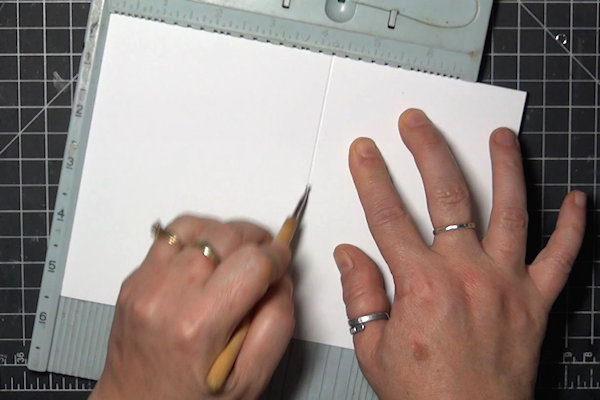
Cut a panel for the card front, 5 1/2” x 3 3/4". Turn to the back side and from the short end, score every 1/4”.
-
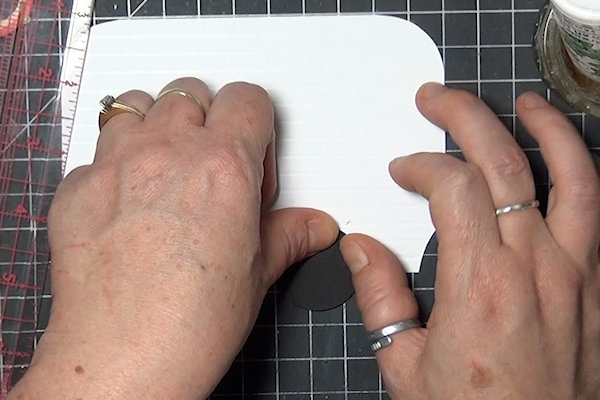
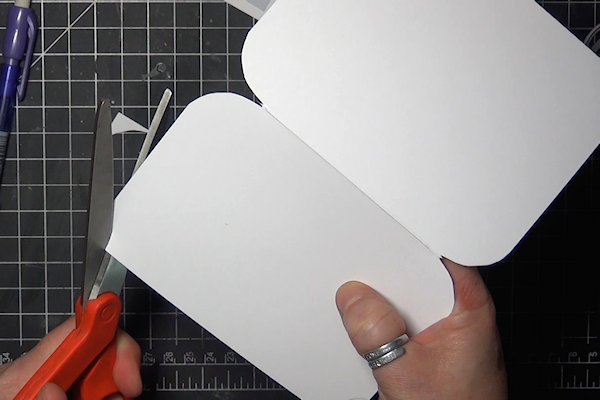
Step 2
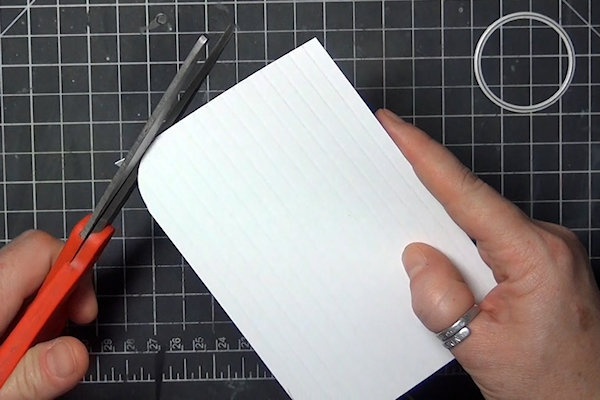
Line up a 1 1/2” circle die in the top corners and trace a rounded corner on both sides.
-
Cut the corners away with scissors.
-
Step 3
Brush the panel lightly with grey ink to highlight the scored ridges and add a little distressing. You can brush the edges if you wish as well.
-
Step 4
Mark an oval or tag die on both sides to help align for a cut away from the bottom corners. In the sample, the cutaway portion is 3/4" tall and 3/8” wide. It can be a curve or angle – you can cut with scissors if you don’t want to fiddle with dies.
-
For the wheel well, use a rounded oval or tag die (or get creative with an alphabet die, maybe an upper case D?). Tape in place. In the sample, the wheel well is 1 1/4" wide and about 1/4" high, 1 1/4" from the edge of the panel.
-
Step 5
Die cut, and repeat the corner cut on the other side.
-
Step 6
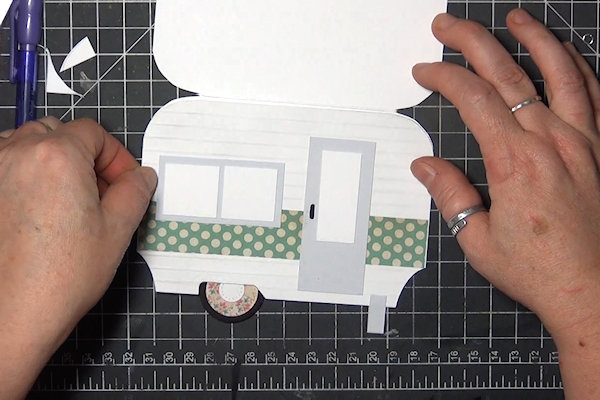
Cut and glue a decorative strip, 1” x 5 1/2", across the panel above the corner cuts.
-
Step 7
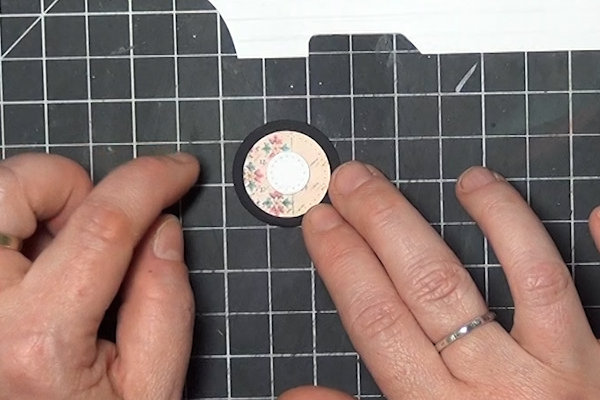
The wheel is made of 3 concentric circles, 1 1/4", 1”, and 1/2". Glue them together.
-
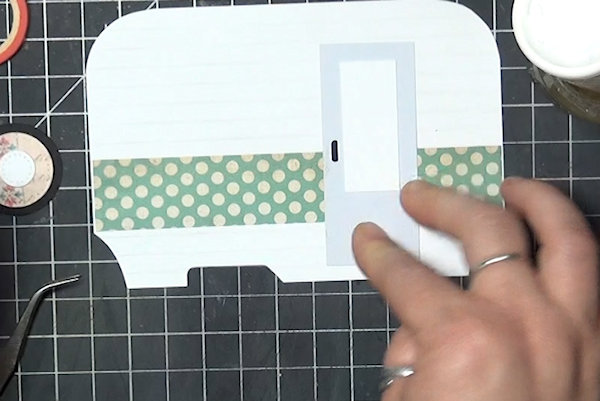
Step 8
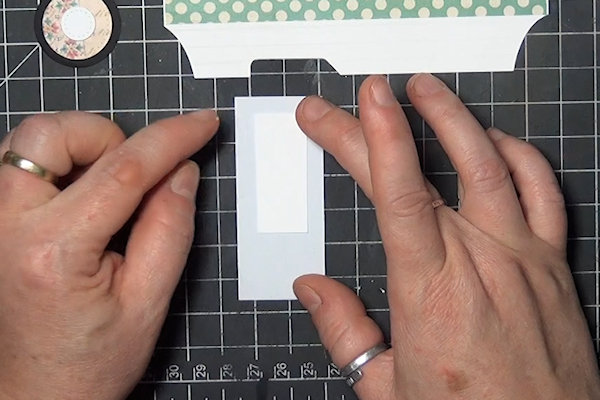
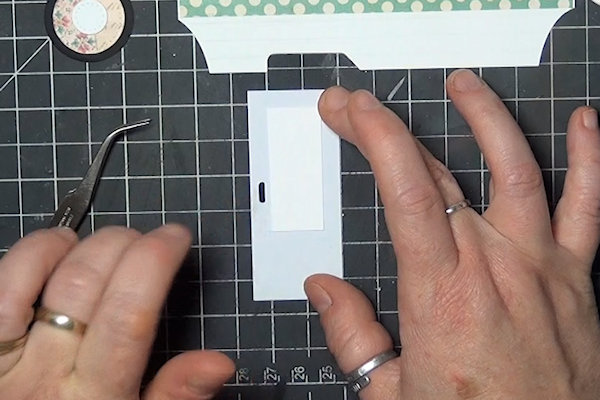
The camper door is 1 1/4" x 3”. Cut a window 3/4" x 1 3/4" and center it toward the top of the door piece.
-
Cut and adhere a small door handle – for the sample, the handle piece came from the inside of a die-cut letter B.
-
Step 9
Glue the door to the card about 1” from the right and 1/4” from the bottom edge.
-
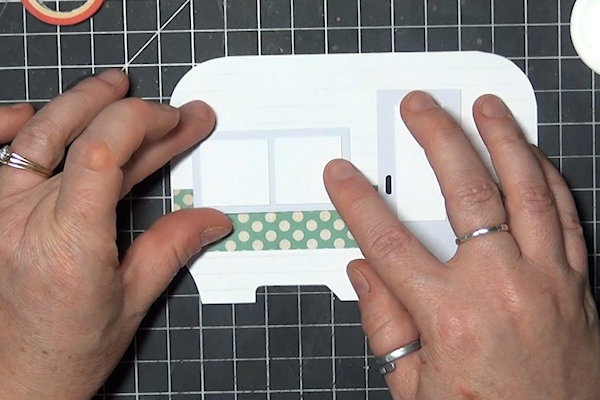
Step 10
Cut two windows, each 1” square. The base for the windows is 1 1/4" x 2 3/8”. Mount the squares onto the base. There will be an 1/8” border around the edge and at the center.
-
Adhere on the left side of the panel, centered between the door and edge, and overlapping the accent stripe.
-
Step 11
Glue the wheel to the back side of the panel so that the bottom of it creates a height of 4 1/4".
-
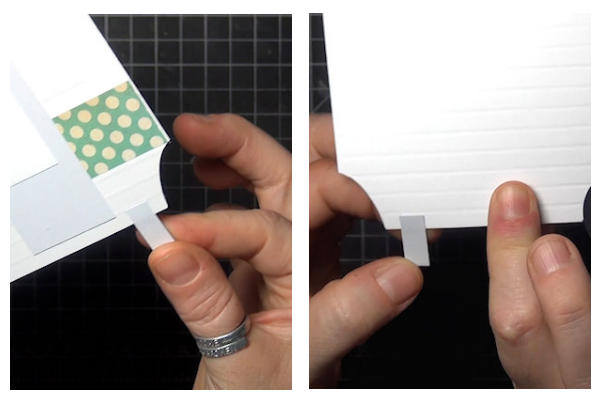
Step 12
Cut a strip of cardstock 1/4" x 1 1/2" and score at 3/4". Fold in half.
-
Add glue to the strip on both sides of the fold. Adhere the folded strip so that it’s glued to the front and back of the panel and to itself , also aligned so that the bottom of it creates a height of 4 1/4" for the panel. This will allow the card to stand up nicely when it’s displayed.
-
Step 13
Cut a card base 5 1/2" x 8, and score at 4 1/4".
-
Trace the cut-away corners using the camper panel as a template.
-
Step 14
Cut away the top corners on the fold, and the bottom corners from the front only.
-
Adhere the camper panel to the base. Embellish more if desired.
-
Step 15
Complete the project.


Video!
Your Turn
You've seen the tutorial, now you try it! We've got a section of the gallery set aside for Vintage Camper Card. Try this technique, then upload your artwork to the gallery. Show us your creations!
***Please note - Internet Explorer/Edge is not a supported browser, and will not allow you to see the videos. Please use Chrome, Firefox or Safari to view our tutorial videos.

Questions and Comments
We'd love to get your feedback or questions. Leave your comment below.
Hugs & blessings,
Chrissy
Loretta
i look forward to seeing MORE of your creativity in this respect
Page 1 of 1 pages