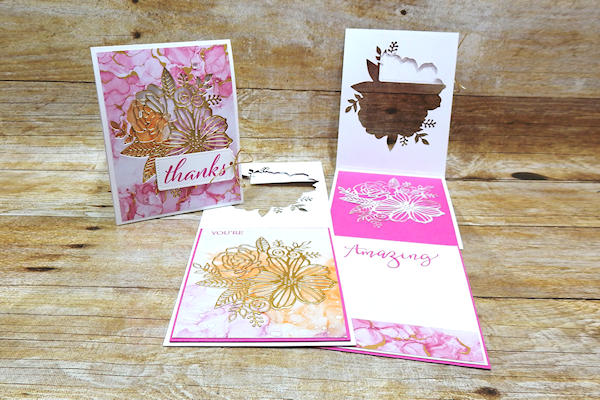
Vertical Trifold Window Card
by Wendy Lee
Create a fun fold card with a cut out window.
Supplies
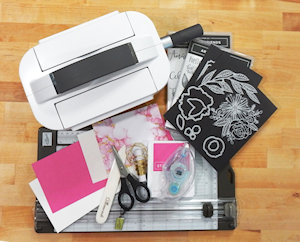
- Cardstock – 4 1/4” x 11” & 4” x 10 1/2” (Stampin’ Up!® Thick Basic White and Magenta Madness cardstock used here)
- Paper trimmer
- Die-cut machine
- Bone folder
- Dies (SU Artistic Dies used here)
- Adhesive
- Other supplies as needed to complete the project (SU supplies used here: Artistically Inked Stamp Set, Create With Friends Stamp Set, Thick Basic White, Basic White, and Magenta Madness cardstocks, Expressions in Ink Specialty Designer Series paper, Gold Foil, Magenta Madness Ink, Elegant Gems, Take Your Pick, Tailored Made Tags Dies, Stampin’ Seal, Mini Stampin’ Dimensionals, Multipurpose Liquid Glue, Paper Snips, Sponge, Silicone Craft Sheet)
Step-by-Step
-
Step 1
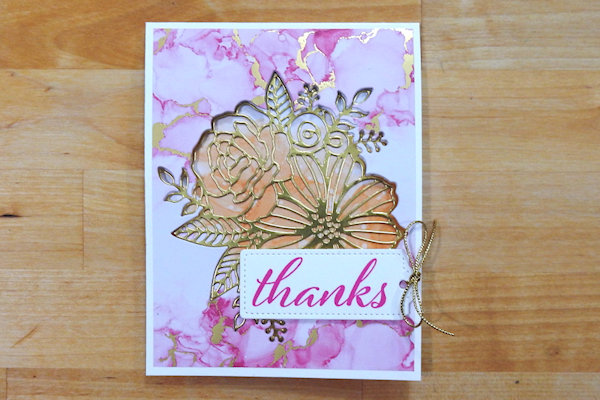
Fold a 4 1/4” x 11” cardstock in half for the outer card layer.
Add adhesive to the back of a 4” x 5 1/4” designer paper and adhere it to the front of card base. (optional)
Die cut a window though both layers.
-
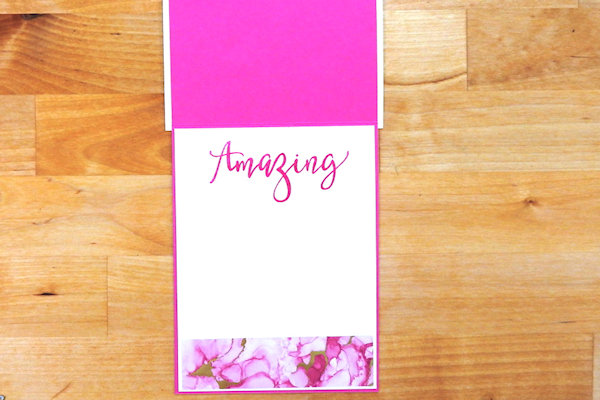
Step 2
Fold a piece of 4” x 10 1/2” cardstock in half for the inner card layer. Add adhesive to the back of the cardstock and adhere to the inside of the card base, with the fold along the bottom.
-
Embellish inside card layers as desired.
-
Step 3
With the card closed, insert the die cut into the window, adhering it to the inner cardstock layer.
-
-
Step 4
Embellish the card front as desired.
-
Step 5
Complete the project. The card will fold flat to mail in an A2 envelope.


Video!
Your Turn
You've seen the tutorial, now you try it! We've got a section of the gallery set aside for Vertical Trifold Window Card. Try this technique, then upload your artwork to the gallery. Show us your creations!
***Please note - Internet Explorer/Edge is not a supported browser, and will not allow you to see the videos. Please use Chrome, Firefox or Safari to view our tutorial videos.

Questions and Comments
We'd love to get your feedback or questions. Leave your comment below.
I know that the card base is 4-1/4" x 11" (it's in the written instructions) but the video says 4" x 11". You may want to add a note to mention that.
I also love how your voice sounds so pleased when things go just so. It made me smile as I know we all talk to ourselves as we bring our creations together.
Fun card and fun video. Thank you Wendy
Page 1 of 1 pages