Two Tier Eclipse
by Susan Campfield
Stack die cuts for a raised, camouflaged sentiment or image.

Supplies
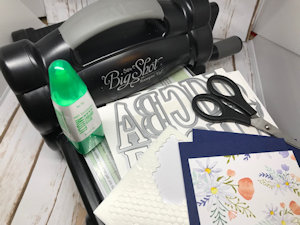
- Patterned paper (Stampin’ Up!® Delightful Daisy Designer Series Paper used here)
- Die-cutting machine, if using dies
- Letter dies, shape die, or punch (SU Large Letters Framelits used here)
- Dark cardstock (SU Night of Navy used here)
- Mini Dimensionals or other foam pop-ups
- Scissors
- Liquid glue
- Stamps and ink pads (Optional: SU Night of Navy ink pad and Thoughtful Banners used here)
Step-by-Step
-
Step 1
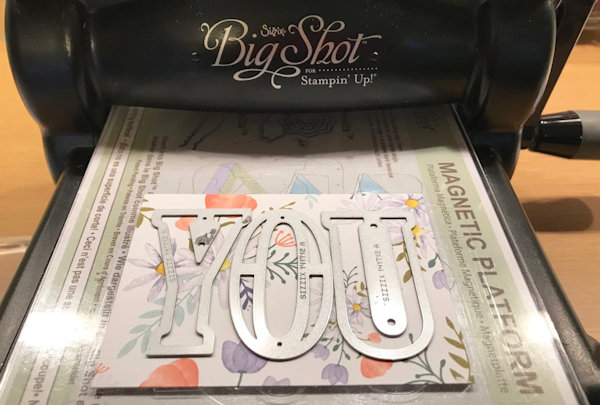
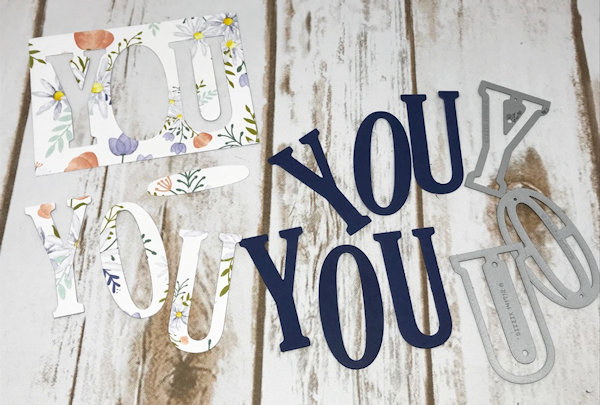
Cut a piece of patterned paper that allows room for the word you want to spell. A 3” x 4” piece was used here.
Lay the patterned paper on the platform of the die-cutting machine, placing the letter dies on top. Push them close together (almost touching) and make sure they are straight and in line. Die cut, following machine instructions.
TIP:
Adhere the dies down with a sticky note if you think they may shift during cutting. -
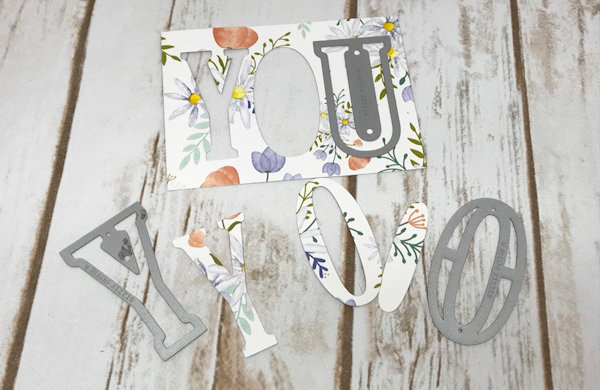
Step 2
Carefully poke out the die cut letters. Make sure to keep any inside portions of letters, like the center of the O or the centers in the letter B. Be careful not to rip the paper when taking it out of the dies.
-
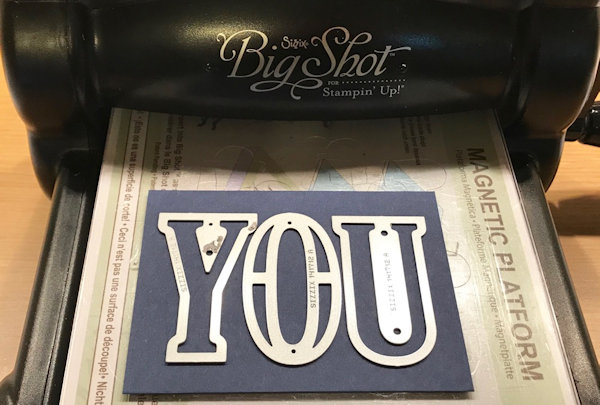
Step 3
Cut the same letters out of the dark cardstock. These letters will create the “shadow” effect so a dark color is best. For best results the color should be significantly darker than the overall color of the patterned paper. The letters should be the same color as the layer that you will be mounting your designer paper on. (Night of Navy was used here).
-
Step 4
Carefully remove the die cut letters from the dies. Repeat the process a 2nd time so that you have two of each letter.
-
Step 5
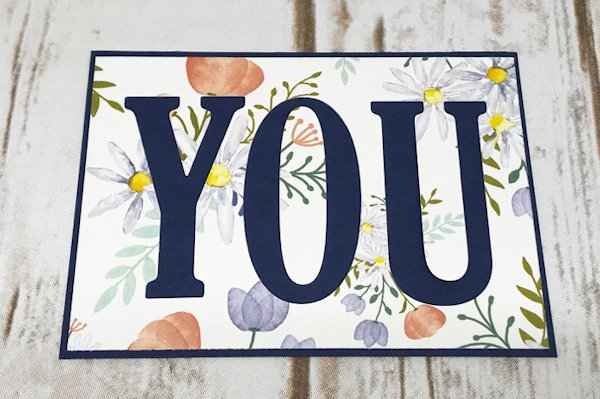
Adhere the paper that you cut the letters out of on to a slightly larger dark layer. (The layer in this example is Night of Navy 3 1/8” x 4 1/8”. Adhere any inside parts of the letters that were cut out (like the center of the O here).
-
Step 6
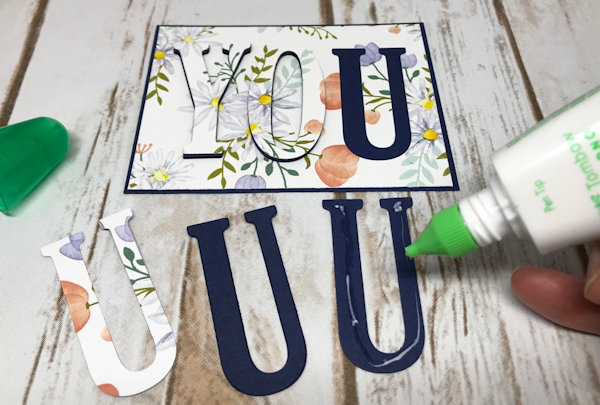
Adhere the dark duplicate letters together.
-
Step 7
Adhere the patterned letter on top of the layered dark letters.
-
Step 8
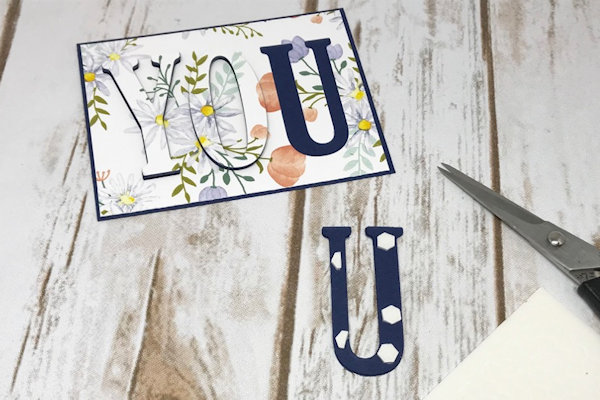
Place adhesive foam dimensional pieces on the back of the letters and place them back in the negative space that they came from. Now the letters are raised up from the card layer creating a shadow or eclipse effect. (Stampin’ Up! Mini Dimensionals used here, some cut in half.)
-
Step 9
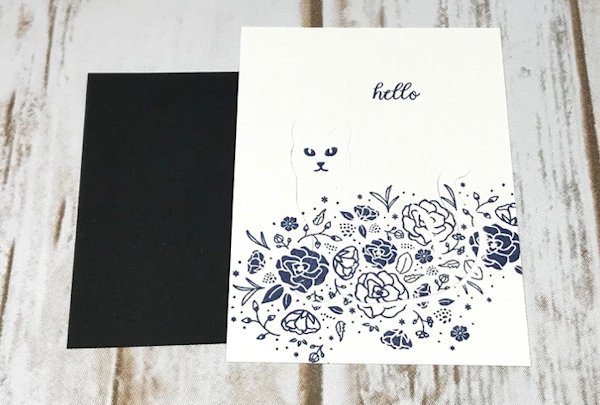
Adhere the panel to the card base to complete the project. Add any stamp images to the upper portion of the card to compliment your eclipsed word. (The word “celebrate” was added in this example.)
-
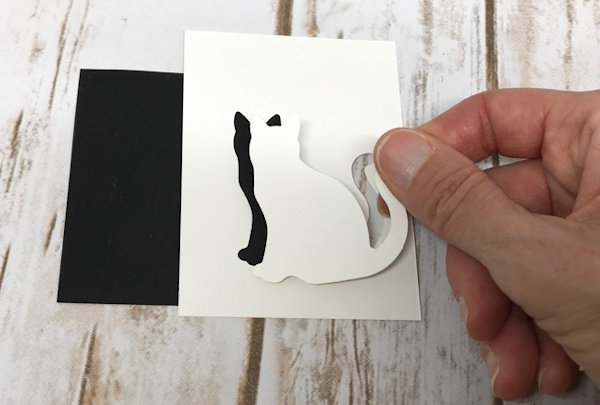
Step 10
For an alternative method, use plain paper and stamp images either before or after punching / cutting. If you want your stamping in a certain area of the punched or die cut image, then cut or punch first. Place the punch or die cut image back into the negative space.
-
Stamp the image(s).
TIP:
You may want to place a post it note on the back of the cardstock, with the sticky portion up, to hold the image in the negative space for stamping. -
Step 11
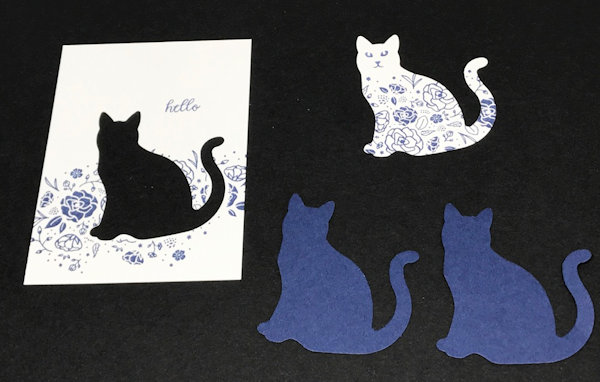
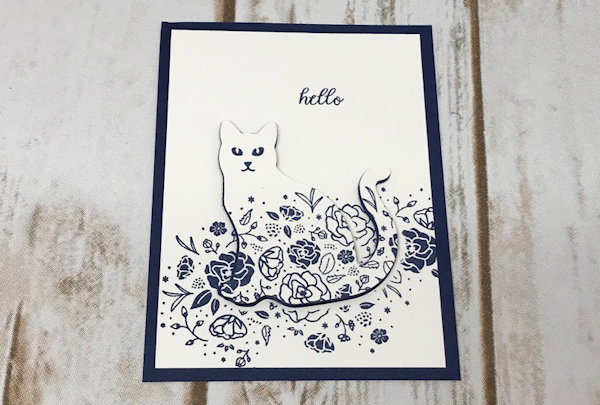
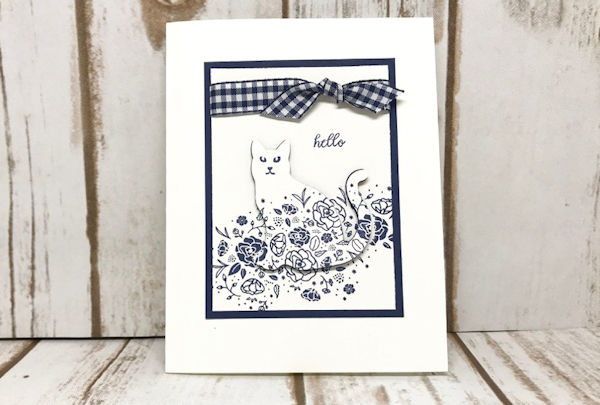
Punch or die cut 2 of the same image in a darker color of card stock. (Night of Navy used here).
-
Adhere the two punched out images together, and then adhere the stamped image on top.
-
Step 12
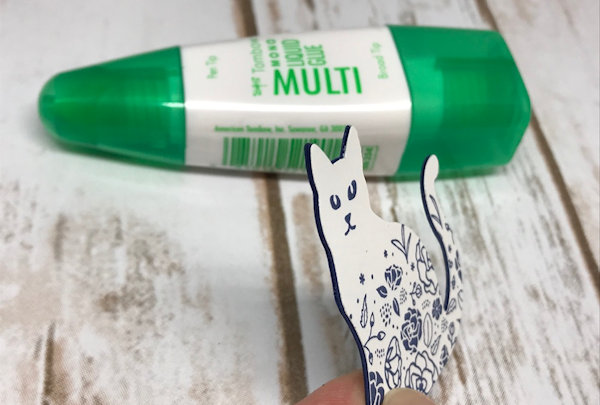
Adhere the piece with the negative space to a layer of dark cardstock (Night of Navy used here).
-
Place adhesive foam dimensional pieces on the back of the punched and layered cat. Adhere the popped up image in the negative space.
-
Step 13
Use the finished panel to complete a card or other project.


Video!
Your Turn
You've seen the tutorial, now you try it! We've got a section of the gallery set aside for Two Tier Eclipse. Try this technique, then upload your artwork to the gallery. Show us your creations!
***Please note - Internet Explorer/Edge is not a supported browser, and will not allow you to see the videos. Please use Chrome, Firefox or Safari to view our tutorial videos.

Questions and Comments
We'd love to get your feedback or questions. Leave your comment below.
I hope you have a blog, because your voice, speed, instructions, etc. are just spot on. No, beyond spot on. : )
Page 1 of 1 pages