Twisted Pop-Up Card
by Dina Kowal
Create a pop-up card that opens with a twisting element.
Supplies
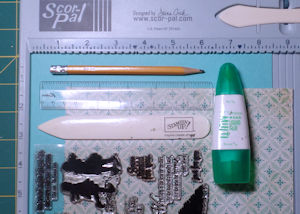
- Cardstock
- Coordinating paper
- Strong adhesive (Tombow Mono Multi glue used here)
- Scoring tool
- Bone folder
- Pencil
- Ruler
- Other supplies as needed to complete the card (stylus, Impression Obsession DIE025 Mitten Die Set and CL606 Winter Silhouettes clear stamp set, white adhesive fun foam, Big Shot)
Step-by-Step
-
Step 1
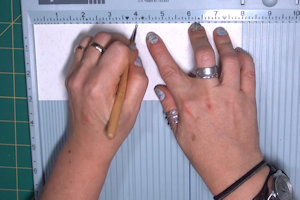
Cut a card base, 4 1/4" x 11”.
Score at 5 1/2" on the long side.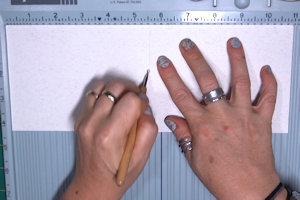
-
Step 2
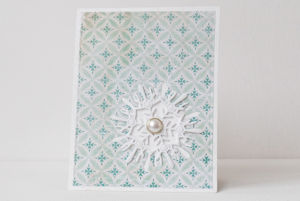
Fold the cardstock into a top-fold A2 card. Decorate the card front as desired. (This can be done later but is easier to do at this time while the card base is flat.)
-
NOTE:
The inside panels can also be lined with paper at this time, however part of the panel will be covered by the pop-up mechanism. If you want more of this layer to show, wait until step 9 to line the inside of the card.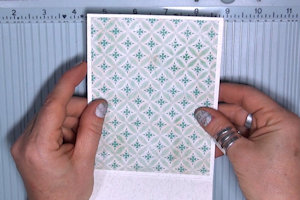
-
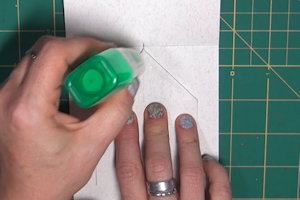
Step 3
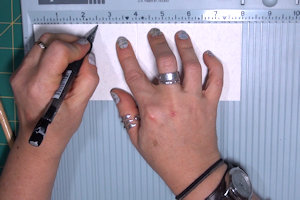
Cut cardstock for the pop-up mechanism, 3” x 8”.
-
Score down at the center of both sides – at 4” on the long side and 1 1/2" on the short side.

-
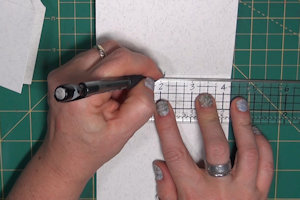
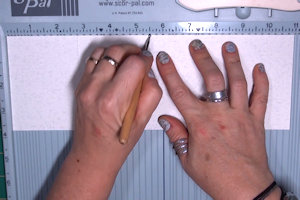
Step 4
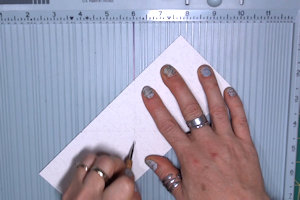
Mark at 2 1/2" from each corner with a pencil, on the top and bottom edge of the cardstock.
-
Score an X from mark to mark. The center of the X should match the center of the cardstock where the other score lines intersect.
-
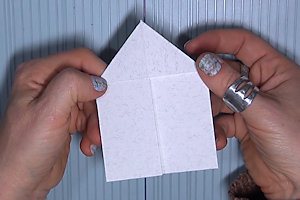
Step 5
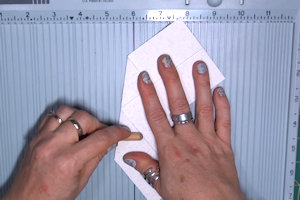
Burnish all score lines with a bone folder, folding both ways on each fold.
-
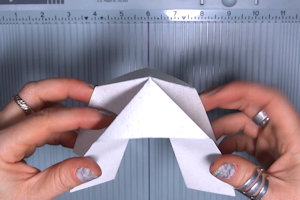
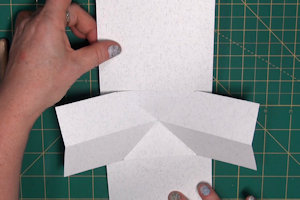
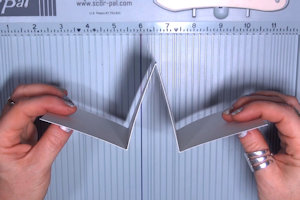
Step 6
Push the long center score lines toward each other until they meet. Fold the sides back. The center X should form triangles front and back, with the folded sections inside, folds together.
-
The folded pop-up mechanism should look like this.
-
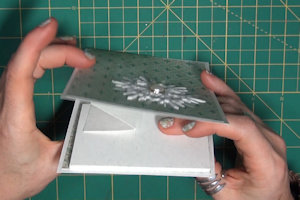
Step 7
Mark the center point on the fold of the card base, 2 1/8".
-
Center and adhere one side of the pop-up mechanism, gluing only the triangular area. Close the card to be sure the point does not interfere with the fold.
-
Step 8
Add adhesive to the triangle facing upward, and close the card to adhere it into place.
-
Allow the glue to dry, and test the pop-up mechanism by opening and closing the card.
-
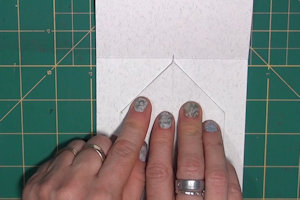
Step 9
Cut two layering panels for the inside of the card, 4” x 5 1/4". Mark at 2” on the short side, and 2” down on each side. Cut from the side points up to the center point to shape panels that will fit inside the card and cover up the central part of the pop-up mechanism.
-
Adhere the panels to the inside of the card.
-
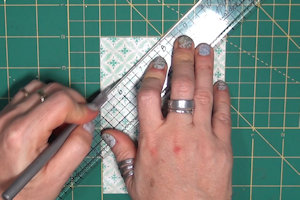
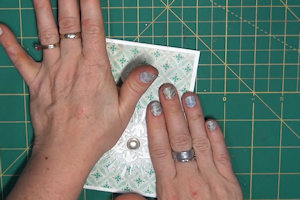
Step 10
Cut cardstock for the focal piece, 3 3/4" x 11”.
Score at 2 3/4" from each end on the back side, if the cardstock has an obvious front and back (print or texture).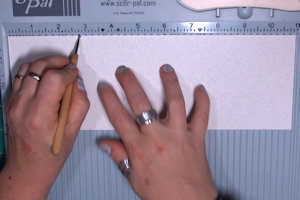
-
Flip the cardstock to the right side and score at 5 1/2".
-
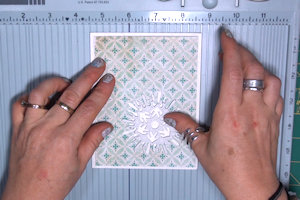
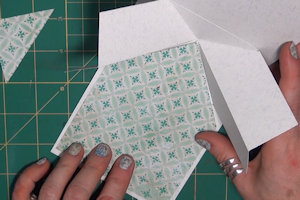
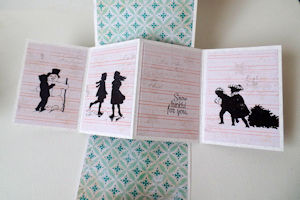
Step 11
Fold the panel into a W shaped booklet and burnish the folds.
-
Step 12
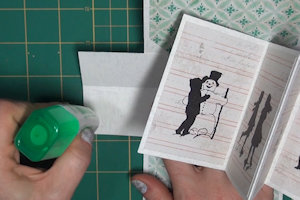
Embellish the panels as desired.
Each panel will accommodate an ATC sized panel, 2 1/2" x 3 1/2”.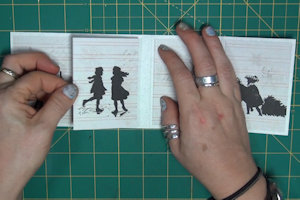
-
Step 13
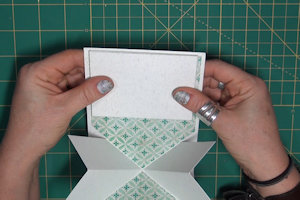
To assemble the card, center the booklet at the top of the open card, ends upward just inside the edge, with the back ‘page’ facing up.
-
Step 14
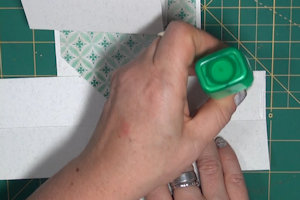
Apply adhesive to the pop-up mechanism as shown, above the fold on the right side, covering about 1” from the end.
-
Close the card to apply the adhesive to the booklet. Allow the glue to dry before moving to the next step.
-
Step 15
Apply adhesive to the other side of the pop-up mechanism as shown, below the fold on the left side, covering about 1” from the end.
-
Step 16
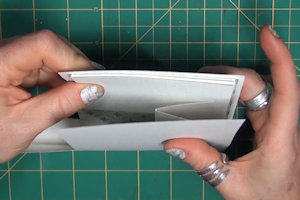
Close the card, bringing the booklet to the card’s edge with the left side of the mechanism closed in on top of it.
-
Press down to secure the adhesive and allow the project to dry completely.
-
Step 17
Complete the project.
-
The card will fit in a standard A2 envelope. Depending on the thickness of the layers, it may need extra postage.
Video!
Variations
For a notecard sized Twisted Pop-Up Card (3 1/2" x 5), follow the instructions above with the following changes:
In Step 1, cut the card base to 3 1/2" x 10".
In Step 9, cut the layering panels to 3 1/4" x 4 3/4". Mark at 1 5/8" for the diagonal cuts.
In Step 10, cut the focal piece to 3" x 11".
In Step 12, cut the layering panels to 2 1/2" x 2 3/4".
Your Turn
You've seen the tutorial, now you try it! We've got a section of the gallery set aside for Twisted Pop-Up Card. Try this technique, then upload your artwork to the gallery. Show us your creations!
***Please note - Internet Explorer/Edge is not a supported browser, and will not allow you to see the videos. Please use Chrome, Firefox or Safari to view our tutorial videos.

Questions and Comments
We'd love to get your feedback or questions. Leave your comment below.
Meanwhile, I'd like to wish everyone at Splitcoast
Stampers, and all members, A very Merry Christmas and a happy and peaceful New Year.
Are there measurements/calculations for making this card smaller? I would like to make some for Valentine's Day and think they would be cute if the base card was gift card size.
card base 3 1/2" x7",
panel strip 1 1/2" x 6",
pop and twist mechanism 1 1/2" x 5".
One 8 1/2" x 11" sheet will yield two cards if you first cut a 1 1/2" strip length-wise and trim to two 5" lengths. Cut two card bases and two panel strips cross-wise from remaining CS.
Not the size I wanted, but still a nice small size.
Page 1 of 2 pages 1 2 >