Twin Pocket Purse
by Chris Slogar
Create a purse with two pockets for your choice of items – note cards, gift cards, tea bags, or small gifts.

Supplies
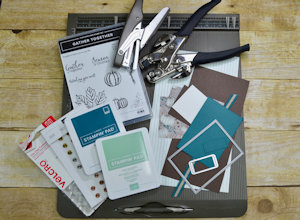
- Cardstock(Stampin’ Up! Early Espresso, Pretty Peacock, and Whisper White used here)
- Designer paper (Stampin’ Up!® Come To Gather used here)
- Paper trimmer
- Scoring tool
- Stapler
- Hole punch
- 5/8" Adhesive Velcro Dots
- Adhesive (Tombow Multi-purpose glue and SU Tear & Tape used here)
- Other supplies as needed to complete the project (SU supplies used here: Gather Together Stamp Set, Stitched Rectangles Dies, Stitched Labels Dies, Mint Macaron Ink, Pretty Peacock Ink, Designer Elements, and Pretty Peacock 1/2" Scalloped Linen Ribbon)
Step-by-Step
-
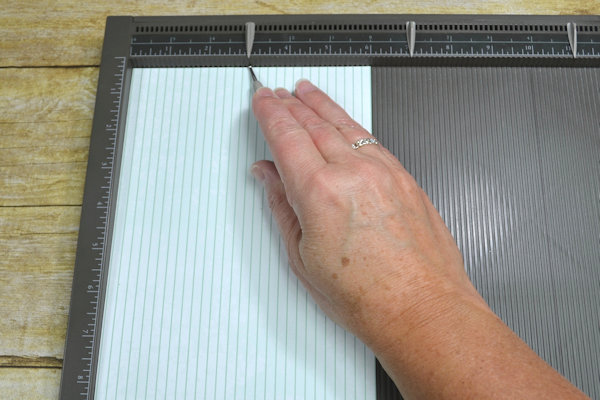
Step 1
Score 6" x 10" designer paper in half lengthwise at 3". Rotate and score at 3" and 7".
-
Score a 4 1/4" x 8 1/2” piece of cardstock at
3 1/4”, 3 3/4”, 4 1/4”, 4 3/4”, and 5 1/4”. -
Step 2
Die cut a 3” x 4 3/8” stitched rectangle (or plain rectangle) for the purse flap, and a stitched label shape (or other shape) for the closure tab. Score the rectangle in half at 1 1/2” and score the stitched label in half.
-
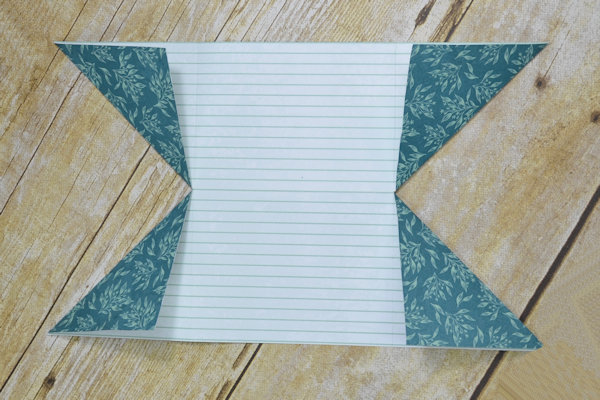
Step 3
At each end of the 6” x 10” designer paper, cut along the lengthwise score line to the first crosswise score line. Fold the cut line to meet the crosswise score line in each direction to make diagonal folds as shown.
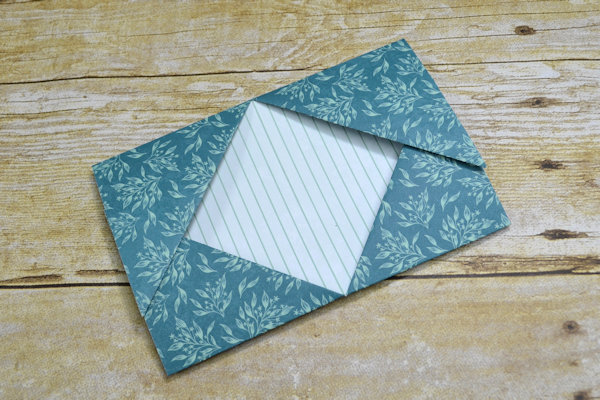
-
Fold the triangular sections from each end to the middle to make pockets as shown. Fold along the remaining score line so the pockets are back to back.
-
Step 4
Accordion fold the score lines on the cardstock base.
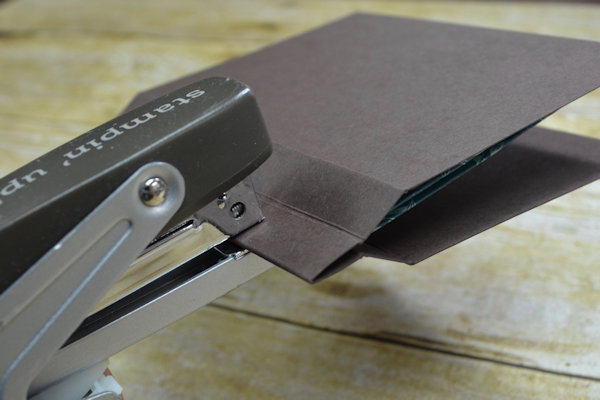
-
Secure the folded pocket section in the middle fold with staples.
-
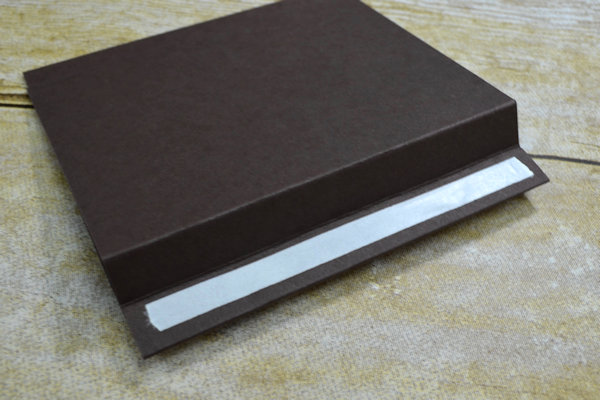
Step 5
Apply adhesive over the staples on both sides of the middle fold and press adjacent accordion folds to the adhesive.
Add two 3” x 4” pieces of designer paper to the outside front and back of the purse. -
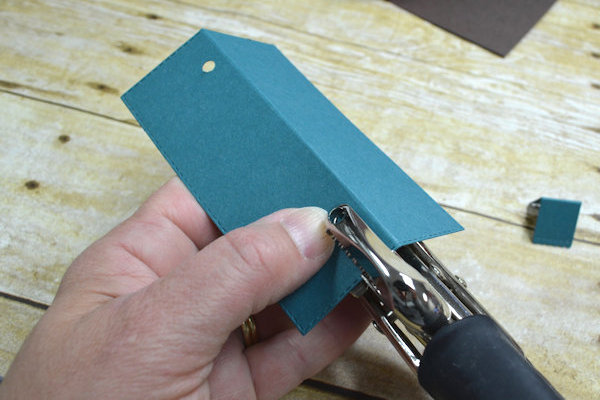
Step 6
Punch holes in the back of the flap piece.
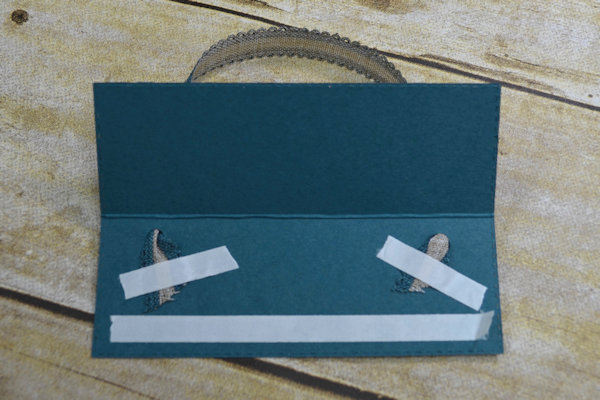
-
Thread ribbon ends through the holes and secure to the inside of the flap.
-
Step 7
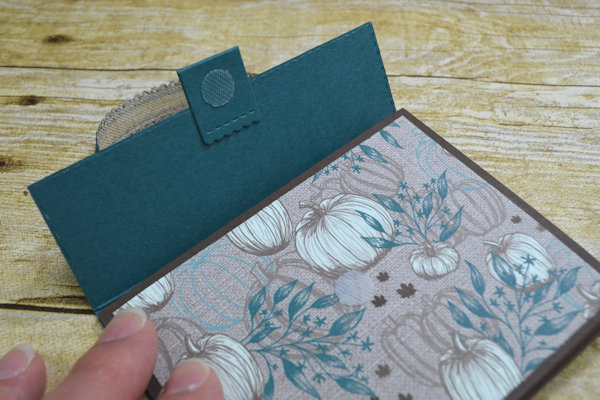
Adhere the back of the purse to the inside of the flap.
-
Step 8
Attach the folded stitched label piece (closure tab) around the front of the purse flap. Add an embellishment to the outside and a Velcro dot to the inside of the closure tab.
-
Step 9
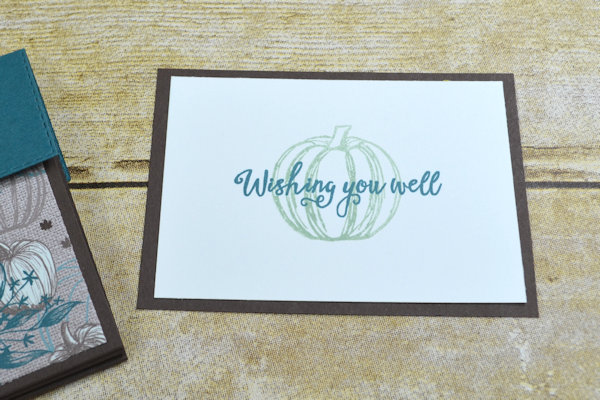
Create matted note cards using 2 1/2" x 3 1/2" cardstock and 2 1/4" x 3 1/4" Whisper White, stamped as desired.
-
Step 10
Complete the project.


Video!
Your Turn
You've seen the tutorial, now you try it! We've got a section of the gallery set aside for Twin Pocket Purse. Try this technique, then upload your artwork to the gallery. Show us your creations!
***Please note - Internet Explorer/Edge is not a supported browser, and will not allow you to see the videos. Please use Chrome, Firefox or Safari to view our tutorial videos.

Questions and Comments
We'd love to get your feedback or questions. Leave your comment below.
Lori (Queenpea)
Page 1 of 1 pages