Twine Inlay
by Jeanne Jachna
Use colored twine to fill a die cut opening with texture and warmth.
Supplies

- Watercolor paper (Canson XL 140# Cold Press used here)
- Watercolor medium (Peerless Watercolor & Fine Tec Gold used here)
- Baker’s twine (Lilac, Maraschino & Gold Shimmer twine from the Twinery used here)
- Dies (Memory Box (99542) Emerson Ornament and Ranger Multi Matte Medium in Needle tip tube used here)
- Other supplies as needed to complete the project (used here: Memory Box Christmas Botanicals clear set, Versafine Onyx Black, gold adhesive pearls)
Step-by-Step
-
Step 1
Fold a 4.25" x 11" piece of watercolor paper in half to create a card base.

-
Step 2
Cut a slightly smaller panel of watercolor paper and paint with watercolors. When dry, splatter with gold watercolor paint for shimmer. Stamp a sentiment along bottom of watercolor panel.

-
Step 3
Die cut the watercolor panel with an open die.

-
Step 4
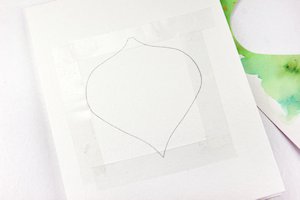
Lay the die cut panel over your card base and trace the opening with pencil. Remove the watercolor panel and add double sided tape along the outside of the outline.
-
Step 5
Attach twine over the pencil drawing, securing the ends by attaching them to the double sided tape. When the area is completely covered, trim the edges so they don’t extend beyond the cover panel of the card.

-
Step 6
Attach adhesive foam tape around the twine area.

-
Adhere the watercolor panel to the card base.

-
Step 7
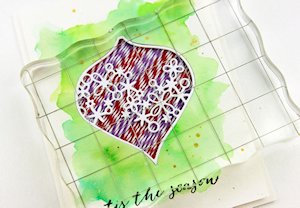
Adhere the die cut inside the opening with liquid adhesive. Use an acrylic block to hold it in place while the glue dries to be sure of good adhesion to the twine.
-
Step 8
When adhesive is dry, embellish the card as desired.

-
Step 9
Complete the project.

Video!
Your Turn
You've seen the tutorial, now you try it! We've got a section of the gallery set aside for Twine Inlay. Try this technique, then upload your artwork to the gallery. Show us your creations!
***Please note - Internet Explorer/Edge is not a supported browser, and will not allow you to see the videos. Please use Chrome, Firefox or Safari to view our tutorial videos.

Questions and Comments
We'd love to get your feedback or questions. Leave your comment below.
Thank you for a very simple tutorial and video!
Page 1 of 1 pages