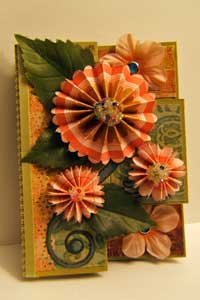
Tri-Shutter Card

by Bonnie Szwalkiewicz

Special occasions call for special cards. This one will fit the bill!

Supplies
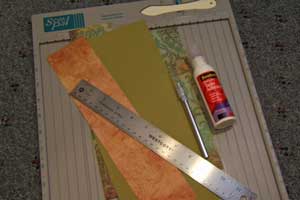
  • One 5 1/2" x 12" piece of Cardstock
  • Scor-Pal™ or other scoring tool
  • Paper Cutter
  • Patterned Paper
  • Bone Folder
  • Craft Knife
  • Ruler
  • Adhesive

Step-by-Step

  1. Step 1

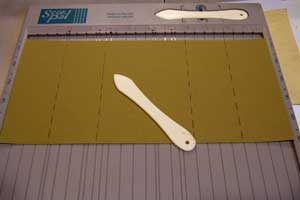
    Place 5 ½” x 12" piece of cardstock horizontally in your Scor-Pal.

    Score at 2”, 4”, 8” and 10”.
  2. Step 2

    Turn cardstock a ¼ turn.

    Along the long edge, measure in 1 ½” .

    Make a slit with a craft knife between the score marks at 2” and 10”. Repeat on the other long side.
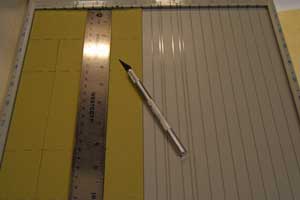
  3. Step 3

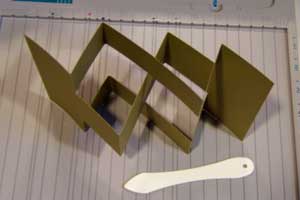
    Fold card as pictured.

  4. Step 4

    Using card base as a template, trace the section with the T-shaped fold onto patterned paper.

    Cut two of this shape.
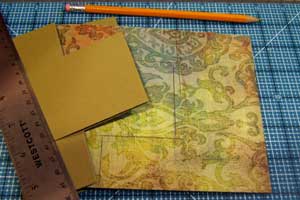
  5. Step 5

    Trim 1/16” from all sides of patterned paper.
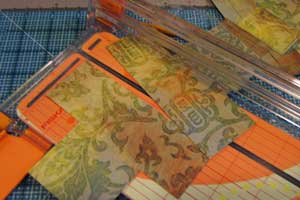
  6. Step 6

    Cut 4 pieces of patterned paper 1-3/8" x 1-7/8" .

    Cut 2 pieces of patterned paper 1 3/8” x 3 7/8”.

    Cut 1 piece of patterned paper 2 3/8” x 3 7/8”.

    Dry fit all of the pieces, then adhere to card base.
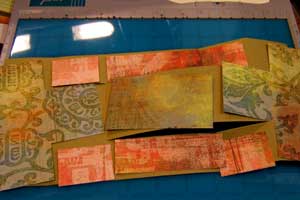
  7. Step 7

    Now that the basic Tri-Shutter card is complete, go forth! Embellish & decorate.

    If you are interested on how the Fan Fold Flowers were created, check this tutorial.
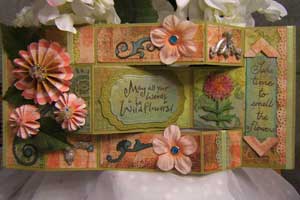
  8. View of the card closed.

Video!

Variations

    To use 8 1/2" x 11" cardstock:
    Trim cardstock to 5" x 10 1/2".
    Score at 1 3/4", 3 1/2", 7" and 8 3/4". Cut your lines horizontally at 1 1/2" and 3 1/2" from the first to the last score line.You will end up with a card that measures 3 1/2″ × 5″.

Your Turn

You've seen the tutorial, now you try it! We've got a section of the gallery set aside for Tri-Shutter Card. Try this technique, then upload your artwork to the gallery. Show us your creations!

***Please note - Internet Explorer/Edge is not a supported browser, and will not allow you to see the videos. Please use Chrome, Firefox or Safari to view our tutorial videos.

Questions and Comments

We'd love to get your feedback or questions. Leave your comment below.

Hi Bonnie,
I love your tri shutter tutorial. I have read several posts talking about an adapted version for a full front card. I have searched but cannot find it. Can you send me the link to that? Thank you!
Stamperw/sparkle  |  Thu Jul 9, 2009 at 7:58 AM
Beautiful!
Laura  |  Fri Jul 24, 2009 at 12:09 PM
What a nice site! How nice to see what others are doing. I haven't had time to explore everything, but I plan to get back often. Thank you for this valuable site.
Pat Bevington  |  Mon Jul 27, 2009 at 5:40 PM
I would like to know where I can find the directions for making the Tri-Shutter Card. They are so cool looking.

Thank you.
Marie Anderbery  |  Mon Jul 27, 2009 at 9:50 PM
I would like the directions for making the tri-shutter card. Thanks so much
beth Hull  |  Tue Jul 28, 2009 at 9:12 AM
Would love to have the directions for the Tri-Shutter Card. Love it!
Debbie Criscone  |  Tue Jul 28, 2009 at 10:21 AM
The tutorial will be posted tomorrow morning! smile

Hugs and smiles
Beate  |  Tue Jul 28, 2009 at 11:04 AM
Stamperw/sparkle,

You can find Bonnie's instructions for the Tri-Shutter Card with the full card front here.

Hugs and smiles
beate  |  Tue Jul 28, 2009 at 5:38 PM
would love instructions to make the flowers on the Tri-Shutter Card. Thanks!!
mary sebastiano  |  Wed Jul 29, 2009 at 4:12 AM
I've seen and saved several tutorials on how to do this card. I was not pleased with my results and wasted a lot of paper. Yours showed how to make the slit using the Scor-pal. I'm off to get a metal ruler and try again. Thank you.
Consuella  |  Wed Jul 29, 2009 at 4:15 AM
I love being able to see both tutorials. Thank you for sharing them. This card seemed very intimidating, but after watching Beate make it, I think I may have to try one of my own... oh, and I agree..love that cs!!
Beverly  |  Wed Jul 29, 2009 at 4:24 AM
Consuella,
Make sure you place a cutting mat between your hobby blade and the Scor-Pal or you might damage your Scor-Pal. I think Bonnie only wanted to show you where to cut in picture #2.
Cutting is easy though. Line up your cardstock vertical in your paper trimmer at the 1.5" mark. Now cut between your first (2") and last (10") score mark. Slide the paper over to the 4" mark and repeat cutting from first to last score line.
beate  |  Wed Jul 29, 2009 at 4:47 AM
Gorgeous cards! I echo Beverly's comments -- having the video really helps de-mystify this more complicated card.

Stunning!
Leanne  |  Wed Jul 29, 2009 at 5:00 AM
I was amazed at how easily this card came together! Thanks for making the complicated easier!
Jessica  |  Wed Jul 29, 2009 at 5:29 AM
Thank you for taking the time to make this video. I have seen these cards but never made one.. you make it look so easy.. love the card.

thanks.
Pam T  |  Wed Jul 29, 2009 at 5:30 AM
Tr�s joli, je vais me lancer pour la faire.
Je la trouve tr�s raffin�e et classe.
valou  |  Wed Jul 29, 2009 at 5:46 AM
Hi it is so beautiful to show but I can't hear. I am deaf. Can you give me measure. I will understand the direction. Thank you for sharing.
Roberta Noddin  |  Wed Jul 29, 2009 at 5:50 AM
Absolutely beautiful! Can't wait to try it.
Janet P  |  Wed Jul 29, 2009 at 6:14 AM
This tutorial is great! I especially like the included video. It does make understanding the intricate cutting of this card much easier.

I also like the included video for making the flower for the printed tutorial.

Patti
Patti  |  Wed Jul 29, 2009 at 6:28 AM
Thanks so much for doing this tutorial. It takes the guess work out - now I can make one of these cards. I have been wanting to try this for so long now.
Charlene H.  |  Wed Jul 29, 2009 at 6:43 AM

Page 1 of 7 pages  1 2 3 >  Last »

You need to be logged in to comment

GET OUR NEWSLETTER


Splitcoaststampers's privacy policy