Triple Step Pop-Up
by Christine Okken
Create a 3-level pop-up feature for a real stand-out card.
Supplies
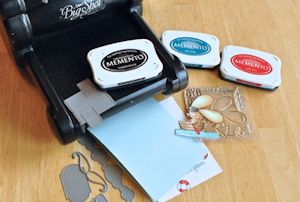
- Cardstock for base, cut to 4 1/4" x 11" and scored in center
- Cardstock for card front, cut to 4" x 5 5/16"
- 3 stamped and colored images (trimmed out) or shapes for each step of the pop-up feature
- Die cutting machine
- Basic PopUp CutUps (The Cat’s Pajamas)
- -- or --
- Channel paper trimmer, ruler, and scoring tool
- Adhesive
- Other supplies as needed to complete the card (The Cat’s Pajamas Mustaches CutUps die, Cloud Border CutUps die, Bitty Banners die, Memento Tuxedo Black, Teal Zeal and Lady Bug inks, and other cardstock colors for accents used here)
Step-by-Step
-
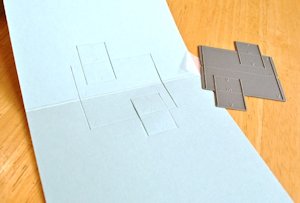
Step 1
If using Basic Popup CutUps Die:
On inside of scored 4 1/4" x 11" piece of cardstock, center the die on the score line of the card.
-
Ensure the small channels in the die lay on the fold. Tack down with low tack tape and run through a die cutting machine.
-
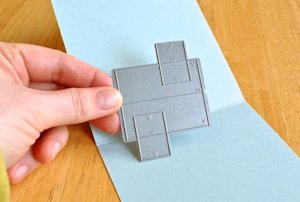
Step 2
The die also embosses which sections of the die become mountain peaks (M) or valley folds (V). This will help with folding.
-
Step 3
If using a trimmer and ruler rather than the die:
Cut the larger vertical center cuts at 1 1/4" and 3 3/16", across the center scoring of the card, making the cuts 1 1/4" deep (half of the cut above the center score line and half below). Score horizontally at the top and bottom of these cuts. (These horizontal scores will be at approximately 4 11/16" and 6 5/16" from the top of the card). These will become valleys for the pop-up shelves.
-
Step 4
Next make the smaller upper cuts at 1 7/16" and 2 1/8" across the top scoring mark made in the step above. Make these cuts 1" long, 1/2" above and below the upper score line. Score at the top and bottom of these cuts (approximately 4 1/4" and 4 3/16" from the top of the card).

-
Step 5
For the lower shelf cuts - measure and cut at 2 1/4" and 2 15/16" across the lower score line, making these cuts 1” long (1/2" above the score line and 1/2" below). Finish by scoring horizontally across the top and bottom of these smaller sections (approximately 5 1/4" and 6 5/16" from the top of the card).

-
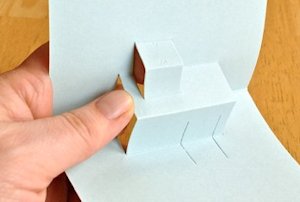
Step 6
Holding the card as shown, use your fingers to pop the cut areas forward, beginning with the largest step. Each pair of cut lines will form a mountain peak.
-
Crease the card closed each time to make it a crisp section for the mountains and valley folds.

-
Step 7
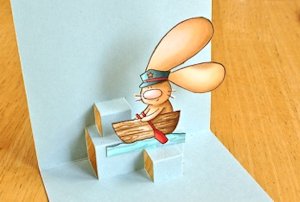
Now you have 3 “shelves” or pop-ups to decorate.

-
Adhere the first colored image to the largest center step with a strong adhesive like Scor Tape on the back.
-
Step 8
Adhere additional images to the smaller top and bottom steps.
-
Add other inside embellishments as desired.

-
Step 9
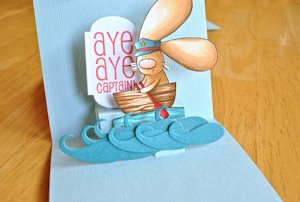
Because of the cuts on the inside of the design, it’s a great idea to disguise this area on the outside of the card.

-
Take a piece of cardstock measuring 4" x 5 5/16", line it up with the top fold of the card and adhere. Decorate as desired.

-
Step 10
Complete the card.

Video!
Your Turn
You've seen the tutorial, now you try it! We've got a section of the gallery set aside for Triple Step Pop-Up. Try this technique, then upload your artwork to the gallery. Show us your creations!
***Please note - Internet Explorer/Edge is not a supported browser, and will not allow you to see the videos. Please use Chrome, Firefox or Safari to view our tutorial videos.

Questions and Comments
We'd love to get your feedback or questions. Leave your comment below.
Love your card, can you please let me know where I can get the pop up die?
Thanks!
Can seem to find the manufacturer. .please help! Thanks
Page 1 of 1 pages