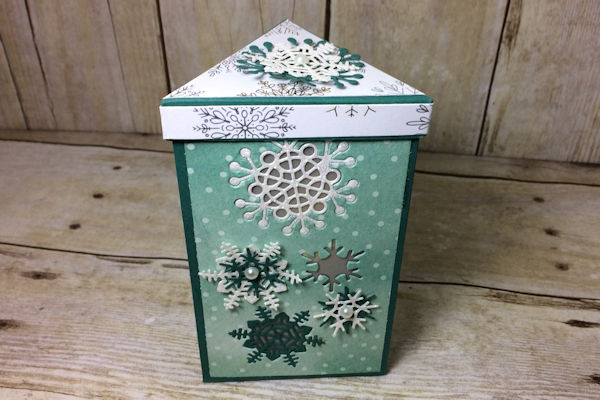
Triangle Luminary Box
by France Martin
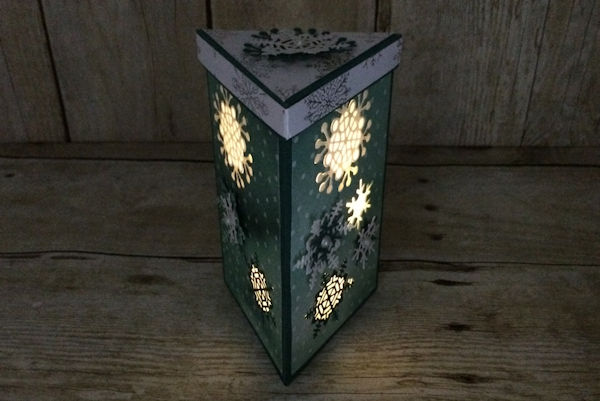
Create a unique gift box that can double as a lighted decoration.
Supplies
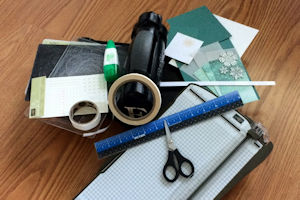
- Cardstock (Stampin’Up® Tranquil Tide, Dazzling Diamond Glitter used here)
- Patterned paper (Year of Cheer, Delightful Daisy Designer Series Paper used here)
- Vellum
- Adhesive (Tombow Mono Liquid Glue, Glue Dots, and Adhesive Tear and Tape used her)
- Scissors
- Bone folder
- Paper trimmer
- Scoring tool
- Shaped dies
- Die cutting machine
- Other supplies as needed to complete the project (Stampin’Up!® supplies used here: Seasonal Layers Thinlits, Basic Pearl. Fairy lights.)
Step-by-Step
-
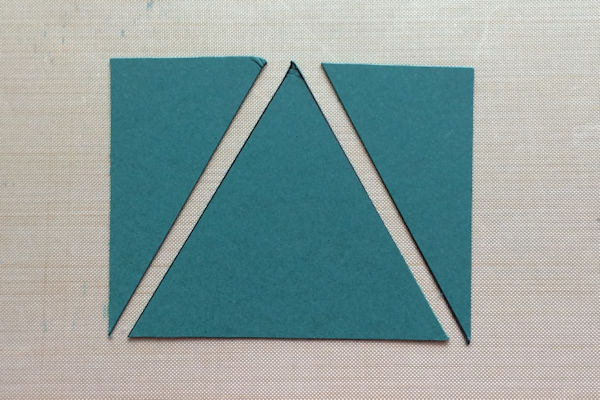
Step 1
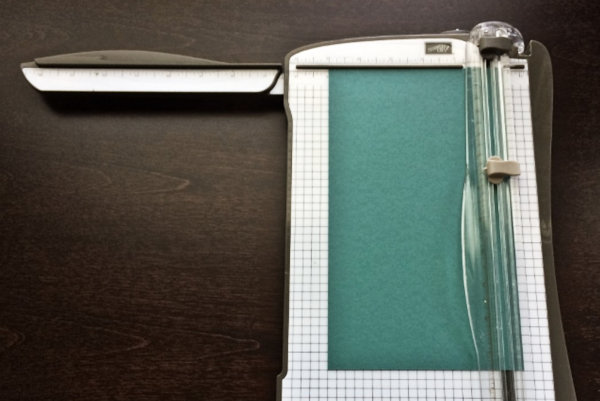
To make the Triangle Box, cut cardstock to 9 1/2" x 5 1/2".
Score at 3”, 6”, and 9”. Rotate the panel and score at 1/2". -
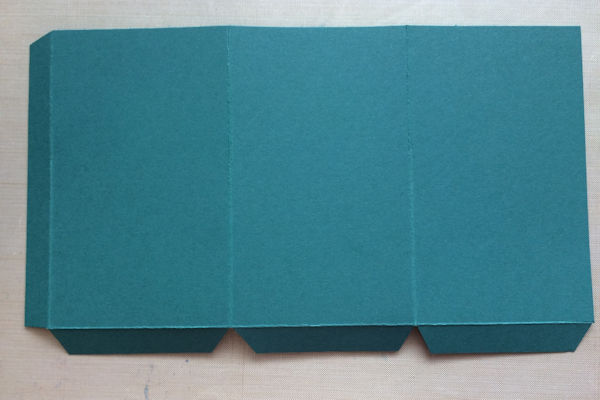
Step 2
With the 1/2" score line at the bottom, cut a V at each score below the horizontal line. Cut the corner diagonally on the last full panel. Remove the square below the tab and cut out at a slight diagonal as shown.
-
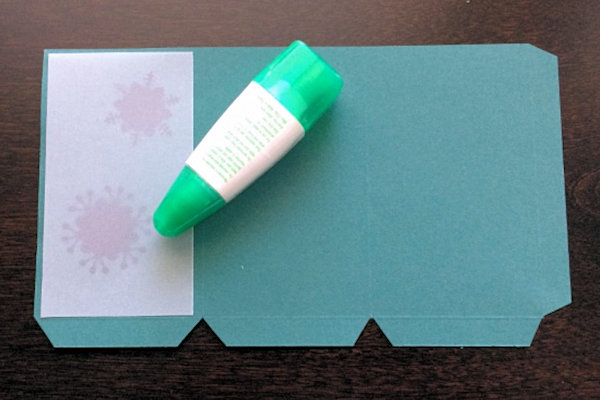
Step 3
Adhere 4 3/4" x 2 3/4" designer paper in each section.
NOTE:
It’s very important to apply adhesive to cover the entire piece of designer paper. -
Step 4
Using dies, cut out a window or two on each panel.
Use coordinating cardstock or glimmer paper to cut out the same shape for the overlay in the opening. -
Step 5
Cut 3 pieces of vellum at 4 7/8” x 2 7/8”. Adhere these to the back, which will be the inside of the box.
-
Adhere a matching die cut to the front of the vellum window.
-
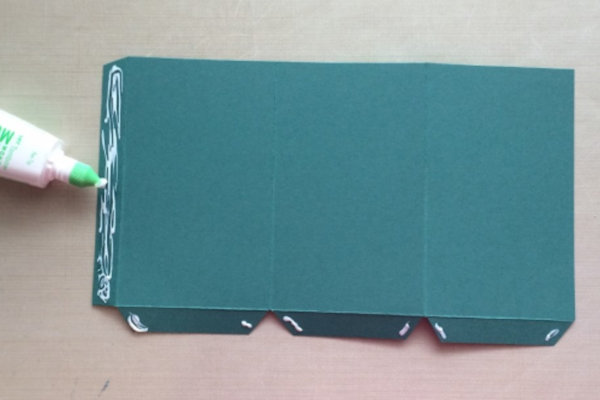
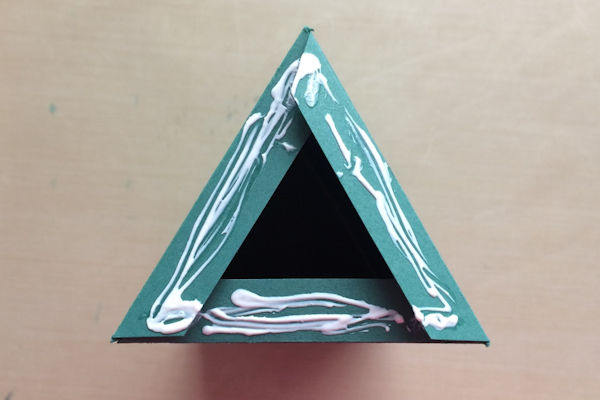
Step 6
Reinforce all scores for the box. Apply adhesive on the side 1/2" tab and adhere it to the first panel.
-
-
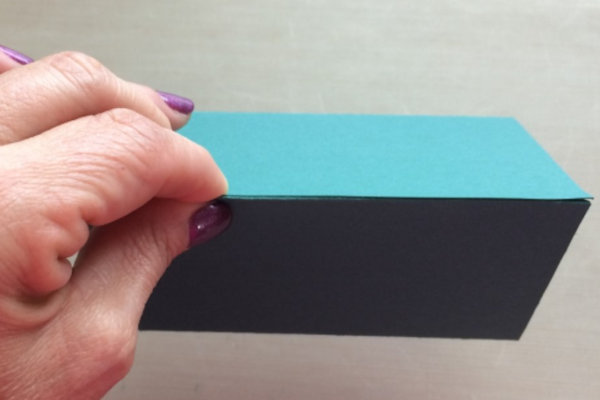
Step 7
To create the bottom piece of the box, cut cardstock to 3” x 2 5/8”. Make a mark on the 3” side at 1 1/2".
-
Step 8
On the paper trimmer, line up the center mark with the bottom right corner in the center of the cutting track. Cut diagonally between the points. Repeat on the left side. This will give you a perfect triangle for the bottom of the box.
Cut a piece of designer paper to decorate the top lid, using the same measurements. -
Step 9
Apply liquid glue to the bottom flaps of the box and adhere the bottom triangle piece.
-
Step 10
To create the top lid, cut cardstock to 4 7/8” x4 1/4”. Make a mark at the center of the 4 7/8” side at 2-7/16”. On the paper trimmer, line up the center mark with the bottom right corner on the cutting track. Cut diagonally between the points. Repeat on the left side.
-
Score at 1/2” from the edge on all 3 sides.
-
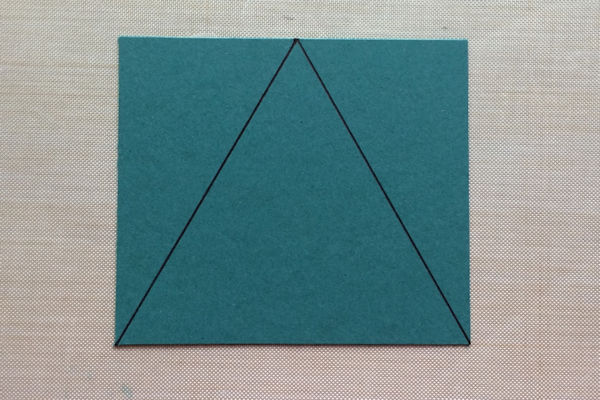
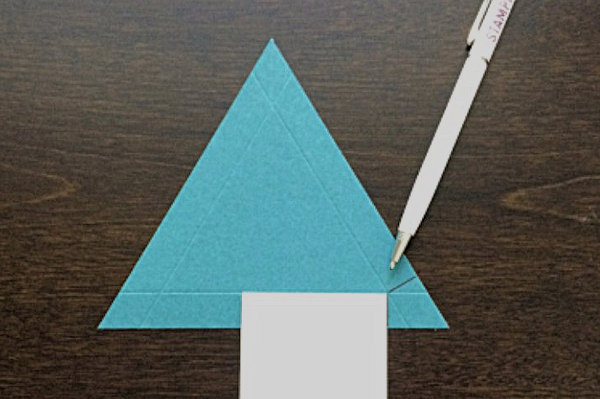
Step 11
Line up a small rectangle of cardstock on the score line with the corner at the X where the score lines intersect. Draw a line along the edge of the template down to the edge of the triangle. Do this on both sides of each corner.
-
You will finish with 6 marks.
-
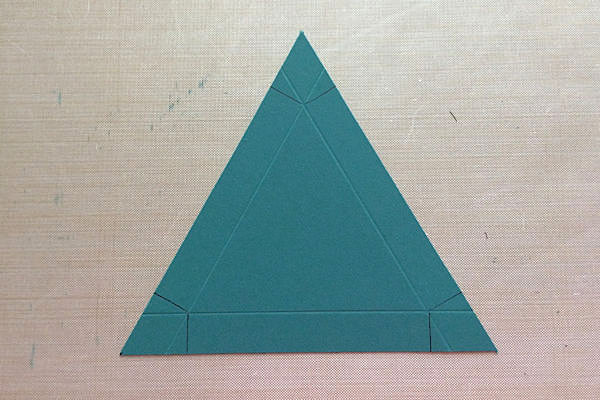
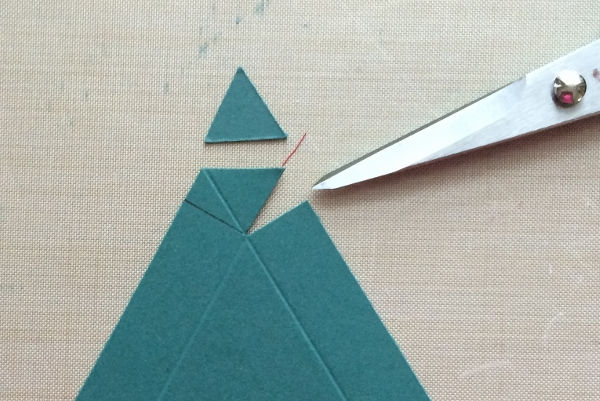
Step 12
At the corner, cut away the tip outside the ends of the score lines. On all sides, cut the pencil line on the left and cut the score line on the right, removing a V shape.
-
Repeat on the remaining corners.
-
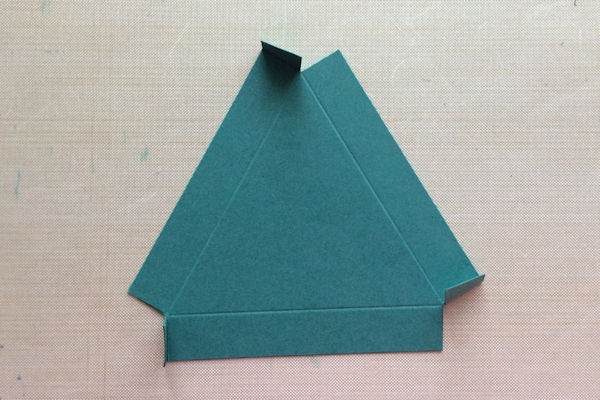
Step 13
Fold each tab at the pencil mark.
TIP:
Fold straight down by matching the edge of the tab to the score line. -
Apply liquid glue to all 3 tabs and adhere them to the inside of the lid.
-
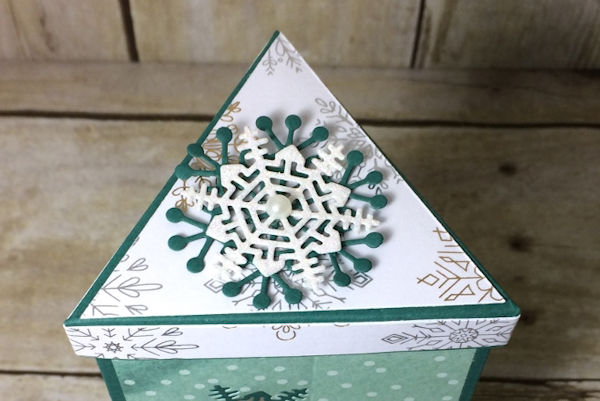
Step 14
Decorate the box. For the top, use the designer paper cut in step 8 above. The strip around the cover is a 12” x 3/8” strip of designer paper.
-
Step 15
Complete the project.
-


Video!
Your Turn
You've seen the tutorial, now you try it! We've got a section of the gallery set aside for Triangle Luminary Box. Try this technique, then upload your artwork to the gallery. Show us your creations!
***Please note - Internet Explorer/Edge is not a supported browser, and will not allow you to see the videos. Please use Chrome, Firefox or Safari to view our tutorial videos.

Questions and Comments
We'd love to get your feedback or questions. Leave your comment below.
She makes card making fun
Page 1 of 1 pages