Top Note Box
by Angie Tieman
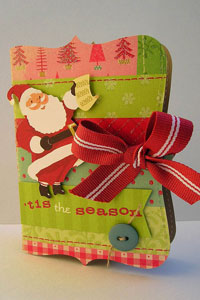
Create a gorgeous box out of Top Note Die cuts.
Supplies
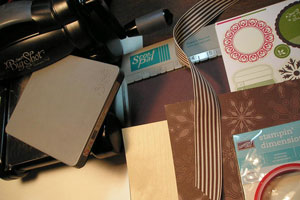
- Two 3 3/4" x 5" pieces of Wood Sheets or cardstock
- Two 3 3/4" x 5" pieces of Patterned Paper (if you use Wood Sheets)
- One 5 1/2" x 8" piece of cardstock
- Scor-Pal™, or other scoring tool
- Sticky Strip™ tape or other strong adhesive
- Big Shot™, or other die cut machine
- Top Note Die
- Scissors
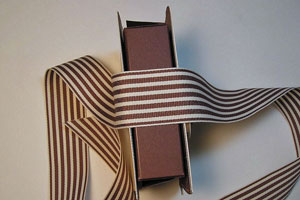
- Ribbon, approx. 24"
- SU Christmas Jingle Simply Scrappin’ kit (or your choice of stamps/accessories) to decorate front of box.
Step-by-Step
-
Step 1
Attach your 3 3/4" x 5" piece of patterned paper to back of wood sheets.
If you use cardstock, you do not need to do this step.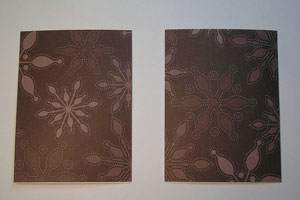
-
Step 2
Lay piece on Top Note die with wood sheet side facing down, lining up the long side just inside of the perforation marks.

-
Run through the Big Shot™ and decorate as you wish.
Note:
You can run both sheets through at once, but I did them separately to get the best definition of the “perforation marks” on the box.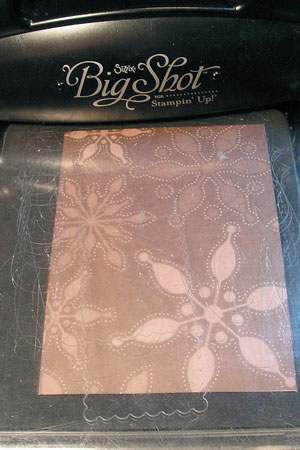
-
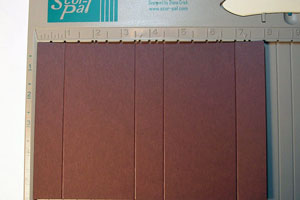
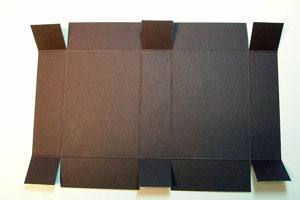
Step 3
For the inside box piece, score your 5 1/2" x 8" piece of cardstock on its long side at 1", 3 1/2", 4 1/2", and 7".
Thank you to Jen del Muro for this “pizza box” pattern!
-
Step 4
Turn cardstock piece and score short side at 1" and 4 ½".

-
Step 5
Cut scored lines as shown, up to the 1" score line to make the box tabs.
-
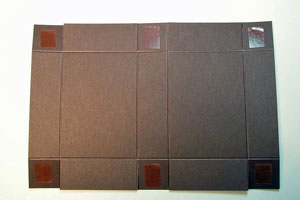
Step 6
Turn the box over and apply Sticky Strip to the right side of the tabs, as shown.
-
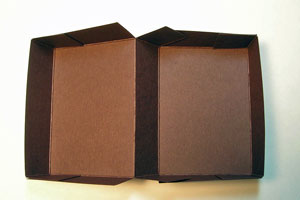
Step 7
Tuck flaps in and assemble box as shown.
-
Step 8
Attach Sticky Strip tape to the top and bottom of the box and attach the wood sheet pieces, lining up the straight edges with the side spine of the box as shown.

-
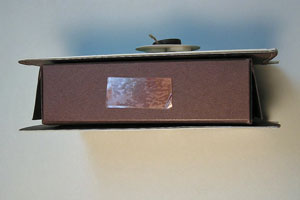
Step 9
Attach a small piece of Sticky Strip tape to the side spine of the box as shown.
-
Step 10
Attach ribbon to Sticky Strip™ to keep it in place.
-
Step 11
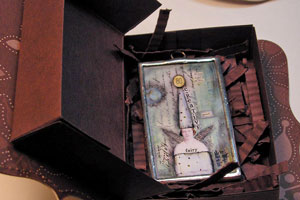
Fill box with crimped, shredded cardstock and gift or candy treats!
-
Tie ribbon and decorate your front.
Your box is done.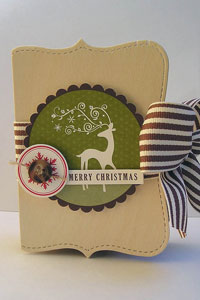
Video!
Variations
-
Use Eyelets:
Attach jumbo eyelets as shown, run Sticky Strip™ tape along the inside of the front and back cover to attach ribbon before adhering the covers to the box.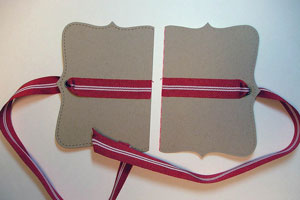
-
Your Turn
You've seen the tutorial, now you try it! We've got a section of the gallery set aside for Top Note Box. Try this technique, then upload your artwork to the gallery. Show us your creations!
***Please note - Internet Explorer/Edge is not a supported browser, and will not allow you to see the videos. Please use Chrome, Firefox or Safari to view our tutorial videos.

 *
*
Questions and Comments
We'd love to get your feedback or questions. Leave your comment below.
Thanks
Keep on Rockin'!
I plan to make several and fill them with
RAK fancies in cello envelopes to put in the
boxes as Christmas gifts.
Thanks for sharing I love your designs WOW
greetings, Petra
I am going to have to try making one myself.
Thanks for sharing.
thanks jacqui
Greetings from abroad, Miriam
Page 1 of 1 pages