Top Hat
by Kim Costello
Create an amazing top hat decor out of grunge paper
Supplies
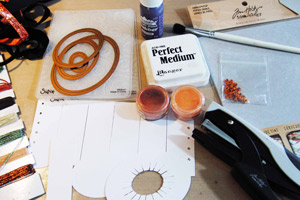
- Ranger Idea-ology Grungepaper
- Embossing Folder
- Acrylic Paint, Adirondack Dabber Eggplant and Terra Cotta used here
- Adhesive, Claudia Hellmuth Multi-Medium Matte used here
- Small Stapler, Ranger Tiny Attacher used here
- Ranger Perfect Medium or embossing ink
- Perfect Pearl Powders
- Soft Brush
- Crop-a-Dile
- Paper Clips
- Tweezers
- Embellishments, Ranger Idea-ology Findings and Charms used here
- Spellbinders Oval Nestabilities or other oval dies or templates
- Co-ordinating eyelets, ribbon, trim, patterned paper
Step-by-Step
-
Step 1
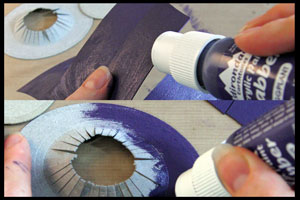
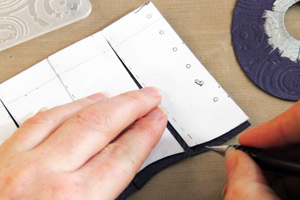
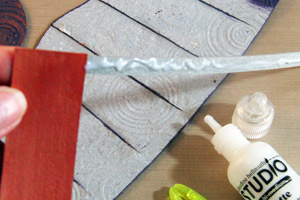
Cut the parts for the top hat from grungepaper, (Tip: some printers will print directly onto grungepaper) use an oval Spellbinder die to help with cutting the brim and crown top. Apply paint to the pieces.
Download the Top Hat Template here.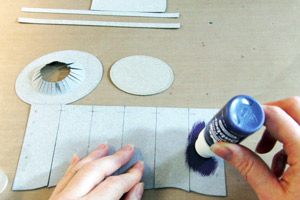
-
Make sure to color both sides of the rim and all the edges.
-
Step 2
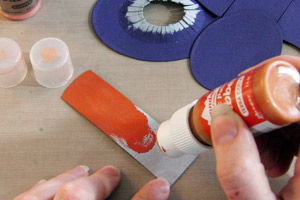
Apply contrasting color paint to the lining piece.
-
Step 3
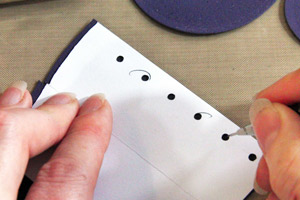
Reposition your template on the crown to redraw the eyelets holes with a pencil.
-
Step 4
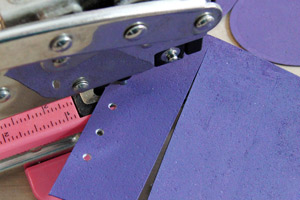
Punch out the two rows of drawn holes with a Crop-a-Dile, or a similar hole punch.
-
Step 5
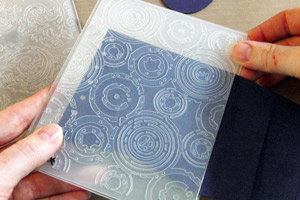
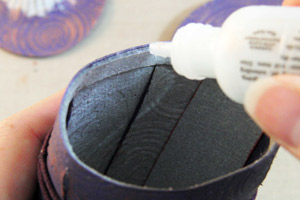
Run the crown piece through your machine with your chosen embossing folder. Joining the pattern centrally if you can.
-
Step 6
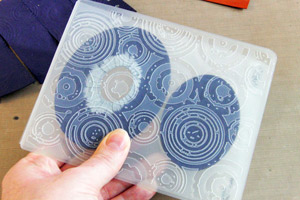
Also emboss the top and brim.
-
Step 7
Position the template over the crown piece and draw a mark to show where the pleat will overlap.
-
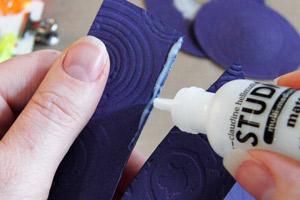
Step 8
Apply a small line of adhesive and press pleats together.
-
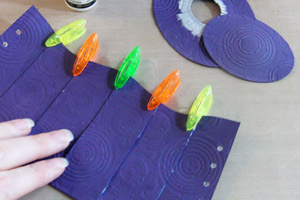
Step 9
Secure with a paper clips at each pleat and leave to dry.
-
-
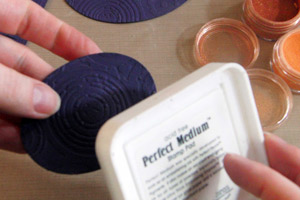
Step 10
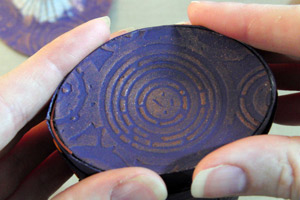
Gently rub Perfect Medium over the embossed areas on the crown, crown top and brim.
-
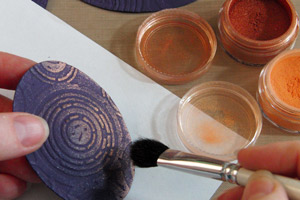
Step 11
Buff on Perfect Pearls powder with a soft brush.
-
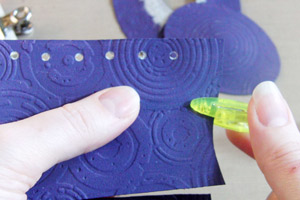
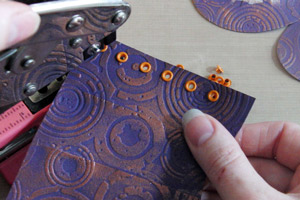
Step 12
Secure eyelets through the holes made in step 4.
-
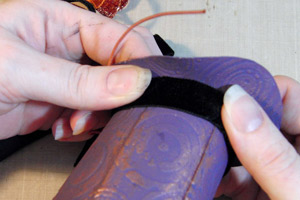
Step 13
Adhere the thin strip of grungepaper about 1mm from the top on the lining piece.
-
Step 14
Apply glue to the strip and line up on the backside of the crown piece.
-
Step 15
Secure the strip with paper clips, but leave it free at the end about 2cm (abut 7/8" ) to allow for the lining. Adhere the other thin strip lower down the crown.
-
Step 16
When dry, apply a line of adhesive to the topmost ledge. Use a rubber band to help hold the oval shape and lay in the crown top.
-
Step 17
Hold the sides to help secure the top, you can leave the band around the crown until the glue has dried.
-
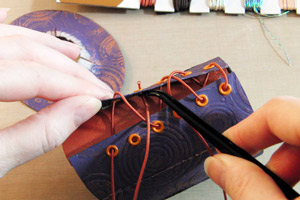
Step 18
String the co-ordinating thread through the eyelets use tweezers to help.
-
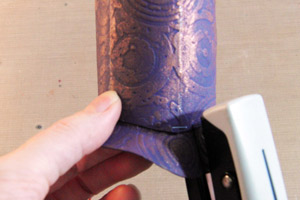
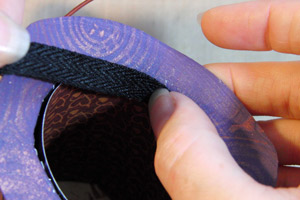
Step 19
Affix the brim using the Tiny Attacher, it will follow the curve of the crown creating a shaped brim.
-
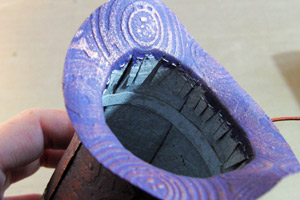
-
Step 20
Roll patterned paper to fill inside the top hat and draw along the edge. Cut along this edge and position inside.
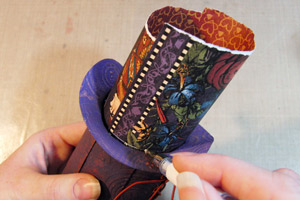
-
Step 21
Adhere ribbon to the cut edge to secure patterned paper.
-
Step 22
Attach the hatband ribbon over the staples with glue.
-
Step 22
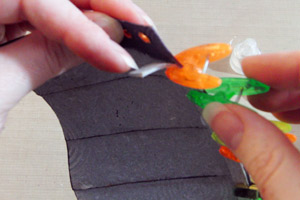
Finally... Create roses and charms using dies and adhere over the join on the hatband. Place your finished hat onto a special Hat Stand.
Check here for a tutorial on how to create the flower.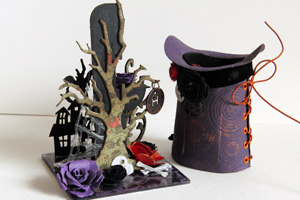

Video!
Variations
Top Hat Stand Instructions:
Apply glossy accents to a square Ranger Idea-ology fragment and place onto patterned paper. Trim the excess and sand any rough edges. Die cut a Sizzix small easel from chipboard, cover with black paint, curve the top corner with a punch and adhere to the fragment. Cut a tree from chipboard with patterned paper and age edges with distress ink. Adhere to the front of the easel, embellish with paper roses, charms and spooky items.
Your Turn
You've seen the tutorial, now you try it! We've got a section of the gallery set aside for Top Hat. Try this technique, then upload your artwork to the gallery. Show us your creations!
***Please note - Internet Explorer/Edge is not a supported browser, and will not allow you to see the videos. Please use Chrome, Firefox or Safari to view our tutorial videos.

Questions and Comments
We'd love to get your feedback or questions. Leave your comment below.
Sorry about that. The template can now be found under step 1.
Hugz
Tonniece
I'm very interested in the music, too. Any credits?
I can't wait to see others take on it!
The music on the video is 'and so to dream', by Mike Rowland... nice and calm lol!
Have a brilliantly creative day
HuGs Kim ♥
Hope it helps
Hugs Kim
Page 1 of 1 pages