Tiny Triangle Box
by Deb Felts
Create a small box for tiny treats out of one square piece of cardstock.
Supplies

- One 6" x 6"square of card stock or double-side designer paper for box
- One 2" x 4 1/4" piece of card stock or designer paper for flap closure
- Contrasting card stock for mat to border focal image
- Magnets or velcro for box closure
- Small stamp (Our Craft Lounge’s Shades of Fall stamp set used here)
- Paper for focal image (blending paper or watercolor paper...extra if you wish to “pop up” the image or to repeat the focal image inside the box bottom)
- Ink and coloring medium of your choice Memento ink and Copic markers were used here
- Scor-Buddy, or other scoring tool
- Adhesives of your choice
- Inks, embellishments, markers to outline edge of focal image (the border of mine was actually part of the stamped image) (optional)
Step-by-Step
-
Step 1
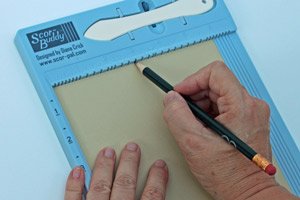
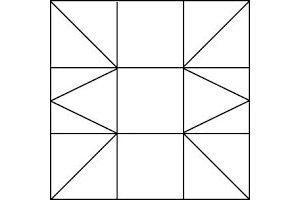
With a pencil, lightly mark the 3" center point of two opposing sides on the 6" x 6" square.
-
Step 2
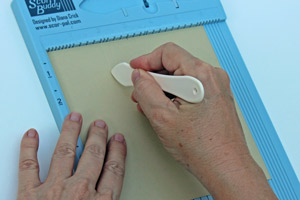
Score 2" from the edge on all four sides.
-
Step 3
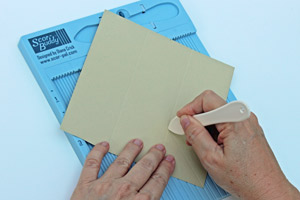
Diagonally score the outer corners: place the scoring tool at the intersection of the two lines and gently move the paper until the tool slips into a groove. Align the corner vertically with the tool and score. Repeat for the other three outer corners.
-
Step 4
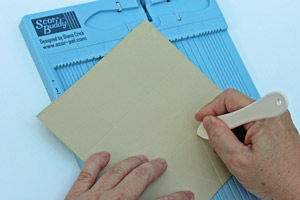
Repeat the same process, this time scoring from the intersecting lines to the mark you made at the center. This creates the center portions of the "W" or "M" diagonal folds that will form the box sides.

-
-
Step 5
When you're finished, your scores should look like this:
-
From the inside, all of the diagonal folds will be "mountain" folds and the vertical and horizontal folds will be “valley” folds.
With the diagonal scores on the sides, the unscored sections top-to-bottom and the inside of the box facing up, gently lift the sides and arrange the folds to nestle together.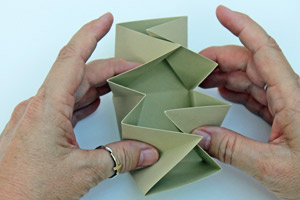
-
Step 6
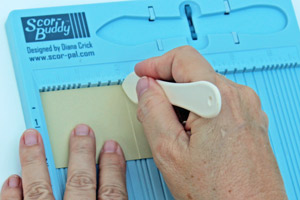
Score flap at 2 1/8". Adhere inside back of flap to outside back of box. (Distress all edges first, if desired).
-
Attach magnets or velcro to inside of flap and outside of box front to keep box securely closed. Additional adhesive may be necessary to hold the magnets in place.

-
Step 7
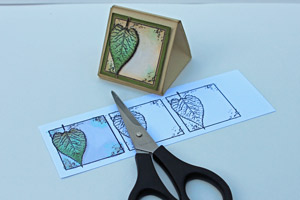
Stamp and color focal image. Trim to 1 5/8" square; outline along edges with multiliner, distress if desired, and adhere to mat. Adhere mat to box front. Embellish as you wish.
Video!
Your Turn
You've seen the tutorial, now you try it! We've got a section of the gallery set aside for Tiny Triangle Box. Try this technique, then upload your artwork to the gallery. Show us your creations!
***Please note - Internet Explorer/Edge is not a supported browser, and will not allow you to see the videos. Please use Chrome, Firefox or Safari to view our tutorial videos.

 *
*
Questions and Comments
We'd love to get your feedback or questions. Leave your comment below.
Love your box and easy to follow instructions.
TFS!
Hugs and smiles
Page 1 of 1 pages