Thumping

by Lydia Fiedler

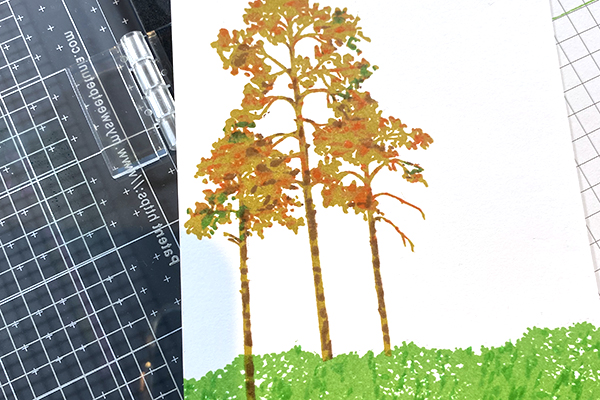
Add more color to your image before stamping by tapping a darker colored marker over an inked image.
Supplies

Step-by-Step

  1. Step 1

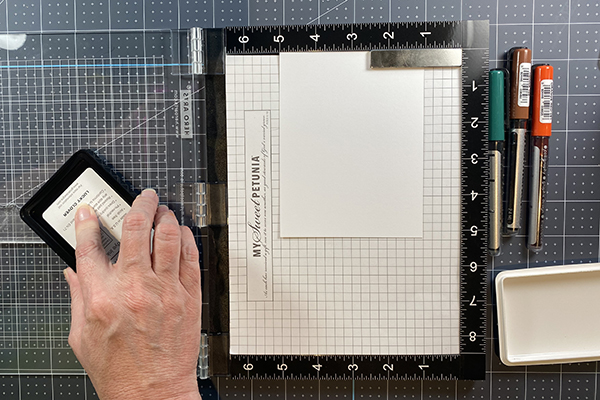
    Ink stamp with an ink pad. Stamp image using a MISTI or acrylic block. Stamp the image on cardstock.

  2. Step 2

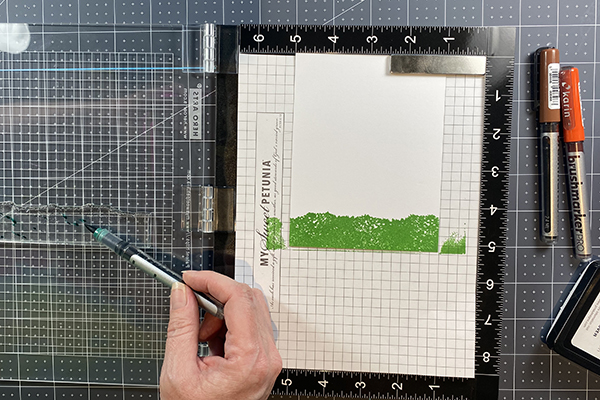
    Clean the stamp, then tap a marker against the stamp randomly to create a pattern. Water based markers work well.

  3. Step 3

    Continue to "thump" the marker on the image and stamp on the original image until you added enough spots to create a marbled look.

  4. Step 5

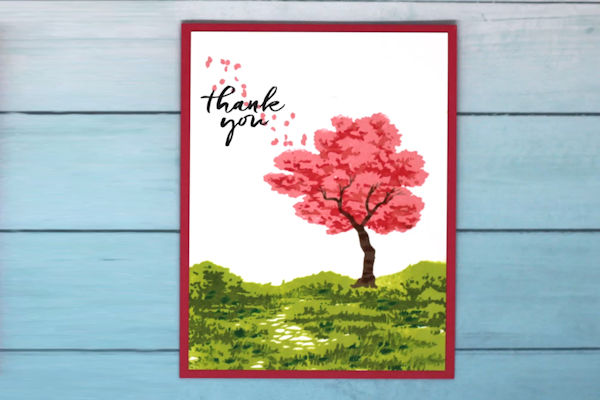
    Finish the card.

Video!

Variations

    Rainbow colors
    Use different colored markers on your image. Start with the lightest color marker and work your way to the darkest color.

Your Turn

You've seen the tutorial, now you try it! We've got a section of the gallery set aside for Thumping. Try this technique, then upload your artwork to the gallery. Show us your creations!

***Please note - Internet Explorer/Edge is not a supported browser, and will not allow you to see the videos. Please use Chrome, Firefox or Safari to view our tutorial videos.
Questions and Comments

We'd love to get your feedback or questions. Leave your comment below.

This is so gorgeous!! I need to try this technique out...very cool!! Beautiful colors and sets you chose here as well!! Thanks!!
Rose Ann  |  Wed Apr 9, 2008 at 5:22 AM
Thanks for this wonderful tutorial on use of colors "thumping" I am going to give this a try. ~thanks, Pam
airbornewife  |  Wed Apr 9, 2008 at 8:27 AM
Great color combo and love this technique. Really need that background stamp..never noticed it until you started using it and saw your fabu creations from its use!
Christine  |  Wed Apr 9, 2008 at 8:43 AM
Beautiful. I am going to try this out today! Thanks for sharing!
Denise G  |  Wed Apr 9, 2008 at 9:40 AM
This is so beautiful. I have never heard of this before. I wish I had the markers to be able to give it a try *pout*!
Allison  |  Wed Apr 9, 2008 at 10:15 AM
Very nice. Happy Birthday!
Nancy  |  Wed Apr 9, 2008 at 10:32 AM
This is the coolest looking technique!!! Great depth to a background stamp!
Krista - Austamper  |  Wed Apr 9, 2008 at 11:41 AM
This is a neat technique. I am looking forward to trying it soon. I like the idea of using different colors too.
Ronda  |  Wed Apr 9, 2008 at 1:05 PM
WOW!!
Excellent card and even more great directions.
Thanks for sharing
Kristen  |  Wed Apr 9, 2008 at 2:27 PM
Love this card. Thanks for always sharing.
Anne Pavlosky  |  Wed Apr 9, 2008 at 2:57 PM
Thanks for another great idea and a great tutorial. Now I just need more time to try all these great things. Beautiful!
Jo Glackman  |  Wed Apr 9, 2008 at 4:11 PM
ya know? I think I can actually do this!
Jody  |  Wed Apr 9, 2008 at 4:14 PM
Thank you for the tutorial,it looks like fun.I love the fresh colours of your card.
barbara hickson  |  Wed Apr 9, 2008 at 4:29 PM
Thank you for this idea. Now I have to try it out and get some of my background stamps out of storage.
Sharon  |  Wed Apr 9, 2008 at 4:49 PM
Such a beautiful design. At first I thought it was design paper, but it is just so much more. Thank you!
Niki  |  Wed Apr 9, 2008 at 5:14 PM
This is cool! I will be trying this tomorrow! I love the colors you used, but when I saw the finished product, you have covered up the thumping effect.
Betty  |  Wed Apr 9, 2008 at 5:18 PM
i LOVE this technique...i made a birthday card for my mother-in-law this evening using this...it turned out beautiful...

thank you so much for sharing...
danelover  |  Wed Apr 9, 2008 at 5:25 PM
What a great idea...and simple, too! I've never heard of "thumping", but now I can't wait to give it a try! Thanks for sharing.
Diane  |  Wed Apr 9, 2008 at 6:14 PM
Wonderful technique.......great card!!!! Thanks for sharing.......Billye
Billye Hanning  |  Wed Apr 9, 2008 at 7:35 PM
What type of markers did you use and where did you get the stamp? I love this tutorial and your card.
Del Skinner  |  Thu Apr 10, 2008 at 4:45 AM

Page 1 of 4 pages  1 2 3 >  Last »

You need to be logged in to comment

GET OUR NEWSLETTER


Splitcoaststampers's privacy policy