Tablet Case
by Sabrina Alery
Create your own custom fabric tablet case using craft inks, stamps and stencils.
Supplies
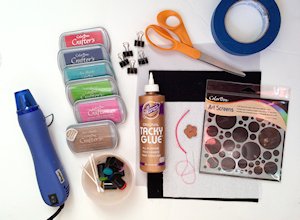
- White or light colored cotton fabric
- Felt
- Fabric inks (Colorbox® Crafter’s Ink used here in Sweet Pea, Aquamarine, Wave, Limelight, Fire, Desert Sand)
- Stencil (Colorbox® Art Screen used here in Rounded)
- Dauber tools or sponges (Colorbox® Art Daubers used here)
- Q-tips
- Fabric glue (Aleene’s Tacky Glue used here)
- Button
- Needle and thread
- 4" of elastic cord or ribbon
- Scissors
- Ruler
- Binder clips or sewing pins
- Painter’s tape or washi tape
- Iron or heat tool
- Paper towel and baby wipes
- Sewing machine (optional)
Step-by-Step
-
Step 1
Measure your tablet. Cut the felt 1 1/2" wider than the tablet. Double the length measurement and add 2".
Cut the fabric 1/2" larger than the felt.
EXAMPLE:
For a tablet 7" wide x 4" high, cut the felt to 8 1/2" x 10". Cut the fabric to 9" x 10 1/2".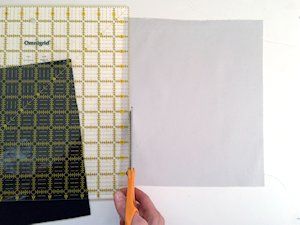
-
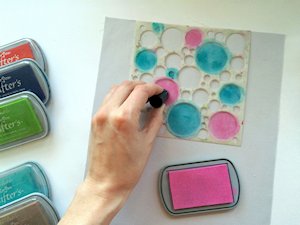
Step 2
Position a stencil on the top center edge of the fabric, and begin applying ink in a gentle dab-and-twist motion using sponge daubers. Start with the color you would like to be highlighted on the case.

-
Step 3
Continue adding colors, spreading them out across the piece for a nice balance.
-
TIP:
You may need to use a cotton swab to fill in any small areas for which the dauber is too large.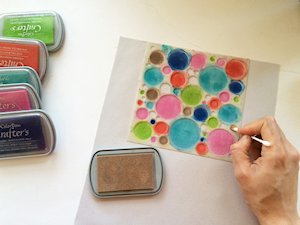
-
Step 4
Tape down the stencil directly below the patterned fabric. The ink remaining on the stencil will serve as a color template as you fill in the second round of fabric ink.
NOTE:
Be sure to wipe up any ink on your fingertips as you work.
-
Step 5
To finish up the fabric, move and retape the stencil in any areas that are still uninked. Continue to use the same colors left on the stencil to create a cohesive pattern.

-
Step 6
When the fabric is complete, the ink needs to be heat set to become permanent and water resistant. Hold down a hot iron for 10 seconds on each section of the fabric. Place a paper towel or pressing cloth between the fabric and iron to keep ink from transferring onto the iron.
You can also use a heat tool, but expect some smoking while the ink sets.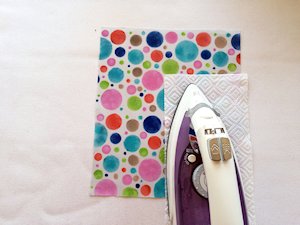
-
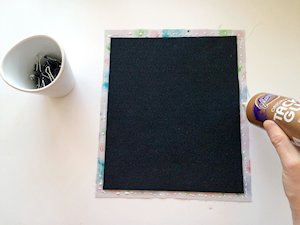
Step 7
Turn the patterned fabric over and center the felt in the middle. Apply a line of fabric glue around the entire edge.
-
Step 8
Fold up the edges of the fabric and secure with a clip or stick pin. Allow to dry completely according to the instructions from the glue manufacturer.

-
Step 9
Pin the elastic cord on the center edge of the fabric.

-
Step 10
Sew along the edge of the fabric to reinforce the glue. Stitch over the cord many times to keep it secured. Repeat stitching on opposite side.
NOTE:
If you do not own a sewing machine, hand stitch the cord in place, but you do not need to add the top stitching.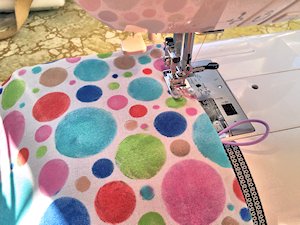
-
Step 11
Line up the button near the center edge, on the side of fabric opposite the cord. Hand stitch in place.

-
Step 12
Fold the case together as it will be when completed. Clip the edges together and sew along the edges to secure, making sure to backstitch at the beginning and end.
NOTE:
If you do not own a sewing machine, hand stitch the edges together. You could even use a decorative stitch like the blanket stitch.
-
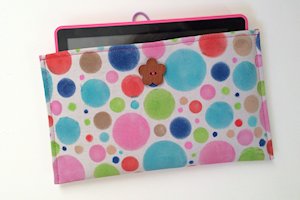
Step 13
Slip the tablet inside to be certain that it fits.
-
Step 14
Secure the cord and button closure. The tablet case is ready to be used on the go or given as gift.

Video!
Your Turn
You've seen the tutorial, now you try it! We've got a section of the gallery set aside for Tablet Case. Try this technique, then upload your artwork to the gallery. Show us your creations!
***Please note - Internet Explorer/Edge is not a supported browser, and will not allow you to see the videos. Please use Chrome, Firefox or Safari to view our tutorial videos.

 *
*
Questions and Comments
We'd love to get your feedback or questions. Leave your comment below.
Page 1 of 1 pages