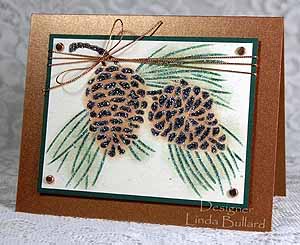
Pasty Razzle Dazzle
by Linda Bullard
Combine stenciling and sponging techniques with translucent embossing paste and glitter to add dimension and color.
Supplies
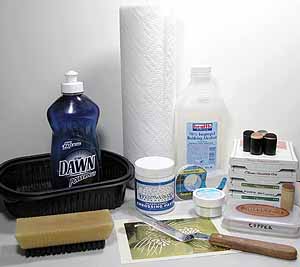
- Brass Stencil
- Cardstock (heavy weight)
- Removable Tape (or low-tack painter’s tape)
- Inks
- Sponge Daubers
- Translucent Embossing Paste (dries clear)
- Palette Knife
- Glitter
- Shallow Pan of Soapy Water (for soaking stencil)
- Scrub Brush (a nail or vegetable brush are good choices)
- Paper Towels
- Rubbing Alcohol (for removing stubborn paste residue)
- Optional – scrap paper for making a mask or shield
Step-by-Step
-
Step 1
Center the brass stencil on cardstock (here Confetti Cream) and adhere to hard, flat surface with removable tape. Take care not to tape over any of the openings.
Hint: It’s important to create a hinge at the top of the stencil, so tape down the top first, then the remaining sides. Tape the bottom second and the sides last, and remove them later in the reverse order.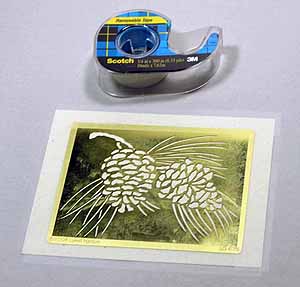
-
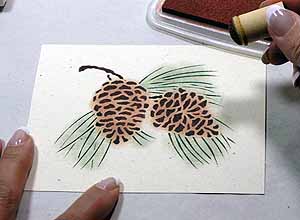
Step 2
Use sponge daubers to color the image with the darker inks.
Hint: It's helpful to use masks to keep the sponging more controlled.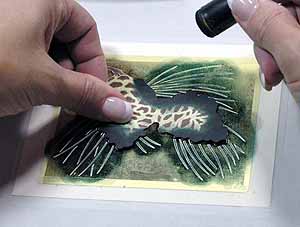
-
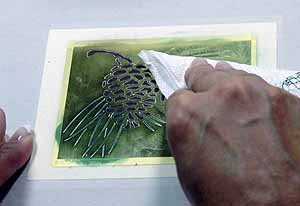
Step 3
Clean the stencil well with a slightly moistened paper towel. Remove the stencil (keeping the tape intact) from the paper and set aside.
-
Step 4
Use sponge daubers to fill in the background with lighter colored inks.
-
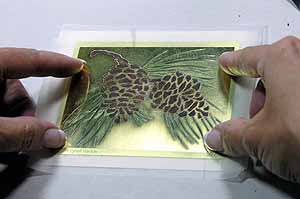
Step 5
Line up and reattach the taped brass stencil over the colored image. Make sure the top “hinge” tape is well adhered.
-
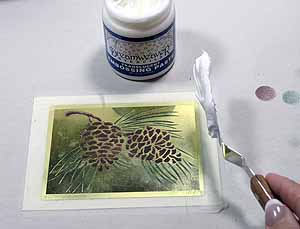
Step 6
Pick up a generous amount of embossing paste with the BOTTOM of a palette knife.
-
Step 7
When applying the embossing paste, right-handers should start from the right side of the stencil, lefties from the left side. Try to keep the palette knife at about a 45 degree angle as a thin, even layer of the paste, is applied using gentle pressure, NOT pressing hard. The layer should be about 1/8 to ¼ inch thick.
NOTE: Work quickly! The moisture in the embossing paste can warp the paper and the paste dries quickly, so use as few passes as possible to cover the stencil. Immediately scrape any excess paste on the palette knife back into the container, replacing the lid as you work to prevent the paste from drying out.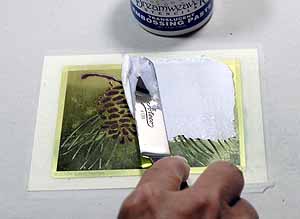
-
Step 8
Keep the palette knife at about 45 degrees and hold it level against the surface of the stencil. Move across the stencil in a continuous, steady motion to scrape off the paste. Leave behind a level coating in the stencil openings.
It may take more than one pass with the knife on large stencils. Try to avoid scraping off any area more than once. The paper tends to warp up into the openings from the moisture of the paste, and you might find yourself scraping the paste right off the image! Immediately clean your palette knife with a damp paper towel.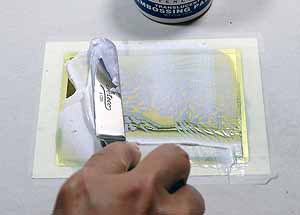
-
Step 9
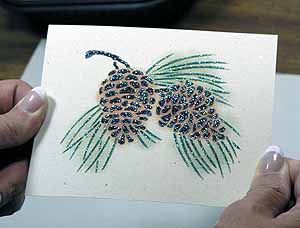
Remove the tape from the sides and bottom, leaving the top hinge tape in place. Lift the bottom of the stencil straight up (see photo).
The security of the tape hinge minimizes disturbing the paste as the stencil is removed. Should the stencil be dropped accidentally, it will fall right back into place.
Remove the stencil and tape from the paper.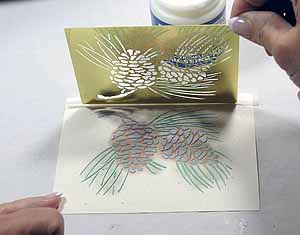
-
Step 10
Dispose of the hinge tape and IMMEDIATELY immerse your stencil in pan of soapy water.
This can be scrubbed and cleaned later.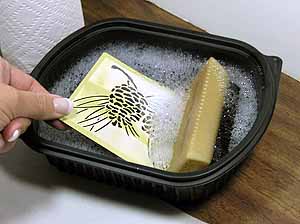
-
Step 11
Quickly apply the glitter to the embossing paste while it’s still wet.
Tap off the excess and allow at least an hour to dry.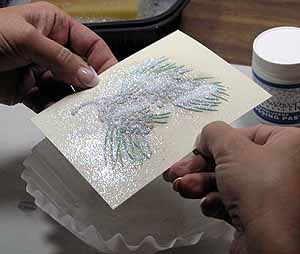
-
Step 12
Carefully brush off excess glitter and admire the dazzling results!
-
Step 13
Trim image and finish card as desired.
Your Turn
You've seen the tutorial, now you try it! We've got a section of the gallery set aside for Pasty Razzle Dazzle. Try this technique, then upload your artwork to the gallery. Show us your creations!
***Please note - Internet Explorer/Edge is not a supported browser, and will not allow you to see the videos. Please use Chrome, Firefox or Safari to view our tutorial videos.

Questions and Comments
We'd love to get your feedback or questions. Leave your comment below.
Thanks for the tutorial.
Thanks
Thank you so much for sharing!
Thanks so much for sharing this tutorial.
Beth
LOVE the card. Two questions:
1. Why can't you use embossing powder instead of the paste?
2.Would this technique work on plastic stencils (from Fiskars)?
Thanks for the great tutorial.
Page 1 of 3 pages 1 2 3 >