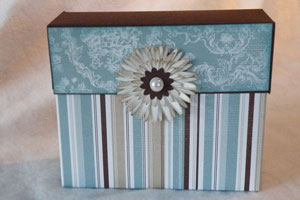
Stationery Box
by Jackie Topa
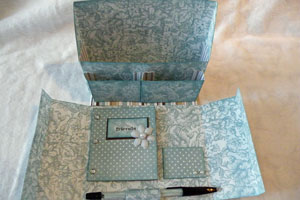
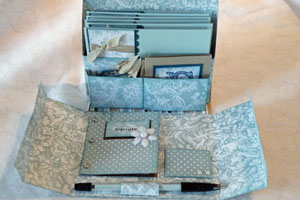
Make a beautiful gift box to hold stationery, notecards, a pen and postage.
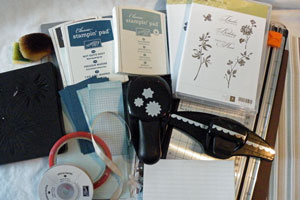
Supplies
- One 12 "x 12" piece of heavy patterned paper (box base)
- One 8 1/2" x 4 1/4" piece of heavy patterned paper
- One 5 1/2" x 2" piece of heavy patterned paper
- One 4 1/2" x 2" piece of heavy patterned paper
- Six 3 1/2" x 6" pieces of lined paper
- One 6 1/2" x 3 3/4" piece of heavy patterned paper
- One 2" x 3" piece of heavy patterned paper
- One 2" x 1 1/2" piece of heavy patterned paper or cardstock
- One 10 1/8" x 6 1/8" piece of cardstock (lid)
- Two 6" x 1 3/4" pieces of heavy patterned paper
- Two 2" x 1 3/4" pieces of heavy patterned paper
- Hole punch
- Brads
- Pen
- Sticky Strip™ or other strong adhesive
- Scissors
- Scoring tool
Step-by-Step
-
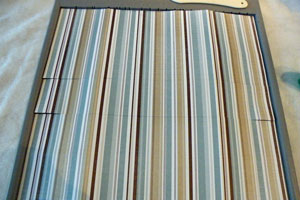
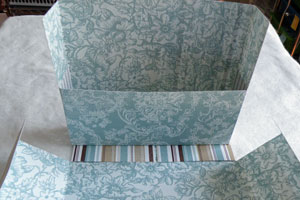
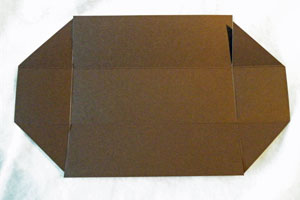
Step 1
Score the 12" x 12" piece of heavy patterned paper at 5" and 7". Turn paper 90 degrees and score at 3" and 9" in the other direction.
-
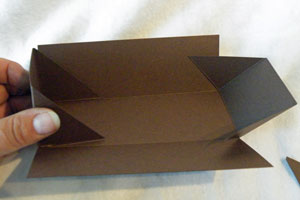
Step 2
Cut sides to score lines. Fold these cut pieces into the center and glue down for extra support.
This will make the bottom of your card box.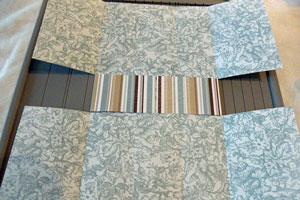
-
Step 3
Cut 1 3/4" off each side of the top panels only. Score the bottom two panels at 1" and 11".

-
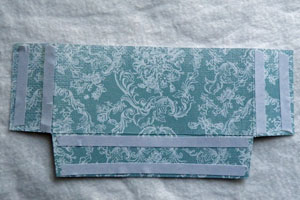
Step 4
Score both short sides and one of the long sides of the 8 1/2" x 4 1/4" piece of heavy patterned paper at 1 1/4".
-
Step 5
Trim the corners and apply Sticky Strip™ to scored sections.
-
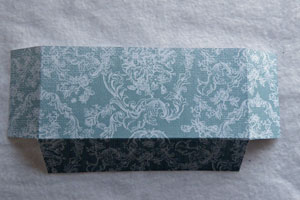
Step 6
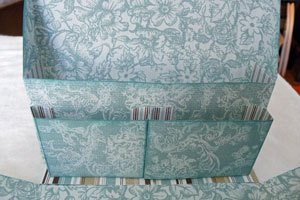
Fold up the top of the card box and attach this piece to the box to form a holder for the cards.
-
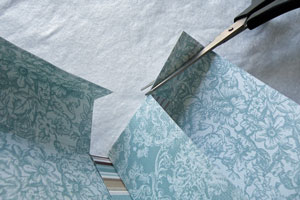
Step 7 (Optional)
Use a pair of scissors to angle the paper from the top corner of the card box to the top corner of the card pocket.
-
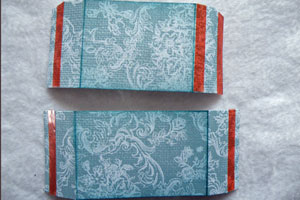
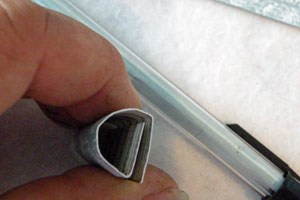
Step 8
Score the 5 1/2" x 2"and the 4 1/2" x 2" pieces of cardstock at 1/2" and 1" from each end. Apply Sticky Strip™ along the score lines of the outer sections and to one of the inner sections as shown.
-
Step 9
Attach the pockets to the front of the card holder.
-
Step 10
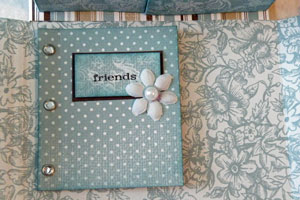
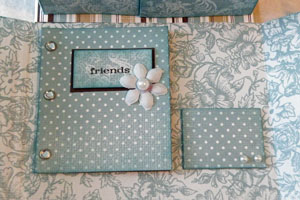
To make the address book, cut some lined paper to 3 1/2" x 6". Six pieces were used here, but the book can be any thickness.
Score the 6 1/2" x 3 3/4" piece of heavy patterned paper at 3 1/4" and 3 3/4" . Fold in half, insert the lined paper, punch three holes and insert brads.
-
Step 11
Embellish the address book and glue it to the bottom half of the card box, leaving enough room for the pen and stamp envelope.
-
Step 12
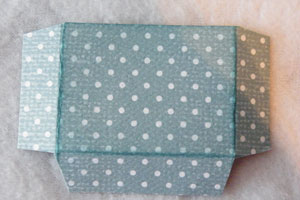
Score the 2" x 3" piece of heavy patterned paper at 1/2" on both short sides and one long side. Trim corners and fold scored pieces under.
-
Step 13
Embellish the stamp envelope as desired and glue it down beside the address book.
-
Step 14
Wrap the 2" x 1 1/2" piece of cardstock or patterned paper loosely around pen making a loop. Center the pen and then attach the loop to the stationery box.
-
Step 15
Decorate the pen to match the stationery box by inserting a piece of patterned paper into the barrel of an RSVP® pen or adhere a piece to the outside of the pen.
-
Step 16
Score the 10 1/8" x 6 1/8" piece of cardstock at 2” on all sides. Cut the vertical score line up to the horizontal score line and trim the corners.
-
Step 17
Fold the ends up to form the lid and glue in place or use Sticky Strip™.
-
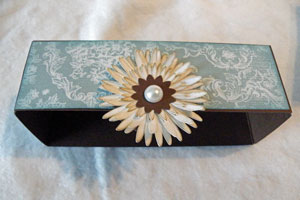
Step 18
Glue the two 6" x 1 3/4" and 2" x 1 3/4" pieces of heavy patterned paper to the lid and make an embellishment for the center.
-
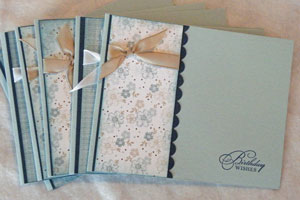
Step 19
Make some cards to fill up the card box.
-
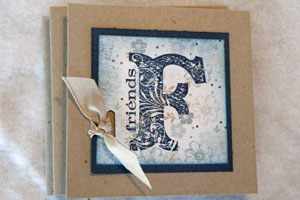
Step 20
Make some 3” x 3” note cards.
-
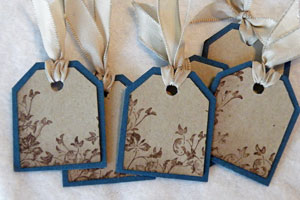
Step 21
Make some tags.
-
Step 22
The finished stationery box.
Video!
Your Turn
You've seen the tutorial, now you try it! We've got a section of the gallery set aside for Stationery Box. Try this technique, then upload your artwork to the gallery. Show us your creations!
***Please note - Internet Explorer/Edge is not a supported browser, and will not allow you to see the videos. Please use Chrome, Firefox or Safari to view our tutorial videos.

Questions and Comments
We'd love to get your feedback or questions. Leave your comment below.
Peggy
Stampin' Up! sells patterned textured cardstock. I would use that. The cardstock Jackie used in the sample is a retired paper pack called Parisian Breeze. The current catalog has two patterned cardstock packs: To the Nines and Storybook Specialty. A new catalog is coming out in July (I think) and hopefully has more textured cardstock.
Teachers End of year Thank You Gifts Solved!!
First of all: thank you for the video. Very clear and easy to follow. I envy those teachers, I would love to receive something like this. I might try my hand at it since I happen to have some of the heavier cardstock ' to the nines' If I start now I could have it ready for my sister's bday in July!
Thanks for sharing!
(and thanks Beate for the video)
JJ
p.s. Still wishing for some of your "Jackie" magic to rub off on me
Page 1 of 5 pages 1 2 3 > Last »