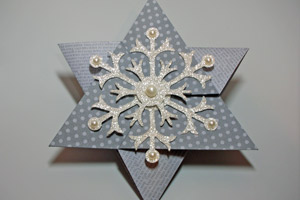
Star Fold Card
by Cindy Elam
Create a folded star or snowflake card.
Supplies
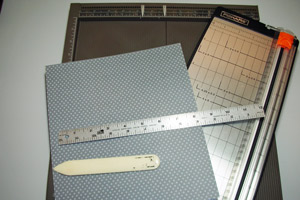
- One 8 3/4" x 10" lightweight cardstock or Patterned paper
- Ruler
- Pen or pencil
- Scoring Tool, Stampin’ Up! Simply Scored used here
- Paper cutter
- Bone folder
- Embellishments, as desired
Step-by-Step
-
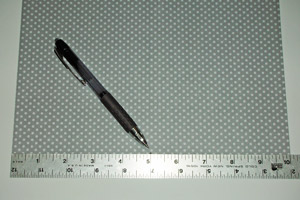
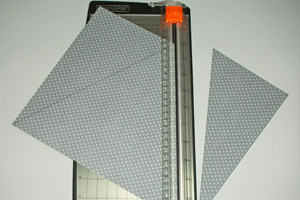
Step 1
Using the ruler and pen or pencil, make a mark in the middle of one 10" edge of paper (5" from each edge).
-
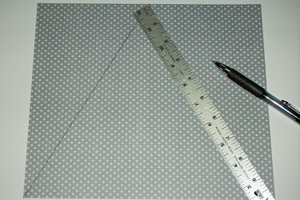
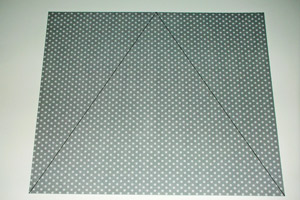
Step 2
Draw lines from the center mark down to each bottom corner.
-
-
Step 3
Align drawn line with groove of paper cutter and trim off excess. Repeat for other side.
-
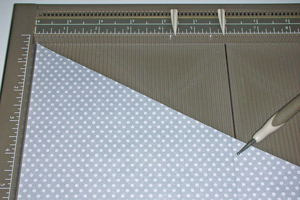
Step 4
Align one straight edge of paper with left side of scoring tool. Score at 4 3/8" and 5 7/8".
-
Note:
For sharp points on the star, move paper a scant 1/16th inch away from left side of scoring tool, as shown.
Score the other two sides as you did for the first.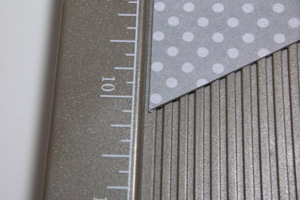
-
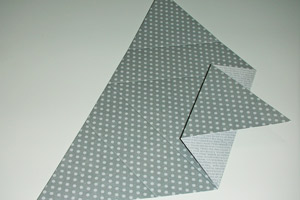
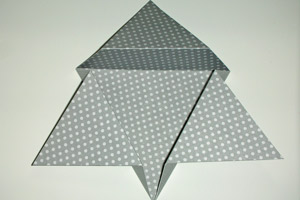
Step 5
Use bone folder to crease score lines – valley fold for the center score lines, and mountain fold for the points of the star.
-
-
Step 6
Fold in one side, then the next side, and tuck the last side under the first to close. Decorate as desired.
Video!
Variations
Here are easy dimensions for using 8 1/2" x 11" or even 8" x 8" paper. Cut paper to 8" wide x 7" high. Mark the center point at 4" and cut the triangle. In step 4, score at 3 1/2" and 4 5/8" from each side. Other instructions are the same. Bonus: the card will fit in an A2 envelope!
Your Turn
You've seen the tutorial, now you try it! We've got a section of the gallery set aside for Star Fold Card. Try this technique, then upload your artwork to the gallery. Show us your creations!
***Please note - Internet Explorer/Edge is not a supported browser, and will not allow you to see the videos. Please use Chrome, Firefox or Safari to view our tutorial videos.

Questions and Comments
We'd love to get your feedback or questions. Leave your comment below.
Hugs and smiles
http://www.splitcoaststampers.com/gallery/photo/2066396?&cat=500&ppuser=205884
greetings,
niki
LOVE the idea of using the star for a tag on a
bottle of wine by the way!-So clever!!
thank you very much!
Thanks again for sharing such a fun addiction.
With your measurements I made one with MTC for my Gazelle, Now I can make them any size I want. Just in time for my all occasion card set.
Page 1 of 1 pages