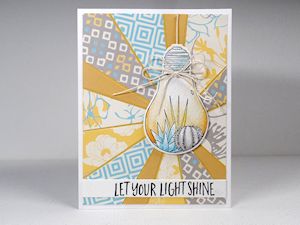
Starburst Background
by Dina Kowal
Use scraps for this dramatic background effect.
Supplies
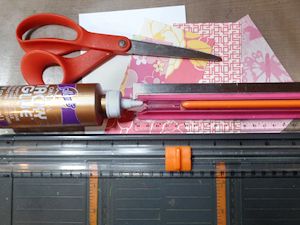
- Coordinating scrap paper strips - about 7-8 pieces of any width, 4-6 inches long
- Matching solid color cardstock for base
- Paper trimmer
- Adhesive
- Scissors
- Ruler
- Other supplies as needed to complete the project (Spellbinders oval die, Concord and 9th "Let's Chat" and "Shine Brighter" clear sets and matching dies, Sizzix tag die, QoR watercolor paints, jute, MISTI, Versafine and Stazon inks)
Step-by-Step
-
Step 1
Collect paper scraps that coordinate. They can be any width, but a width of 1” - 2” works best. Most strips should be at least 5” long, but a few 3"-4" pieces can also be used. A few strips should be long enough to reach from the focal point to an opposite corner (7" at most for an A2 card).
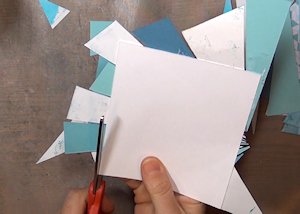
Trim the pieces to rectangles if they have odd cut edges.
-
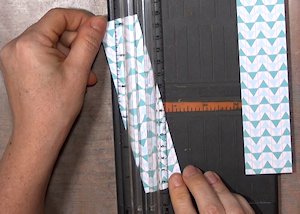
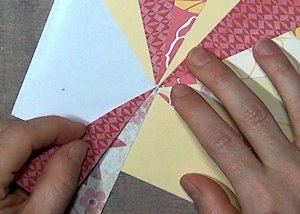
Step 2
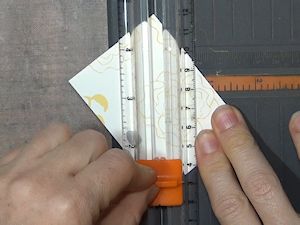
Use a paper trimmer to cut each rectangular strip into a wedge. Line up opposite corners on the cutting line as shown to make the cuts.
-
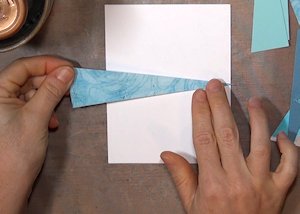
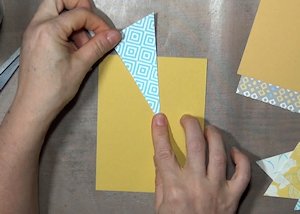
Step 3
For a starburst focused to one side of the panel, choose a focal point anywhere along the edge of the card. Adhere the first wedge across the card, with the point toward the focal point. The point can line up with the edge or extend beyond it.
-
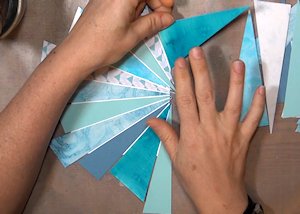
Step 4
Build the starburst out from the initial wedge, leaving a small space between wedges so that the base color shows through.
NOTE:
Leaving a space allows for a contrast layer to show through, which adds to the drama of the starburst effect. It also gives you a little margin for error in case your cuts aren't perfectly straight.
-
Step 5
Continue to add scraps to the background until the space is filled.
-
Step 6
Turn the panel over and trim off the overhanging edges with a trimmer or scissors.
-
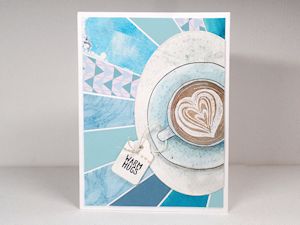
Step 7
Use the panel to complete a card or other project.
-
Step 8
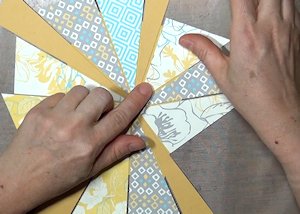
For a more central focal point, the process is similar. Begin with a single wedge pointing toward the chosen focal point.
-
Continue adding wedges as before around the card, leaving a small space between wedges as you go.
TIP:
For short spaces, try using a wider angle of the triangle.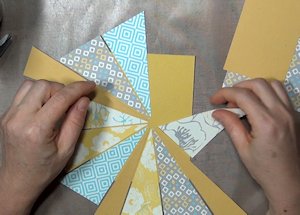
-
Step 9
NOTE:
Because of the spaces between wedges, the points of the wedges will not all converge. Usually this isn’t a problem, because the focal point will be covered with an image.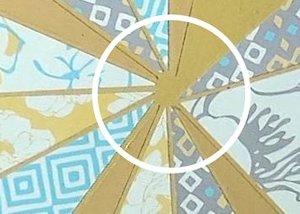
-
Step 10
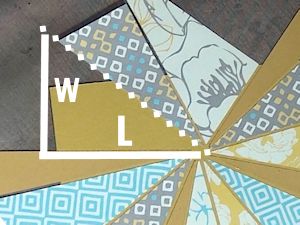
To determine the size of the final wedge, measure with a ruler from the focal point to the edge of the card base along the longer side of the open space. This will be the length of the scrap needed.
Measure at a right angle from the same point on the edge of the card base across the open space to the next wedge. This will be the width of the scrap needed.
-
NOTE:
If your final open space is on a corner as shown, you will need a longer wedge to accommodate the corner. Simply extend your length measurement to a point perpendicular to the corner point. For the width, measure up at a 90 degree angle from that point to the other side of the opening. (In the sample, that wedge was short, so I extended the length of it virtually for the measurement). Best to finish on a side if possible to avoid confusion.

-
Step 11
Cut the scrap to size, and then cut from corner to corner as above, making sure that the right angle is on the correct side.
-
Place it in the final position to complete the panel.
-
Step 12
Use the panel to complete a card or other project.
Video!
Variations
-
If you prefer, choose a point and line the other pieces up very carefully, laying them side by side with points together instead of leaving spaces between them. Label paper works well for this method.
Your Turn
You've seen the tutorial, now you try it! We've got a section of the gallery set aside for Starburst Background. Try this technique, then upload your artwork to the gallery. Show us your creations!
***Please note - Internet Explorer/Edge is not a supported browser, and will not allow you to see the videos. Please use Chrome, Firefox or Safari to view our tutorial videos.

Questions and Comments
We'd love to get your feedback or questions. Leave your comment below.
Thanks a lot!
-Use sticker border strips on the pieces if you have the pieces touching. This covers any "mistakes" and adds some pizzazz to the project.
-Emboss some of the pieces with your favorite embossing folders.
-Do a small panel for the top/bottom of your card.
-I make my panels a bit larger than the desired finished size. I have cut my panel when trimming the pieces. That way I can get my finished panel to the correct size.
My "Senior Ladies" have enjoyed doing these cards. Several of them tried the technique on their own with great results. Thanks, Dina, for a great tutorial.
Page 1 of 2 pages 1 2 >