Standing Pop-Up Card
by Christy Fulk
Pop-up layers allow this fun fold card to stand.

Supplies
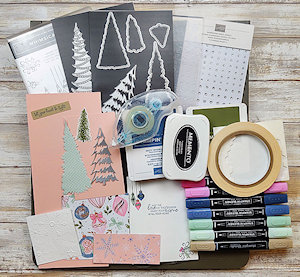
- Cardstock (Stampin’ Up!® Blushing Bride, Crumb Cake, & Basic White used here)
- Patterned paper (SU Whimsy & Wonder Specialty Designer Series Paper used here)
- Scoring tool (SU Simply Scored Scoring Tool used here)
- Strong adhesive (SU Tear & Tape Adhesive used here)
- Adhesive (SU Stampin’ Dimensionals & Stampin’ Seal used here)
- Other supplies as needed to complete the project (SU supplies used here: Whimsical Trees Stamp Set, Christmas Trees Dies, silver foil, Misty Moonlight, Mossy Meadow, & Tuxedo Black Memento inks; Crumb Cake, Mint Macaron, Misty Moonlight, & Polished Pink Stampin’ Blends alcohol markers, Die-Cutting Machine, & Wintry 3D Embossing Folders)
Step-by-Step
-
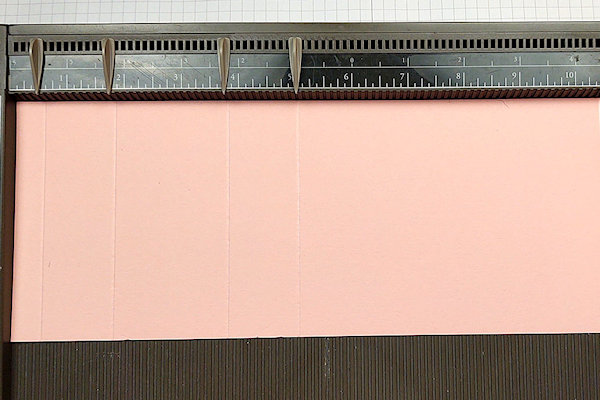
Step 1
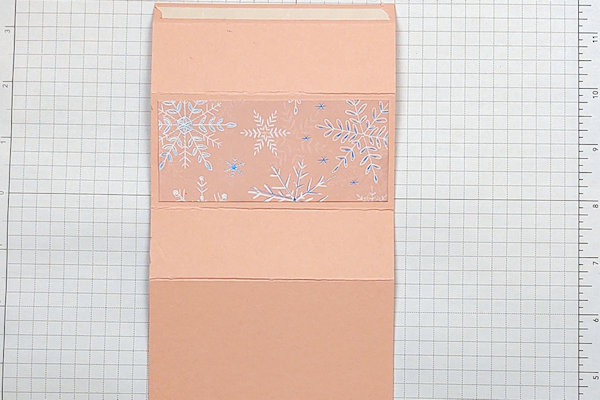
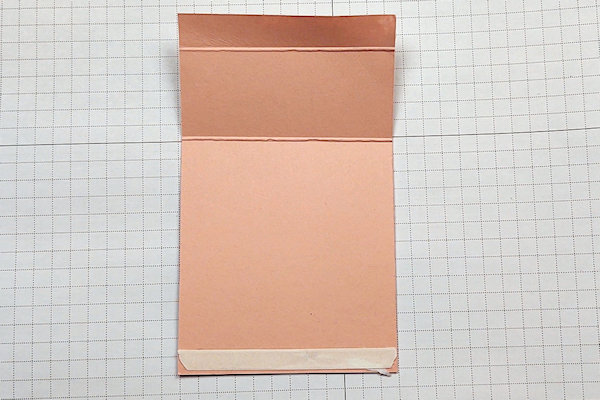
Cut a 4 1/4” x 10 1/2” piece of cardstock for the card base. With a 10 1/2” side along the top, score the piece at 1/2”, 1 3/4”, 3 3/4”, and 5”.
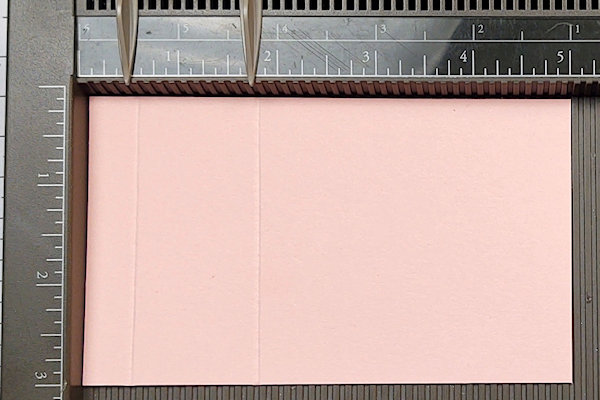
-
Cut a 3” x 5” piece of cardstock (same color as card base used here). With a 5” side along the top, score the piece at 1/2” and 1-3/4”.
-
Step 2
With a 4-1/4” side of the card base on top, and the score lines on the bottom, attach a 4” x 4” piece of patterned paper to the top of the card base. Make sure the top and side cardstock borders around the patterned paper are even. Fold all of the score lines up, and then flatten back out.
-
Turn the piece over, and put the score lines are on top. Attach a strip of strong adhesive along the top, narrow section. Attach a 4” x 1-3/4” piece of patterned to the center of the third section.
-
Step 3
Fold the third score line from the bottom up. The smaller patterned paper should now be showing on the bottom and everything should be lying flat against each other. Remove the paper backing from the strong adhesive on the narrow section. Fold the narrow section back, and attach it to the card base.
-
Bring the folded score lines down a bit to form a rectangle, box-like base.
-
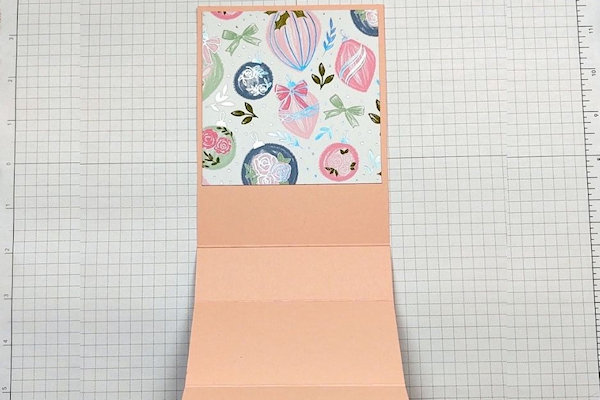
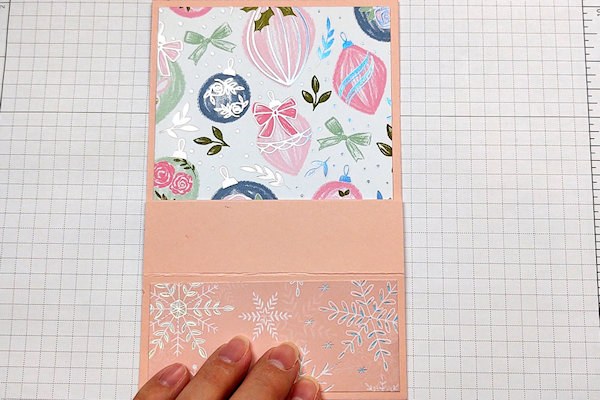
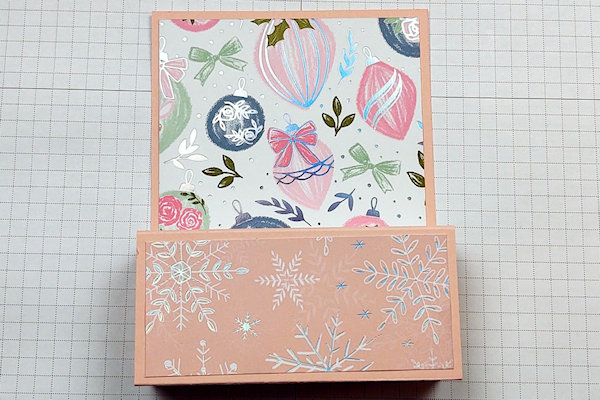
Step 4
Put the 3” side (with the score lines) of the second scored piece on the top, and attach a 2-3/4” x 3” piece of cardstock or patterned paper to the center of the bottom section. Fold all of the score lines back and then flatten back out. Put a piece of strong adhesive along the top, narrow section of the piece.
-
Turn the piece over so the score lines are still on the top. Put a piece of strong adhesive along the bottom edge of the piece.
-
Step 5
Turn the piece back over, keeping the score lines on the top. Remove the paper backing from the top strip of strong adhesive. Fold the bottom score line back. Line the folded score line with the top edge of the card base, centering the piece left and right, and attach.
-
Step 6
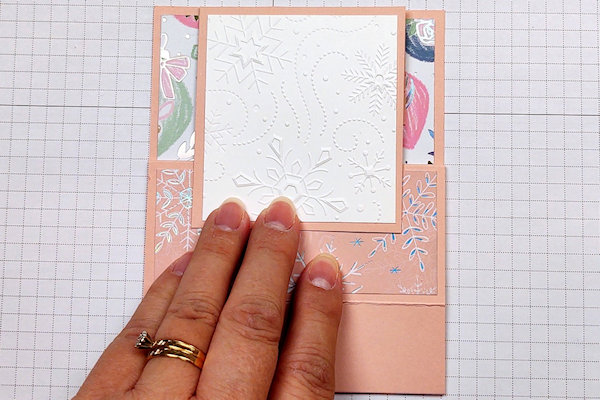
Fold the top piece up, and remove the paper backing from the strong adhesive strip. Fold the bottom “box-like” section flat so the bottom section showing is cardstock, and the top section is the smaller patterned paper.
-
Fold the top score line of the top piece down, lining the score line with the top edge of the card base as before, and attach the bottom of the piece with the flattened “box-like” piece of the card base.
-
Step 7
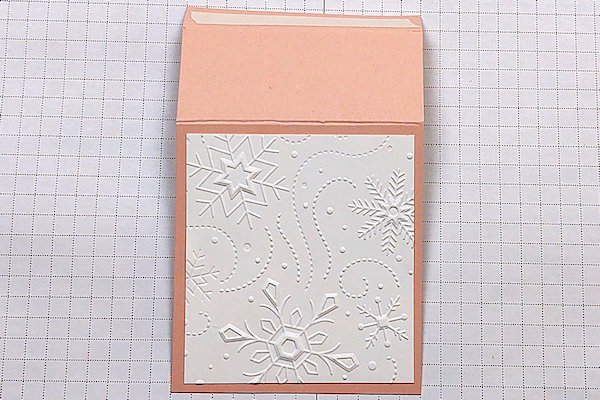
Cut 4” x 5 1/4” piece of neutral cardstock. Stamp/decorate, if desired. Attach the piece to the back of the card base.
-
Step 8
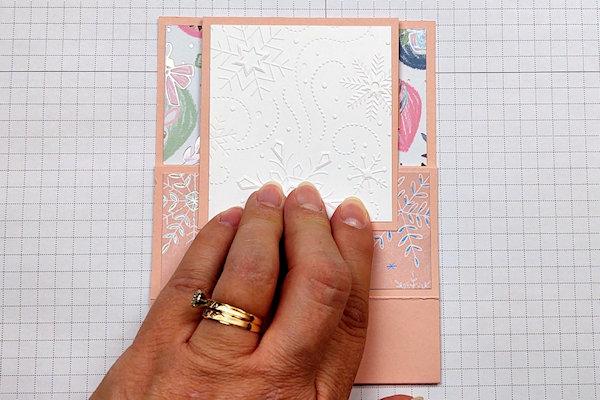
Keeping the card flat, decorate it as desired, and then pop it back up so it stands up to complete the project.


Video!
Your Turn
You've seen the tutorial, now you try it! We've got a section of the gallery set aside for Standing Pop-Up Card. Try this technique, then upload your artwork to the gallery. Show us your creations!
***Please note - Internet Explorer/Edge is not a supported browser, and will not allow you to see the videos. Please use Chrome, Firefox or Safari to view our tutorial videos.

Questions and Comments
We'd love to get your feedback or questions. Leave your comment below.
My card front was too heavy with so many layers that the card would not stand up. I solved it with a little cardstock "hinge" inserted into the hollow front rectangle that hinges a cardstock back to open and you pull it forward to close it.
Page 1 of 1 pages