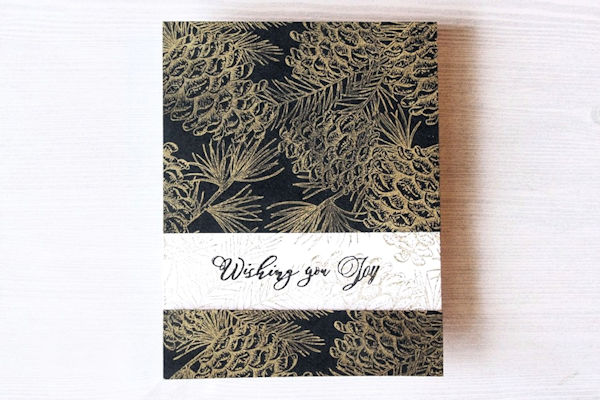
Stamped Layer Card
by Jenny Hall
Stamp and layer two identical panels, then cut away part of the top layer to let the other show through.
Supplies
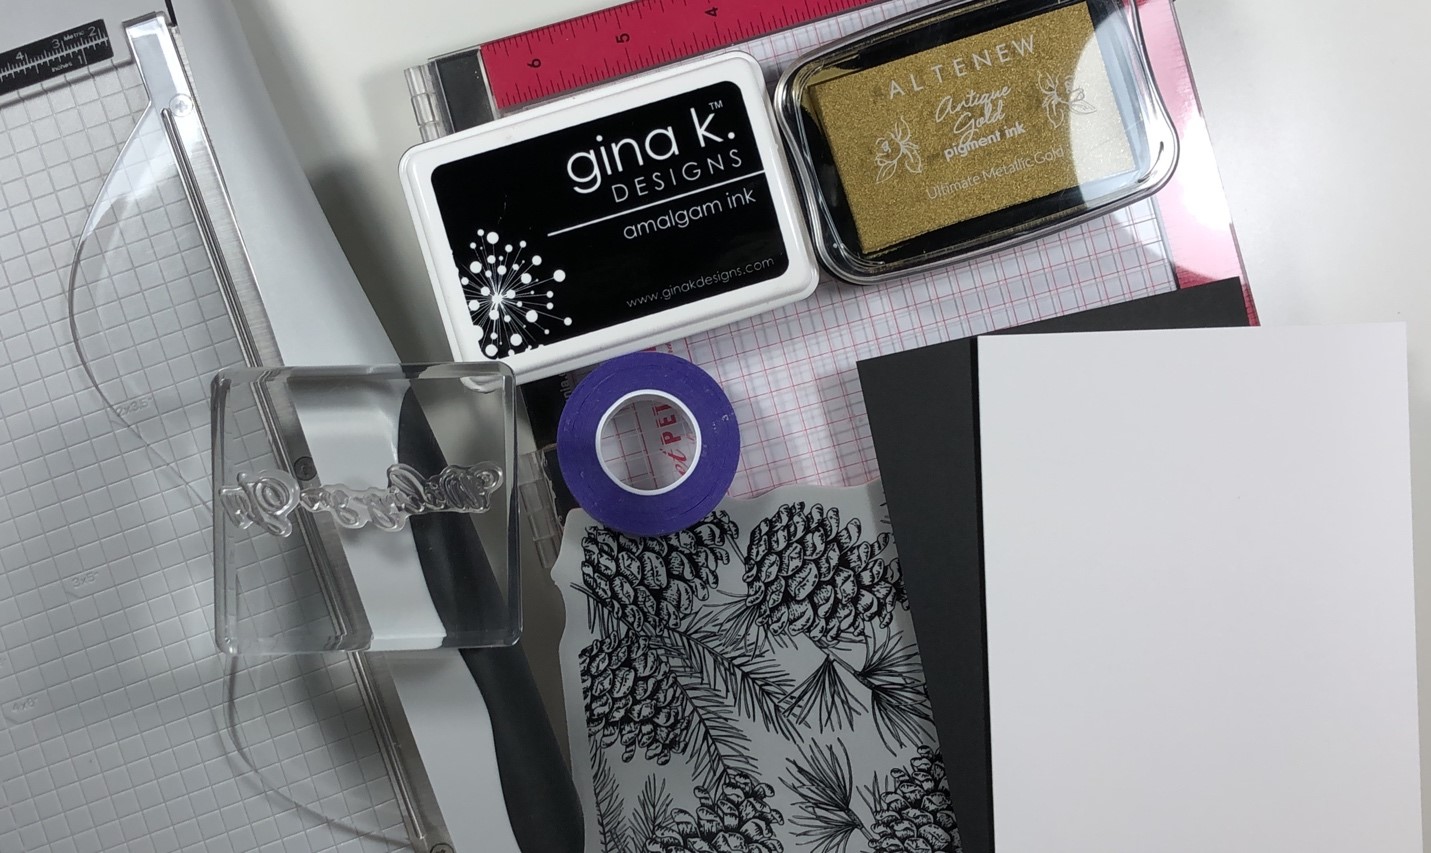
- Two contrasting ink pads (gold pigment ink & black ink used here)
- Low-tack tape
- Background stamp (Simon Says Stamp Pinecone Background used here)
- Sentiment stamp Penny Black's Festive Snippets stamp set used here
- White card base, folded
- Black cardstock panel
- Stamp positioning tool
- Paper trimmer
Step-by-Step
-
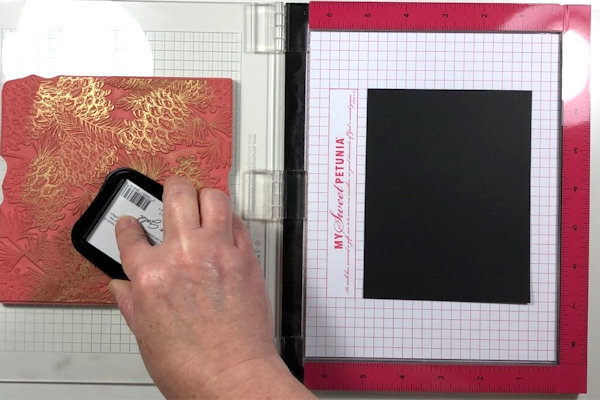
Step 1
Prepare a folded A2 card base (white here) and an A2 cardstock panel (black here).
Place the panel into a stamping positioner and secure it in place with a piece of low-tack tape on the back.
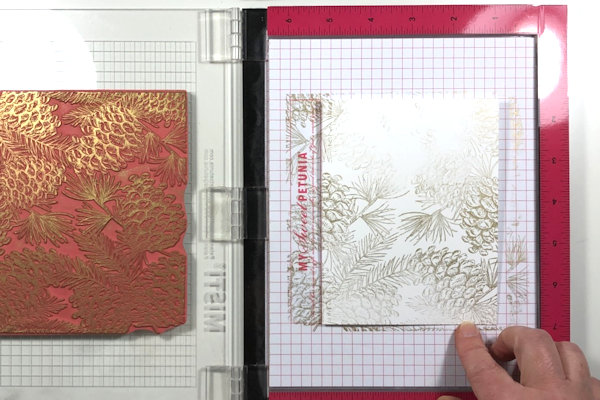
Ink the stamp. -
Apply it to the panel as many times as needed to get a crisp stamped image.
-
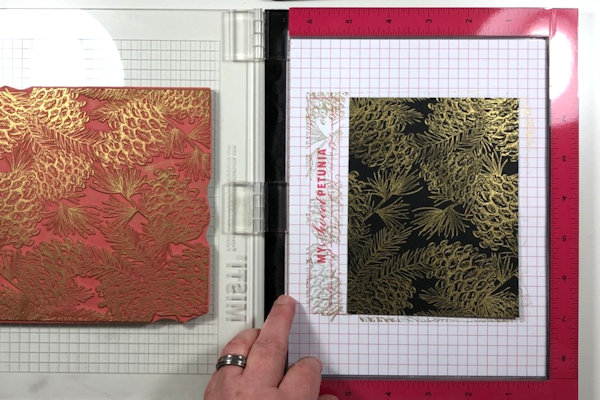
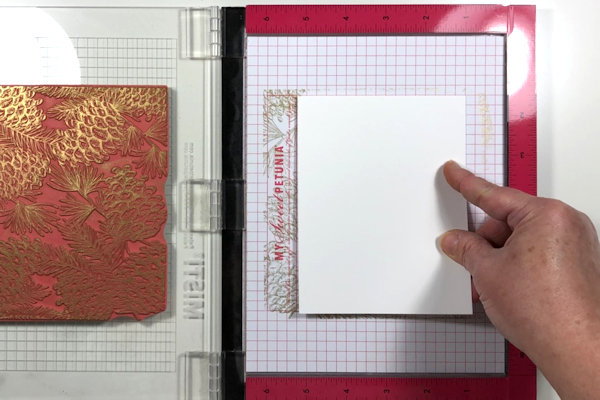
Step 2
Place the card base into the stamp positioner in exactly the same place as the black panel and secure with tape.
-
Stamp the image in the same ink at the exact same place.
-
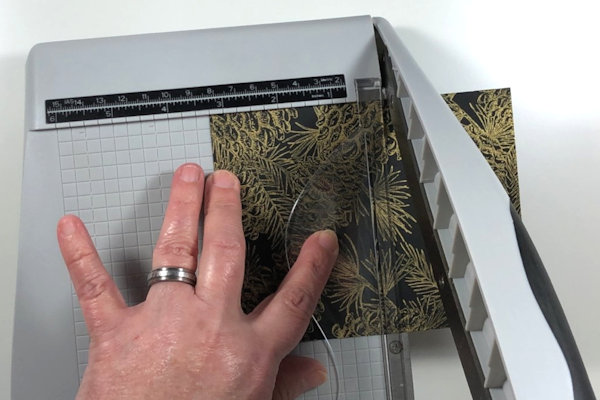
Step 3
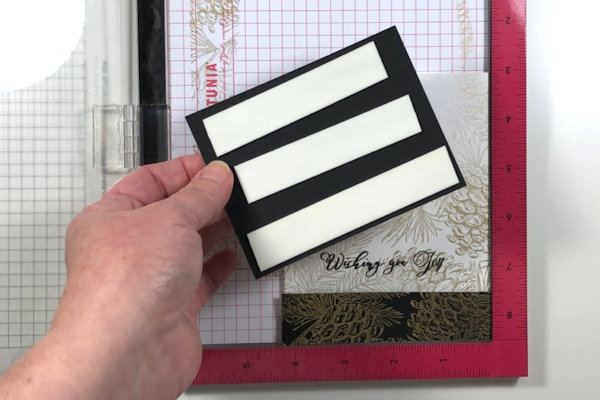
Trim the panel (once dry) as follows: from the top, trim down to 3 1/2". Take the remaining piece and turn it to cut from the inside cut edge (do not trim away from the bottom of the stamped image). Cut the piece 1”from the bottom.
-
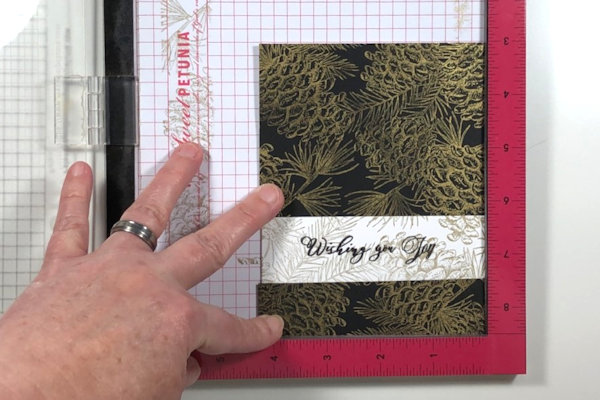
Step 4
Place the card base back in the positioner and lay the two cut pieces in place. Ink the sentiment stamp and apply it in the cutaway area, directly on the card base.
-
Step 5
Place foam adhesive or your choice of adhesive to the back of the two panel pieces and apply them to the card base, The larger piece at the top and the bottom piece at the bottom.
-
Step 6
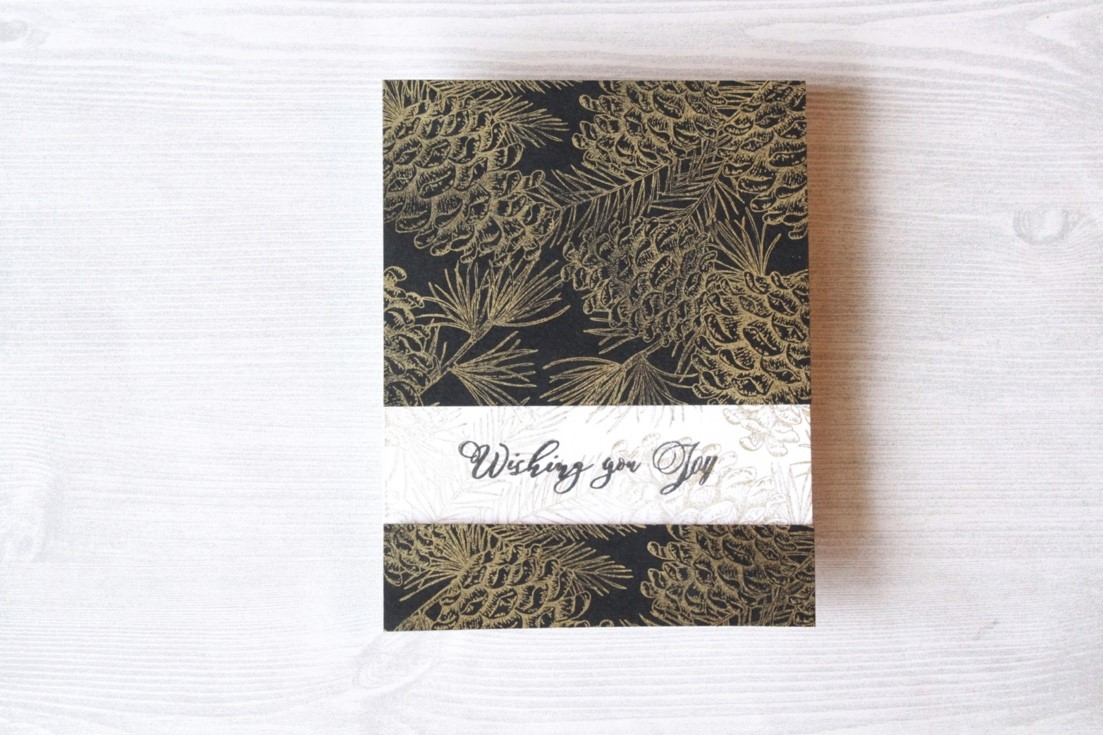
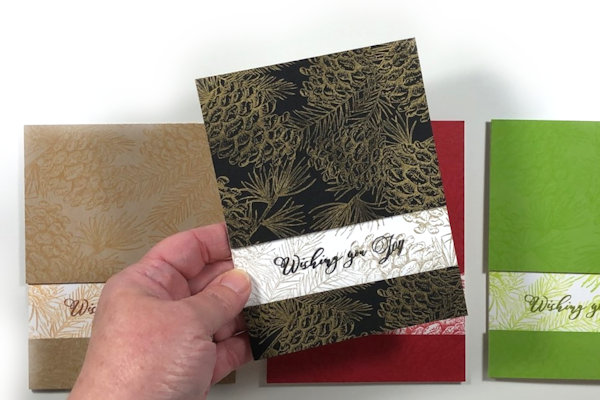
The design will be continuous despite the area that was cut away.
Video!
Your Turn
You've seen the tutorial, now you try it! We've got a section of the gallery set aside for Stamped Layer Card. Try this technique, then upload your artwork to the gallery. Show us your creations!
***Please note - Internet Explorer/Edge is not a supported browser, and will not allow you to see the videos. Please use Chrome, Firefox or Safari to view our tutorial videos.

 *
*
Questions and Comments
We'd love to get your feedback or questions. Leave your comment below.
Thanks
Shirl
Shirl
Page 1 of 1 pages