Stained Mosaic
by Beate Johns
Create a mosaic look with a homemade background stamp.
Supplies
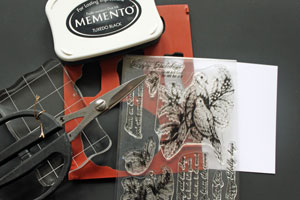
- Acrylic stamp handle
- Rubber trimmings (here, adhesive-backed)
- Rubber Scissors
- Neutral colored Cardstock
- Outline Stamp, Flourishes Dove and Holly used here
- Black Ink
- Versamark™ ink pad, or other clear embossing ink (not shown)
- Clear Embossing Powder (not shown)
- Heat Gun (not shown)
Step-by-Step
-
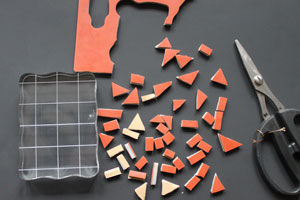
Step 1
Cut your rubber trimmings into small pieces.
-
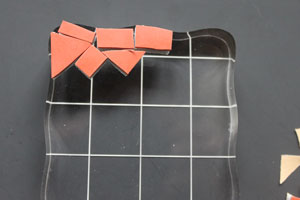
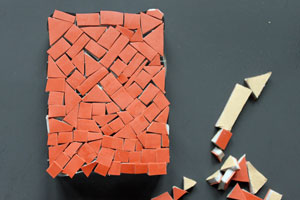
Step 2
Adhere the rubber pieces to an acrylic block.
-
Adhere the pieces close together and fill your entire acrylic block.
-
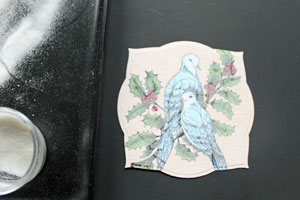
Step 3
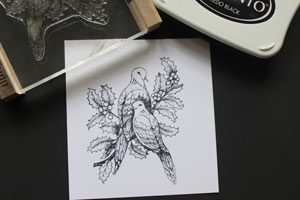
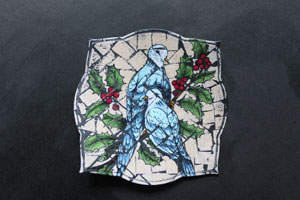
Stamp an image with black ink on neutral cardstock.
-
Step 4
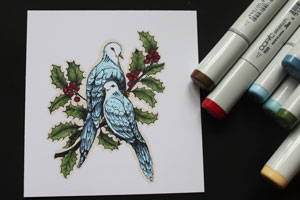
Color your image with vibrant colors.
-
Step 5
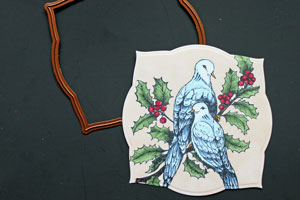
Cut your image to the desired finished shape and size. (Label 4 Nestabilities used here.)
-
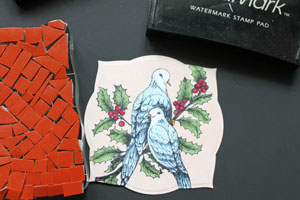
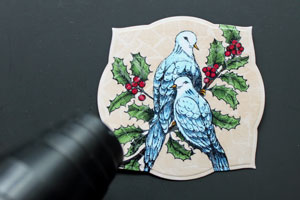
Step 6
Ink mosaic stamp with Versamark™ ink and stamp it over your colored image.
-
Step 7
Add clear embossing powder over your image. Tap off excess.
-
Heat embossing powder with heat gun until it's completely melted.
-
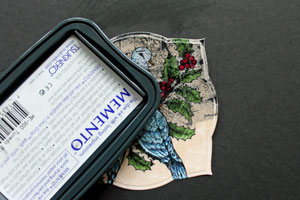
Step 8
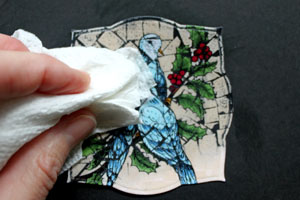
Rub your black ink pad over the image.
-
Buff image with paper towel to take black ink off the embossed parts of your image.
-
Step 9
Repeat step 8 if neccessary. Your stained mosaic piece is done.
-
Step 10
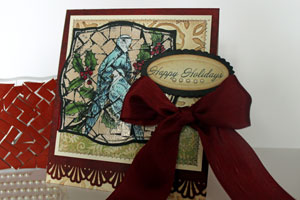
Finish your card.
Video!
Your Turn
You've seen the tutorial, now you try it! We've got a section of the gallery set aside for Stained Mosaic. Try this technique, then upload your artwork to the gallery. Show us your creations!
***Please note - Internet Explorer/Edge is not a supported browser, and will not allow you to see the videos. Please use Chrome, Firefox or Safari to view our tutorial videos.
Questions and Comments
We'd love to get your feedback or questions. Leave your comment below.
My husband was even impressed & belive me when I say he has no interest in my crafts but I had to show him this. Thanks for sharing
Page 1 of 4 pages 1 2 3 > Last »