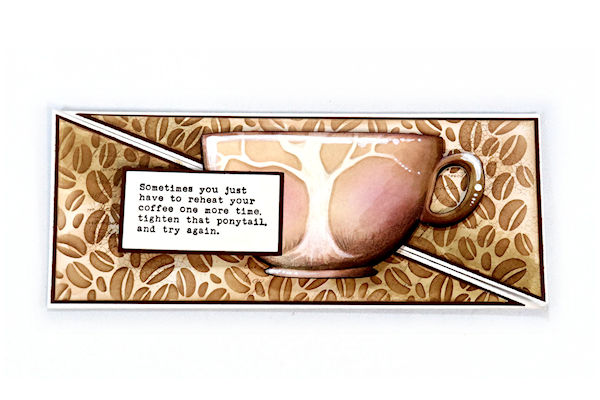
Slimline Diagonal Gate Card
by Dina Kowal
Change up a classic gate fold with a diagonal opening.
Supplies

- Cardstock
- Paper trimmer
- Scoring tool
- Other supplies as needed to complete the project (used here: Hero Art DI565 Cups and Handles Infinity Dies, A Colorful Life Designs Circle Tree and Coffee Beans stencils, Impression Obsession Hybrid inks and C13860 Try Again cling stamp, Copic markers, white gesso, battery eraser, ball stylus)
Step-by-Step
-
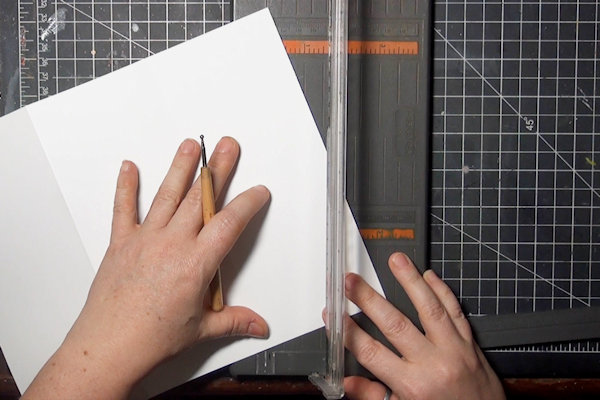
Step 1
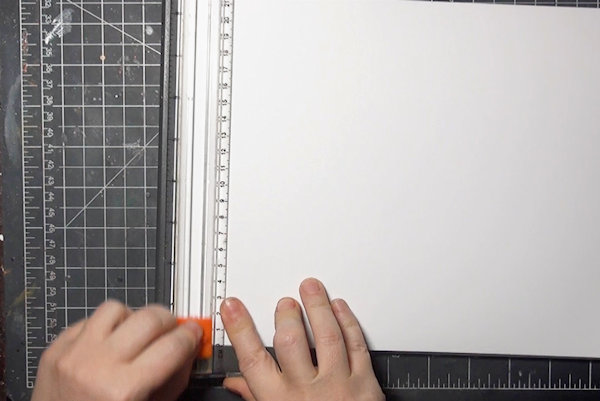
Trim a sheet of cardstock down to 8 1/2" x 10 1/2".
-
Step 2
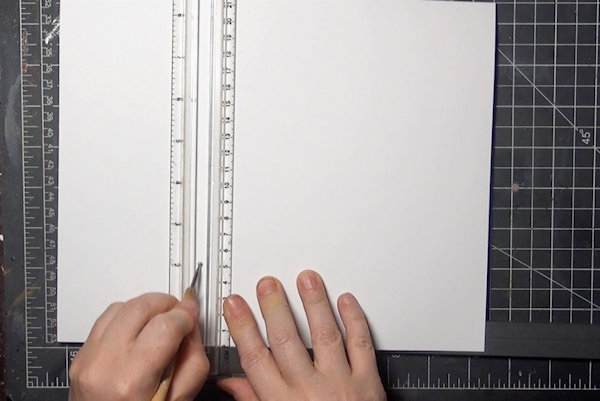
Score at 3 1/2" and 7”.
-
Step 3
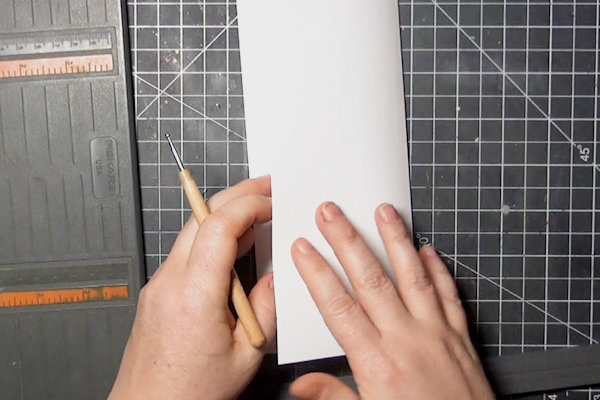
Fold the scored sections in toward the center and burnish the fold lines.
-
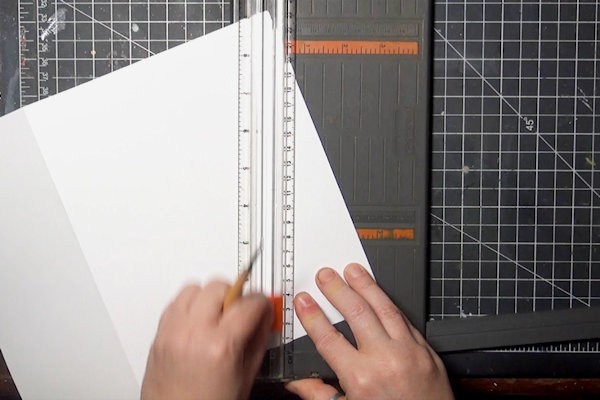
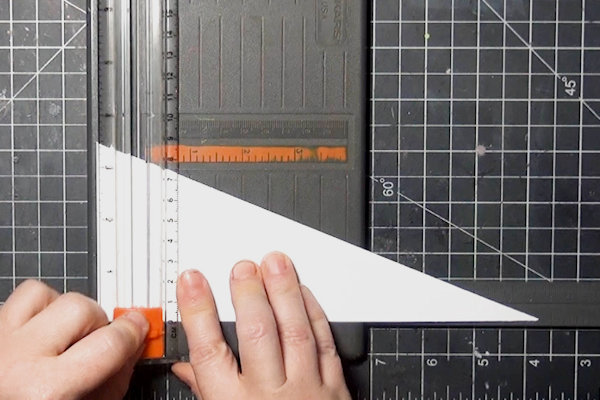
Step 4
Line up a corner with the opposite end of the scored line along the cutting line of your paper trimmer. (Either corner is fine.)
-
Cut diagonally across the section between these two points to create one side of the gate fold.
-
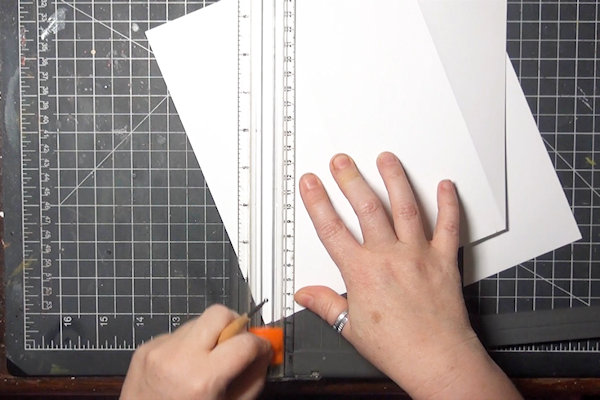
Step 5
Cut a parallel line on the other end panel. You will line up with the opposite corner, and cut to the end of the score line on the other side of the panel. (For the sample I cut from the top left corner first, so this cut will go up from the bottom right corner.)
-
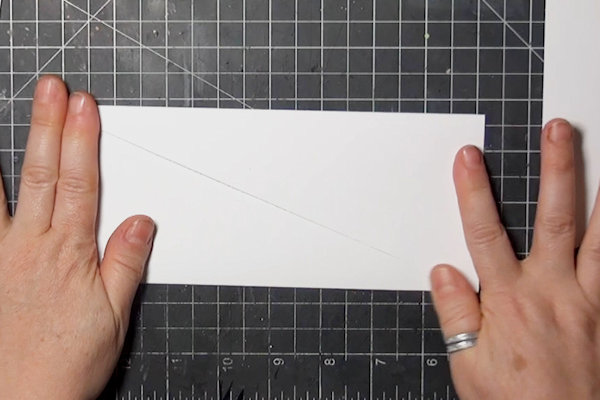
Here is the shape you will end up with. You may choose to cut from the left or right, depending on your card design.
-
Step 6
The cut sections should meet at the center, giving your card a diagonal opening.
-
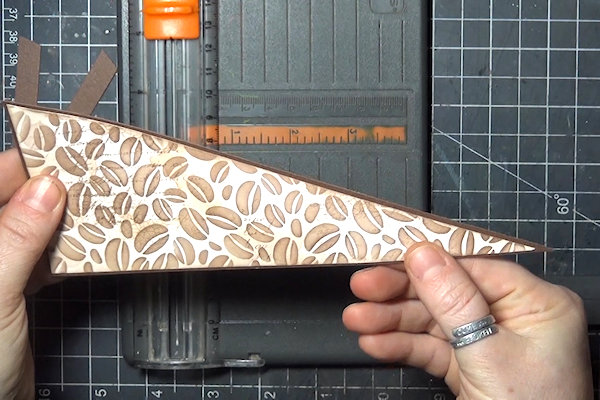
Step 7
Use the off-cut triangles for layering panels on your card. Trim 3/4" from the wide end as shown.
-
The cut panels can be embellished as you like and layered onto your card.
Alternatively, you can cut a piece of coordinating cardstock to 3 1/2" x 8 1/2" and cut it diagonally, then trim 3/4" from the wide end to create a layering piece. -
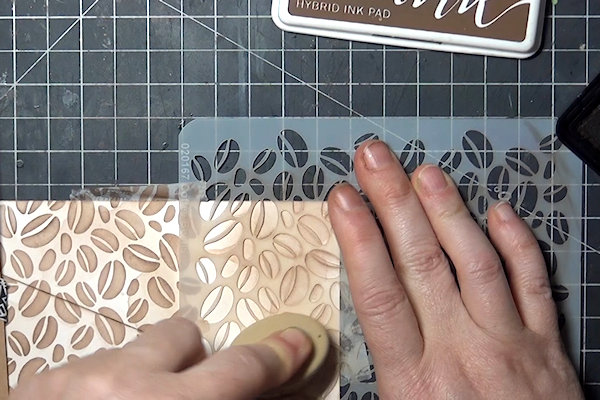
Step 8
Decorate your card panels as desired.
-
An additional (dark brown) layering panel was made here by cutting a piece of coordinating cardstock to 3 1/2" x 8 1/2" cutting diagonally, then trimming 3/8" from the wide end.
-
Step 9
You may choose to create a panel that overlaps the opening of the card. Take care to only adhere it to one panel when you assemble your layers. For the sample, the center diecut panel was taped in place, then I marked a line on the back with a pencil to remind me where to align the piece and also where to put my foam adhesive. The sentiment is adhered to the teacup, not to the card base.
-
Step 10
Complete the card. The finished size of this card is 3 1/2" x 8 1/2" and it will fit in a #9 or #10 envelope.


Video!
Variations
To create this card in another size, determine the closed size of the card, and multiply the width by 3. For example: a 3" x 6" card would require a 9" x 6" base, scored in thirds at 3" and 6". An A2 card would require a 12 3/4" x 5 1/2" base, scored at 4 1/4" and 8 1/2". Cut the diagonals as instructed above.
Your Turn
You've seen the tutorial, now you try it! We've got a section of the gallery set aside for Slimline Diagonal Gate Card. Try this technique, then upload your artwork to the gallery. Show us your creations!
***Please note - Internet Explorer/Edge is not a supported browser, and will not allow you to see the videos. Please use Chrome, Firefox or Safari to view our tutorial videos.

Questions and Comments
We'd love to get your feedback or questions. Leave your comment below.
Page 1 of 1 pages