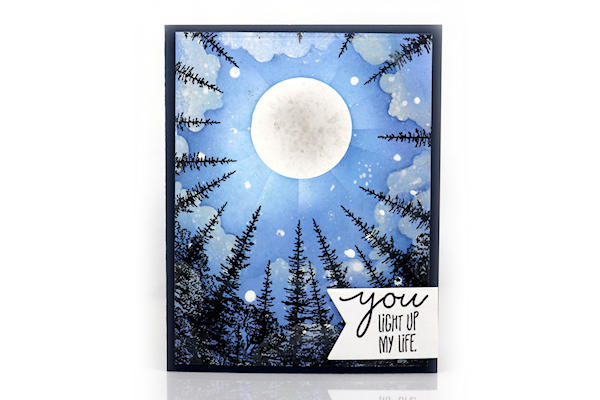
Sky View Scene
by Dina Kowal
Use masks and stencils to create a starry night sky.
Supplies
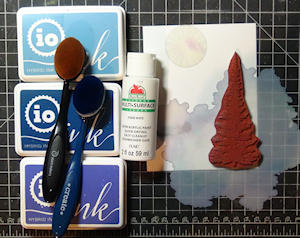
- Circle mask (A Colorful Life Designs Marvelous Mask Circles used here - a die cut circle would work fine)
- Blendable inks in sky colors, light, medium and dark (Impression Obsession hybrid inks used here)
- Blending tools
- Cloud stencil (A Colorful Life Designs Cloud Edger Set used here - if you don't have a cloud stencil, click HERE to see how to use a scalloped circle punch, or cut your own)
- acrylic paint (optional)
- Paint brush
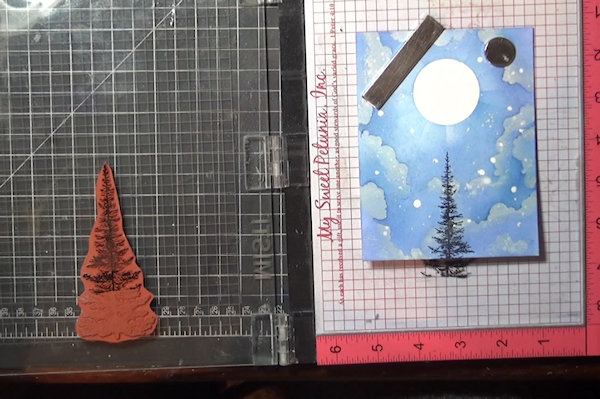
- Tree stamp (Stampscapes Pine and Rubber Stampede Oak Tree used here)
- Compatible ink (can stamp over acrylic paint - Versafine used here)
- Other supplies as needed to complete the project (used here: Impression Obsession You Light sentiment, Sizzix tag die, Scor-Buddy, ball stylus, Neenah cardstock)
Step-by-Step
-
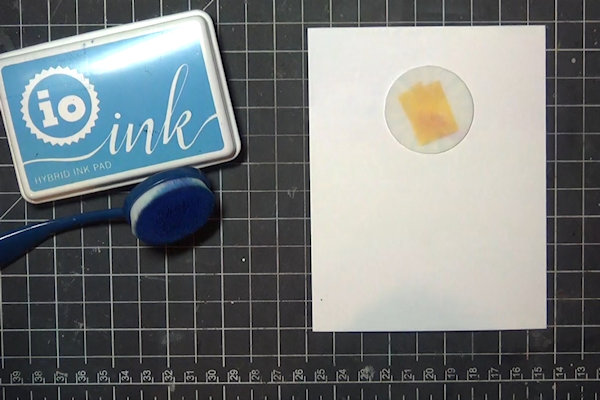
Step 1
Prepare a cardstock panel. Mask off a circle for the moon in your scene. It can be placed anywhere, but a centered position toward the top is best for placement of trees later.
-
Step 2
Select three ink colors for the sky – light, medium, and dark. Beginning with the light color, brush ink lightly around the masked moon.
-
Continue inking with the medium and then the darkest color, working out to the edges of the panel. Soft and uneven inking will add to the texture of the clouds.
-
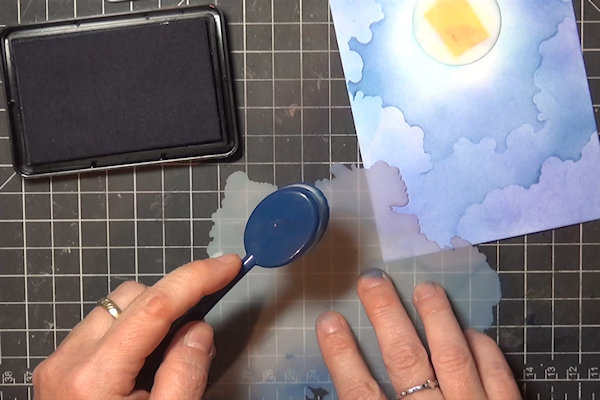
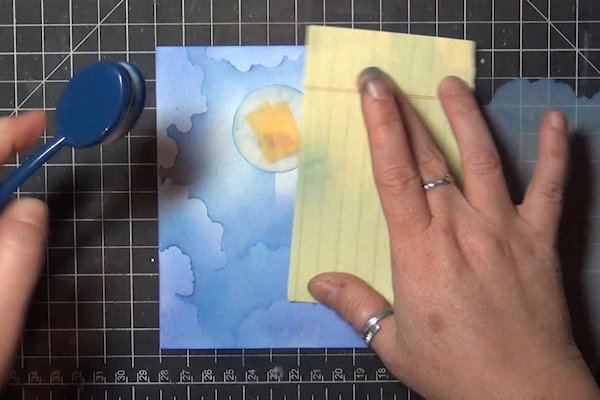
Step 3
Use the medium color ink to brush lightly against the edge of the cloud mask.
-
Continue around the panel to create a ring of clouds around the moon. Add more clouds to fill the space as needed.
-
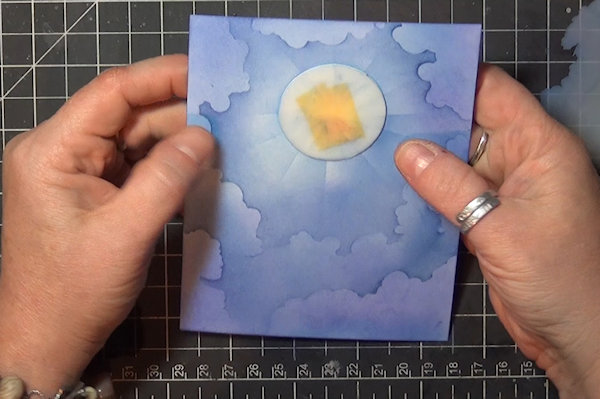
Step 4
Use a ray stencil to add some lightly brushed rays around the moon, OR use the straight edge of a piece of paper to create a ray effect. Align the paper across the center of the moon, and brush ink lightly across the edge.
-
Work around the moon, adding rays until you have the effect you want.
-
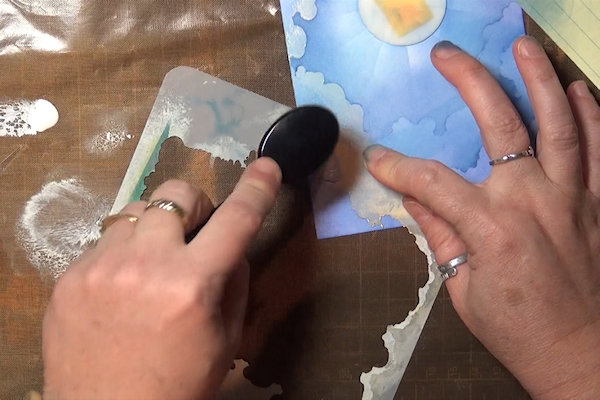
Step 5
If you have a stencil set with the negative piece, use it to highlight the edges of the clouds with white paint. A white colored pencil could also be used.
TIP:
If using a blending brush for paint, tap out most of the paint before lightly applying it along the edge of the stencil. -
-
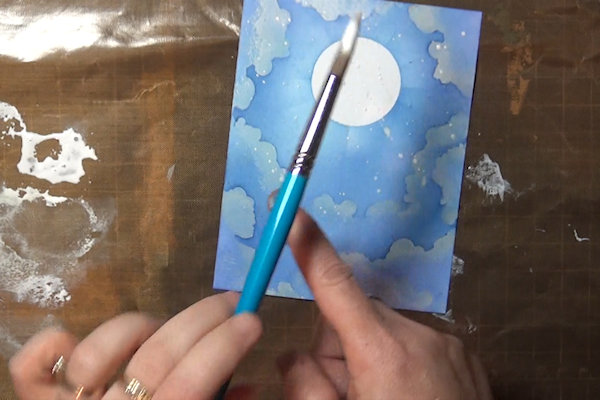
Step 6
Remove the moon mask. Dilute some of the white paint and splatter it onto the panel with a brush (roll the brush in the paint and tap the brush against your finger to create small droplets. Additional dots can be added by dipping the end of the paintbrush into the paint and dotting on the panel. Allow the paint to dry.
-
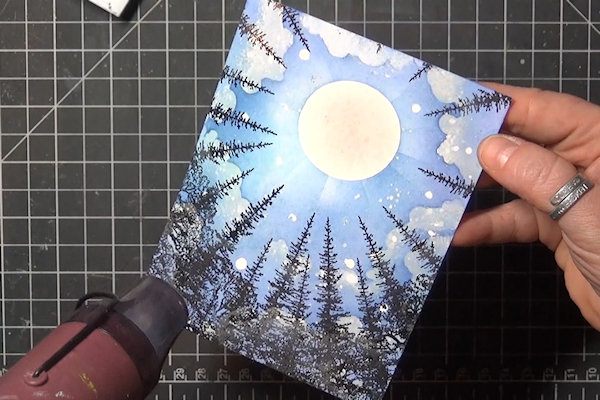
Step 7
Position a tree stamp at the bottom center of the card panel, pointing toward the moon. Ink and stamp with an ink that will dry over paint (solvent, hybrid, archival, Versafine).
-
Note the position of the moon in the stamp positioner. Try to keep it in the same place as you rotate the panel for the next stamp impression. Stamp around the edges of the panel until you have the fullness that you want in your forest.
TIP:
Place a magnet in the center of the moon – this makes it easy to rotate it in place. -
Step 8
Fill in toward the bottom of the panel with additional tree images if desired.
-
Step 9
The splattered paint should have created some raised spots on the moon. Brush with grey ink to highlight them and add some texture to the moon.
-
Step 10
Heat set the ink to dry, especially where it covers painted areas.
-
Step 11
Embellish and complete the project.


Video!

Your Turn
You've seen the tutorial, now you try it! We've got a section of the gallery set aside for Sky View Scene. Try this technique, then upload your artwork to the gallery. Show us your creations!
***Please note - Internet Explorer/Edge is not a supported browser, and will not allow you to see the videos. Please use Chrome, Firefox or Safari to view our tutorial videos.

Questions and Comments
We'd love to get your feedback or questions. Leave your comment below.
Those little tips: "If you don't have one of these, try this..." are much appreciated.
Page 1 of 1 pages