Shaving Cream Stenciling
by Lydia
Give an elegant mixed media look to a throwback background technique.
Supplies
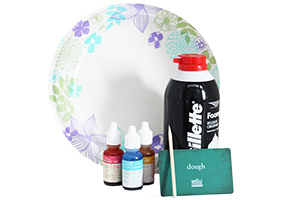
- Shaving cream (foam, not gel)
- An old gift card or plastic scraper
- Water-based dye reinkers
- Pointed stick
- White cardstock
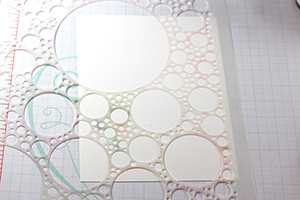
- Stencils
- Paper plates
- Paper towels
Step-by-Step
-
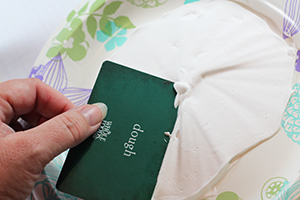
Step 1
Put a small amount of shaving cream on a paper plate and smooth it out with an old gift card.
-
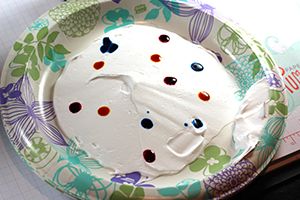
Step 2
Drop some harmonious colors of reinkers onto the surface of the shaving cream. I used primary colors here.
-
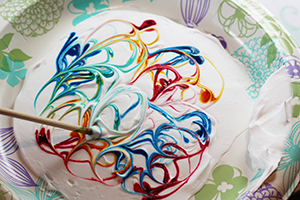
Step 3
Using a pointed stick, or a paperclip, swirl the reinker around until patterns form and the colors mix. Do not overmix, or it will become muddy.
-
Step 4
Place a stencil over a piece of white cardstock.
-
Step 5
Using the clean gift card, carefully lift some of the top layer of shaving cream, being careful to preserve the pattern you made.

-
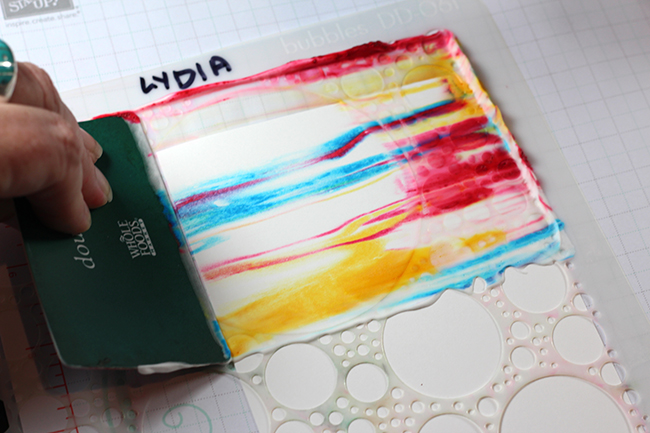
Step 6
Scrape the colored foam across your stencil. The fewer times you have to apply the shaving cream, the more of the pattern will be transferred. The more passes you make, the more you will transfer just color, not pattern. Clean your card and pick up more patterned cream as needed to keep it from muddying. Continue until all the open areas of the stencil have shaving cream.
-
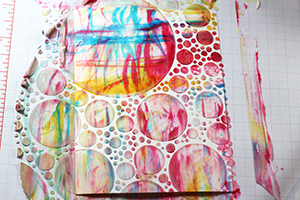
Step 7
Remove any excess foam from the stencil with a clean gift card, and then remove the stencil. Let this dry. Most of the foam will evaporate.
-
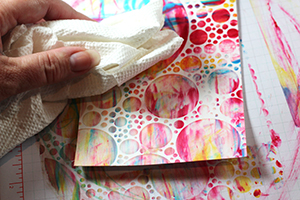
Step 8
When dry, burnish the paper with a paper towel to remove any foam residue - this will brighten your colors.
-
Step 9
If you don't have a stencil, use your dies and some stencil plastic or a transparency or packaging material to create one.

-
Step 10
Finish your card.

Video!
Your Turn
You've seen the tutorial, now you try it! We've got a section of the gallery set aside for Shaving Cream Stenciling. Try this technique, then upload your artwork to the gallery. Show us your creations!
***Please note - Internet Explorer/Edge is not a supported browser, and will not allow you to see the videos. Please use Chrome, Firefox or Safari to view our tutorial videos.

Questions and Comments
We'd love to get your feedback or questions. Leave your comment below.
Can hardly wait!
(((hugs)))
Page 1 of 1 pages