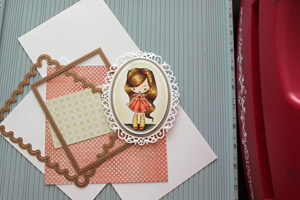
Shaped Card
by Beate Johns
Create a shaped card with dies.
Supplies
- Grand Calibur, or other die cutting machine
- Die templates (Grand Scalloped Rectangle Nestabilities used here)
- Cardstock
- Scor-Pal™ or other scoring tool
- Scor-Tape™ or other strong adhesive
- Patterned paper, stamps and embellishments to finish the card
Step-by-Step
-
Step 1
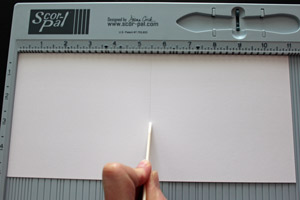
Decide which die template you want to use as your card base. Take a piece of cardstock that is wider then the width of the chosen die template and score it in half.
-
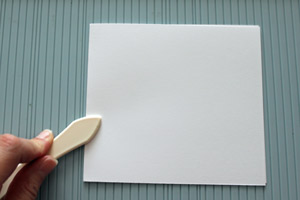
Fold the cardstock strip. This will be your card base.
-
Step 2
Line up your folded cardstock piece on your die template so that the folded side is slightly inside of the die template. This will ensure that you don't cut the hinge of the card base.
Cut and emboss the cardstock with your die cutting machine.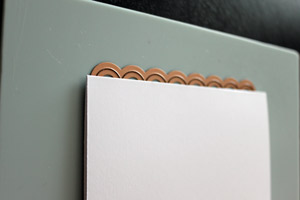
-
Step 3
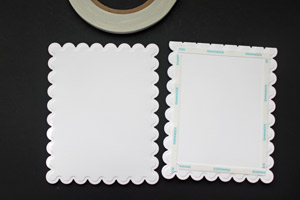
Take a piece of cardstock slightly bigger then the die template you used for the card base and cut and emboss this single piece.
This will be your card front.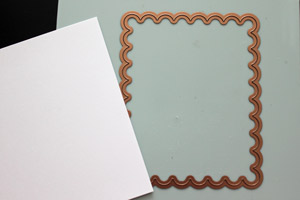
-
Step 4
Apply Scor-Tape™ to the card base.
-
Step 5
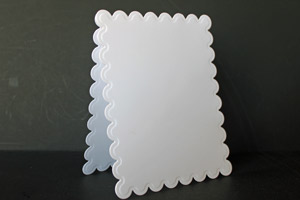
Line up your card front over your card base and adhere. The card front will hide the "hinge" the card base is showing.
-
Step 6
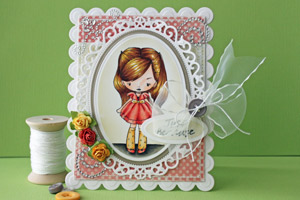
Finish your card.
 *
*
Questions and Comments
We'd love to get your feedback or questions. Leave your comment below.
have fun making this.
bise raymonde
Your tips about the HINGE is MOST helpful!
The oval frame around the image is the largest Floral Oval Nestabilities die.
You can purchase it directly from Spellbinders or you can find it in a lot of online stores. Just type it into google to find them.
Hugs and smiles
TFS!
Page 1 of 3 pages 1 2 3 >