Sanded Pencil Background
by Dina Kowal
Use water-soluble pencils, sandpaper and water to create a textured background.
Supplies
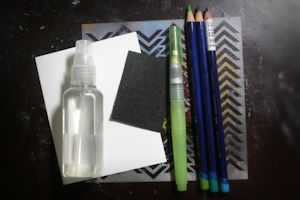
- Water-soluble pencils (Derwent Inktense Pencils used here)
- Watercolor paper, canvas or heavy cardstock
- Mister bottle
- Die template (Spellbinders® oval die used here)
- Water and brush, or Aquapainter
- Sandpaper, medium grit (100 grit used here)
- Waterproof stencil or mask with a fairly open design
Step-by-Step
-
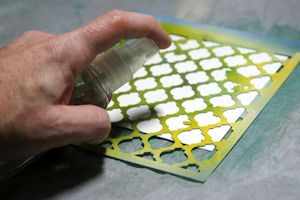
Step 1
Lay a stencil over watercolor paper or other heavy cardstock (110# or more) and secure it with removable tape. Mist water through the stencil openings, in one small section.
-
Step 2
Hold the sandpaper above the wet panel, with the sanding side angled down slightly. Lightly scrape the sandpaper with a sharpened water-soluble pencil or hard water-soluble block, allowing the pigment dust to fall through the stencil into the wet areas. Where the paper is wet, the pigment will stick and lightly bleed.
Note:
If dust is not falling, try sharpening your pencil, lightening pressure, tapping the paper, or moving to a different area of the sandpaper.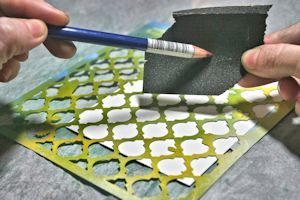
-
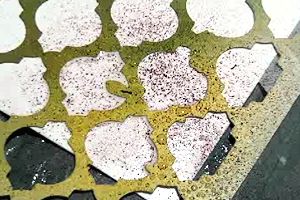
Spray with water and repeat this step as needed until all areas of the stencil are filled to your liking. Be aware that additional spritzing will further activate the pigment and cause it to bleed. To add more colors and prevent muddying, allow the panel to dry completely between applications.
-
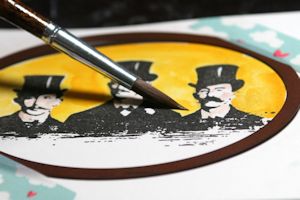
Step 3
This technique can also be used to add texture to a precolored image or background. Brush water just where you want to add texture. A die template can be used as a stencil to shape the background color. Work in one small area at a time.
-
Step 4
Hold the sandpaper as described above. Lightly scrape the sandpaper with a pencil or hard watersoluble block, allowing the dust to fall into the wet areas.
Touching a wet brush lightly into the wet areas will activate the color after it is added, for a more blended look.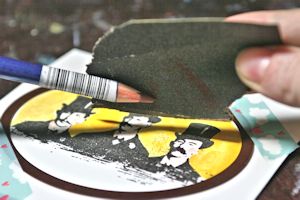
-
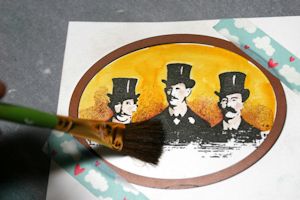
The pigment will only stick where there is water. Excess pigment dust can be blown away, or brushed off when the panel is dry.
-
Step 5
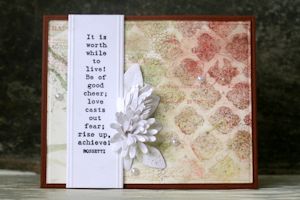
Use the completed pieces as layers or card elements.
-

Video!
Your Turn
You've seen the tutorial, now you try it! We've got a section of the gallery set aside for Sanded Pencil Background. Try this technique, then upload your artwork to the gallery. Show us your creations!
***Please note - Internet Explorer/Edge is not a supported browser, and will not allow you to see the videos. Please use Chrome, Firefox or Safari to view our tutorial videos.

Questions and Comments
We'd love to get your feedback or questions. Leave your comment below.
The crackle on the stenciled card is a stamp from Impression Obsession. It's one of the few stamps I never put away.
Thank you for the great tutorial, I am going to give it a try.
Thanks for sharing your beautiful creations!
Page 1 of 1 pages