Rolling Marble Background
by Beate Johns
Create a marbled background with reinkers and marbles.
Supplies
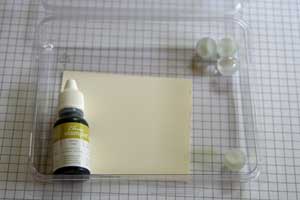
- Reinker
- Marbles
- Plastic box
- Cardstock
- Removable adhesive
Step-by-Step
-
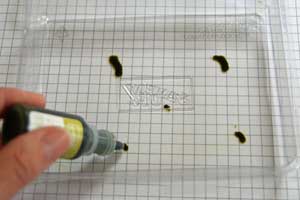
Step 1
Add several drops of reinker to a plastic box.
-
Step 2
Add several marbles to the plastic box and close the lid.
-
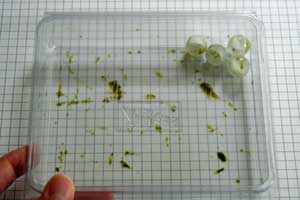
Step 3
Shake box sideways until the marbles are inked. The ink drops will be replaced by ink tracks in the box.

-
Step 4
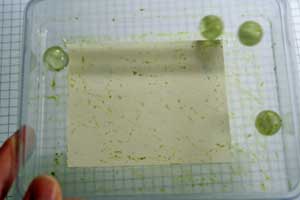
Place cardstock into the box (use removable adhesive if desired) and close the lid.
-
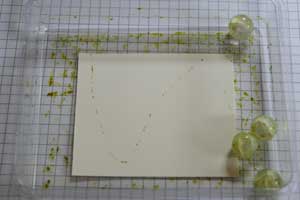
Step 5
Let marbles roll over the cardstock to create a pattern.
-
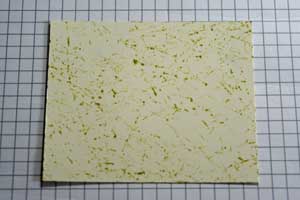
Step 6
Continue to roll the marbles over the cardstock until you like the look of the background.
-
Step 7
Finish your card.

Video!
Variations
Multi-color
After finishinig one color, clean out your plastic box and repeat the steps with another color of reinkers.
Not just for backgrounds
Stamp an outline image over the background you created and cut out the image.
Your Turn
You've seen the tutorial, now you try it! We've got a section of the gallery set aside for Rolling Marble Background. Try this technique, then upload your artwork to the gallery. Show us your creations!
***Please note - Internet Explorer/Edge is not a supported browser, and will not allow you to see the videos. Please use Chrome, Firefox or Safari to view our tutorial videos.
Questions and Comments
We'd love to get your feedback or questions. Leave your comment below.
if you have a technique please share with me.
Check our technique page in the resource section.
We have the Shaving Cream Tutorial listed there.
Hugs and smiles
Thanks!
This would be so pretty with a second color reinker after the first color has completely dried. This would make some really pretty fall background paper using a couple of the Earth Elements reinkers! Will have to try this!
Thanks for the reminder of a very easy, yet very neat, technique.
Go to our main resource page and type in reinker into the search engine. You will find several techniques that use reinker that way.
Hugs and smiles
Page 1 of 2 pages 1 2 >