Ribbon Dyeing
by Amy Rysavy
Custom dye ribbon or fibers to coordinate with your project.
Supplies

- White grosgrain ribbon
- Dye-based ink refill (Bashful Blue)
- Spray bottle filled with water
- Small container
- Gloves
- Paper towel
- Scissors
- Hairdryer
Step-by-Step
-
Step 1
Cut desired length of ribbon and wrap it around your fingers. 2 yards is a manageable amount.
Set aside.
-
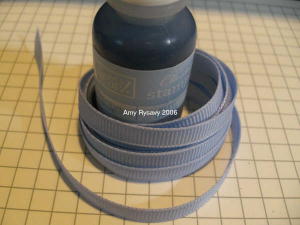
Step 2
Spray water into a small container. For this amount of ribbon, spray about 15 times.
It's best to start with a small amount and add more as needed.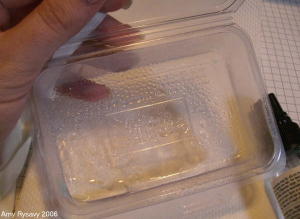
-
Step 3
Add about 10 drops of reinker. The mixture will be much darker than the finished product.
Note: If your ribbon dries lighter than expected, you can always re-dye using more reinker drops.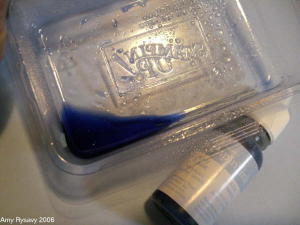
-
Step 4
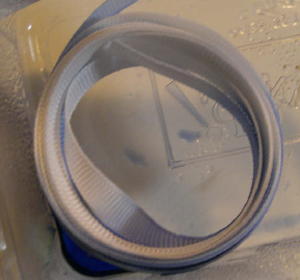
This is where things get messy. You will want to put your gloves on, then place the ribbon in the container.
-
Step 5
Press the ribbon into the mix until fully saturated.
Note: If the ribbon has absorbed all of the mixture, and is still white, pull the ribbon out and add more water and reinker. Then replace the ribbon and repeat this step.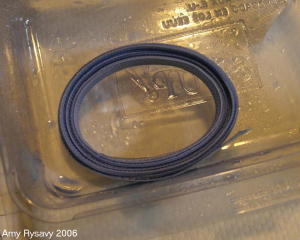
-
Step 6
Remove the ribbon and place it on a paper towel to absorb any excess moisture.
-
Step 7
Unwind the ribbon and blot with the paper towel to speed the drying process.
To heat set the dye and finish drying the ribbon, use a hairdryer on a high heat setting. It will only take a minute or two.
If you hold the ribbon in your hand during this step, keep the hairdryer moving constantly to avoid burns.
Note: If you're dyeing a small [say 6 inches] amount of ribbon, you can use a heat tool for this step. Be sure to hold the ribbon with tweezers to avoid burning your fingers!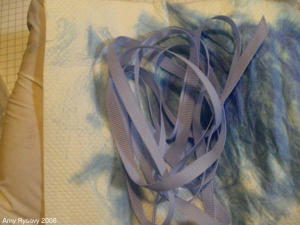
-
Step 8
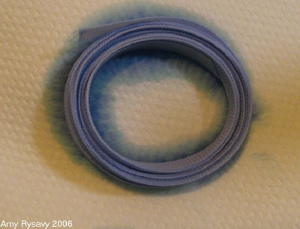
Custom dyed ribbon.
-
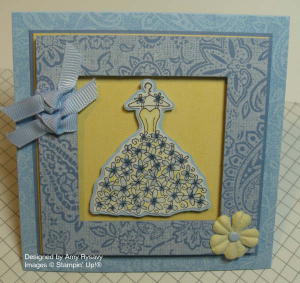
Step 9
Finished project.
Variations
Alternative Methods
Other common methods for coloring ribbon include sponging ink onto grosgrain, using a marker, or pressing it into an ink pad. These all work, but don't seem to hold their color as well as the re-inker/water method. Six months after dyeing, I have ribbon that hasn't faded a bit!
Your Turn
You've seen the tutorial, now you try it! We've got a section of the gallery set aside for Ribbon Dyeing. Try this technique, then upload your artwork to the gallery. Show us your creations!
***Please note - Internet Explorer/Edge is not a supported browser, and will not allow you to see the videos. Please use Chrome, Firefox or Safari to view our tutorial videos.

 *
*
Questions and Comments
We'd love to get your feedback or questions. Leave your comment below.
this is the tutorial i needed today!!
I have a question...i grosgrain ribbon the only one you should attempt to dye.
i have some white organza that i need to turn into another color.
thanks again for sharing
Page 1 of 1 pages