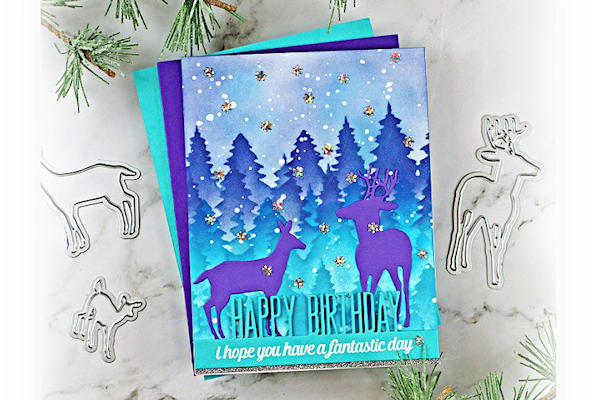
Repeat Stenciled Scene
by Sandi MacIver
Layer repeated scenic elements to create depth.
Supplies
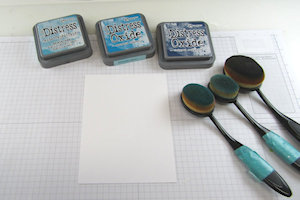
- Blending inks (Ranger Distress Oxide Inks in Broken China, Mermaid Lagoon, and Chipped Sapphire used here)
- Cardstock
- Scenic stencil (Picket Fence Studios Slim Line Double Tree Line Stencil used here)
- Blending brushes or other tools
- Repositionable tape or spray
- White acrylic paint
- Paintbrush and water
- Other supplies as needed to complete the project (used here: Picket Fence Studios Word Topper Dies Subtitles stamp set, VersaMark ink, Heat Tool, Anti-static pouch, White Embossing Powder, Die cutting machine, Picket Fence Studios Dies: Happy birthday Word Topper Die, Deer Family Dies, Starry Skies Sequins from Picket Fence Studios, Bearly Art Glue, Tape Runner, Embellishment Wand, MISTI Stamping Tool)
Step-by-Step
-
Step 1
Attach the card front to a protected work surface for the ink blending. Choose 2-3 analogous colored inks.
-
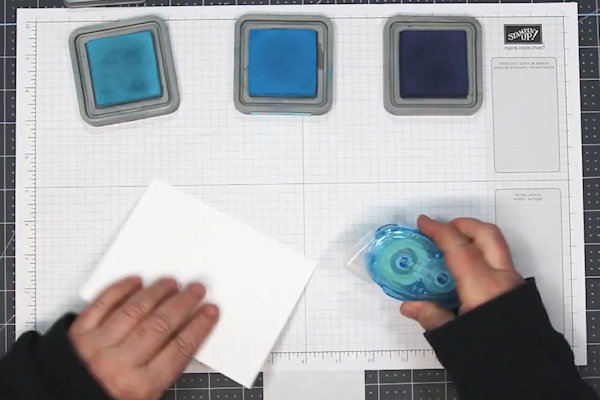
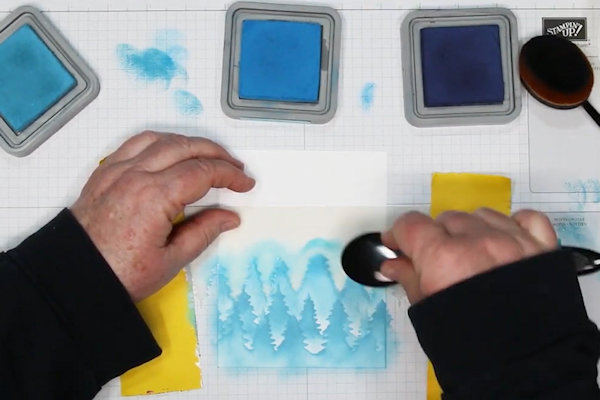
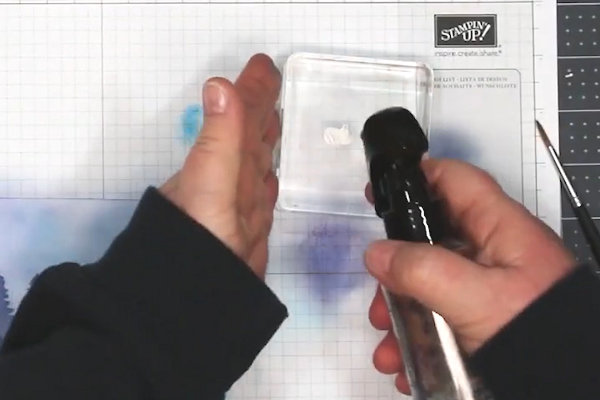
Step 2
Add the stencil and secure it with post it tape. Use a brush or other blending tool to start blending your lightest ink at the bottom of the card front.
NOTE:
Do not worry about the ink being even, because you will be adding multiple layers. -
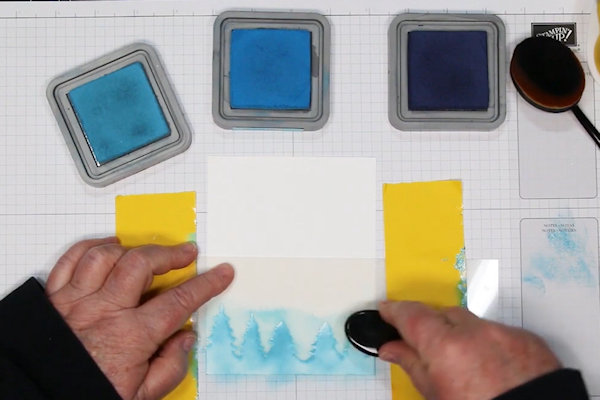
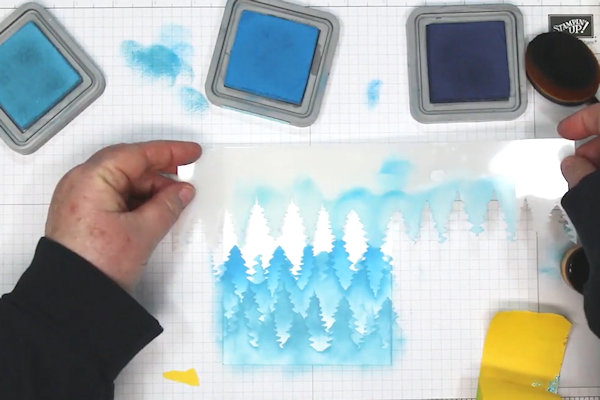
Step 3
Shift the stencil up and over to stagger the design. Ink again.
-
Repeat with a third row. At the top of the stencil, blend in the medium color.
-
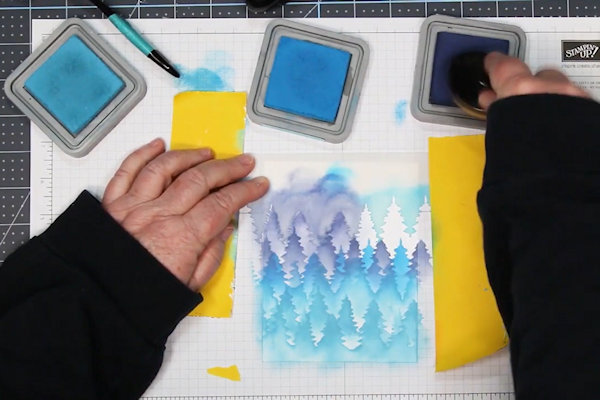
Step 4
Continue upward, adding layers with the medium color…
-
and finally, add a few rows with the darkest color.
-
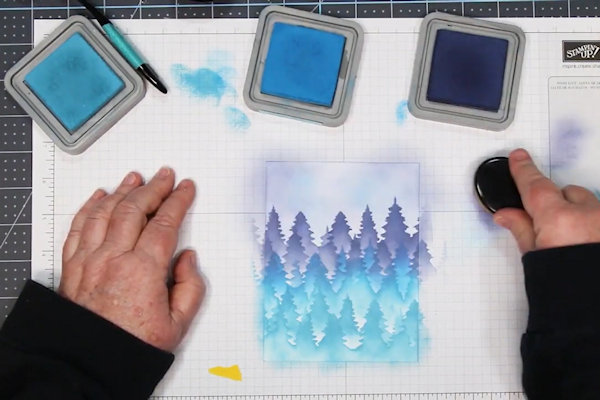
Step 5
Blend the ink remaining in the brushes into the sky and other light areas.
-
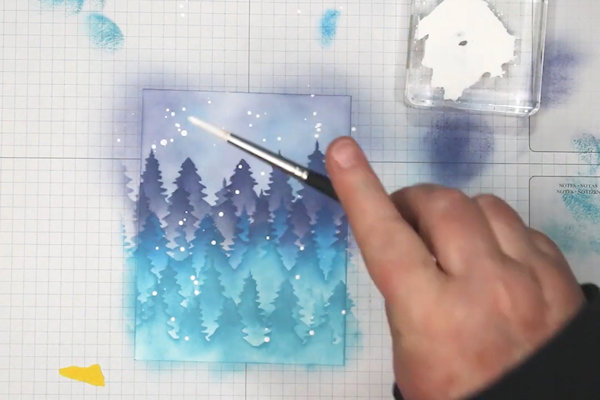
Step 6
Dilute a little white acrylic paint with water.
-
Pick up the watery paint with a brush and tap the brush to splatter the paint onto the scene.
TIP:
Use different sized brushes for different splatter sizes/patterns. -
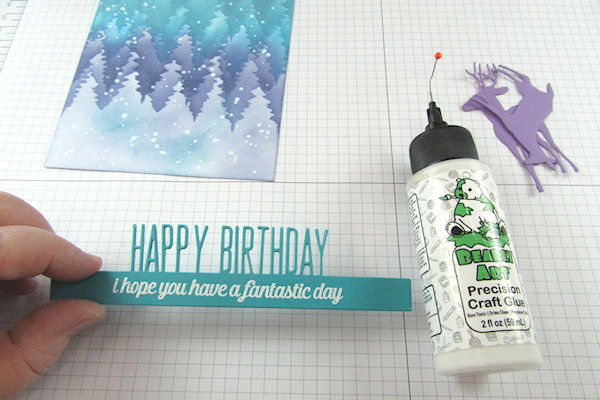
Step 7
Embellish the card as desired.
-
Step 8
Complete the project.

Video!
Your Turn
You've seen the tutorial, now you try it! We've got a section of the gallery set aside for Repeat Stenciled Scene. Try this technique, then upload your artwork to the gallery. Show us your creations!
***Please note - Internet Explorer/Edge is not a supported browser, and will not allow you to see the videos. Please use Chrome, Firefox or Safari to view our tutorial videos.

Questions and Comments
We'd love to get your feedback or questions. Leave your comment below.
Page 1 of 1 pages