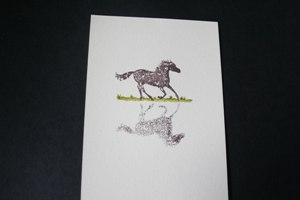
Reflection Technique
by Beate Johns
Use a piece of Acetate to create a reflection.
Supplies
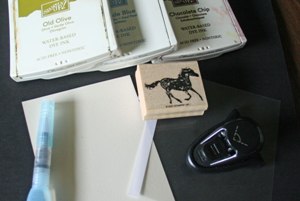
- Stamps
- Ink
- Cardstock
- Piece of Acetate
Step-by-Step
-
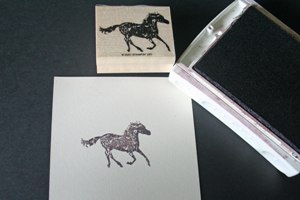
Step 1
Ink your image and stamp it on cardstock.
-
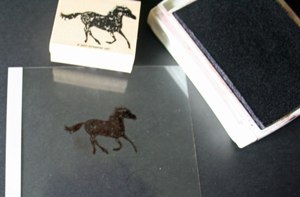
Step 2
Ink your image with the same ink and stamp it on your piece of acetate.
-
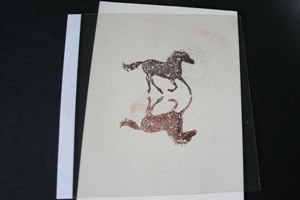
Step 3
Flip your piece of acetate over so your stamped image is facing down. Line it up with your first image to create your reflection. Place acetate on cardstock.
-
Step 4
Rub over your acetate. It will transfer the image from the acetate to your cardstock.

-
Step 5
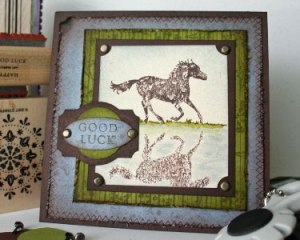
Doodle or paint ground underneath your image.
-
Step 6
Add water or ice looking background around your reflected image.

-
Step 7
Finish your card.
Video!
Variations
-
Stamp on a stamp
Use a solid shape stamp instead of acetate, and transfer your image by first stamping your image right on to the solid shape stamp, then to your paper.
Try a brayer
Use your clean, dry brayer (instead of acetate), to pick up an image off your stamp and then transfer it to paper.
Mirror images
Use this same technique to create a side-by-side "mirrored" image instead of a reflection effect.
Your Turn
You've seen the tutorial, now you try it! We've got a section of the gallery set aside for Reflection Technique. Try this technique, then upload your artwork to the gallery. Show us your creations!
***Please note - Internet Explorer/Edge is not a supported browser, and will not allow you to see the videos. Please use Chrome, Firefox or Safari to view our tutorial videos.
Questions and Comments
We'd love to get your feedback or questions. Leave your comment below.
regards jen
Nancy
It's fun just to play around & see what we can come up with! Keep having fun & thanks for sharing! Bonnie Deibel
Acetate is a piece of clear plastic like Transparency sheets.
Check the comments above for alternate materials like using Vellum or freezer paper.
Hugs and smiles
Beate
I always used a rubber block, I wont now this technique is better.
Thank you
lots of Stamping Hugs
Debbra Hector (Aust.)
I just love the Easy Stamp Press when I am stamping with acrylic or cling back stamps. So easy to use and to know just exactly where you are stamping.
Thanks! Julie
I just added a bit of blue ink with my Aqua Painter underneath the grass. You can also use a watercolor brush. Really easy. I even left it streaky so it would look like ripples in the water.
Hugs and smiles
You do such a great job what would we do without you. many years ago back in 1995 they had a stamp called a reversing stamp that was how we did the mirrow images, this is much easier.
I loved your tutorial but I am wondering what stamp pad did you use? I have tried this technique before unsuccessfully. I would appreciate your advice.
Joanne
I think I used Stampin' Up!'s Chocolate Chip classic ink. It's been a while, but I can see the ink pad in the supply image.
Page 1 of 2 pages 1 2 >