Recessed Window

by Lynn Mercurio

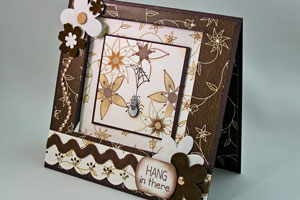
Create a beautiful recessed window for your main image.

Supplies
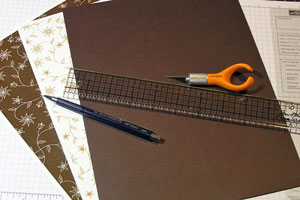
  • One piece of 5 1/4" x 10 1/2" cardstock, folded in half

  • Ruler

  • Pencil

  • Craft Knife

  • Bone Folder and/or other scoring tool

  • Patterned Paper

  • Adhesive Permanent and repositionable

  • Supplies to finish your card

Step-by-Step

  1. Step 1

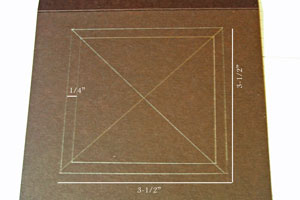
    Use a ruler to measure an outside square 3 1/2" x 3 1/2" on your card front. Trace lightly with a pencil.

    Measure in 1/4" and trace another square within the first square. As a last step, trace an "X" from outside corner to outside corner.

    Note:
    Here, the window was placed slightly higher than center to allow ample room at the bottom for the sentiment. Placement of the window depends on your final design.
  2. Step 2

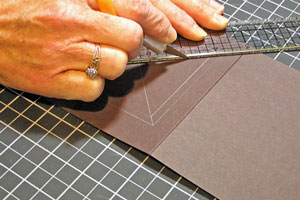
    Using a craft knife and ruler, cut from outside corner to outside corner, creating an "X" opening.
  3. Step 3

    Using a scoring tool, to score both the inside and outside squares.
  4. Step 4

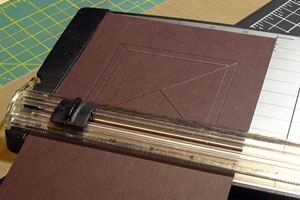
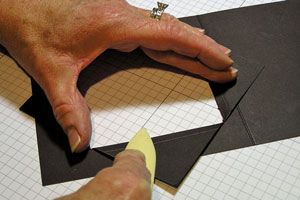
    Turn your project over, and use a bone folder to burnish the "X" outward using the outer scored lines.
  5. Step 5

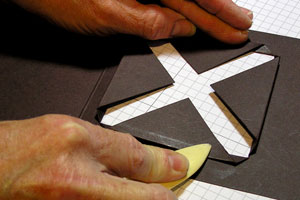
    Burnish the X inward using the inner scored lines.
  6. Step 6

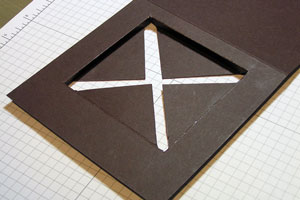
    Turn your project over to the front - it should look like this.
  7. Step 7

    (Skip to Step 14 if you aren't covering the front of your project with patterned paper.)

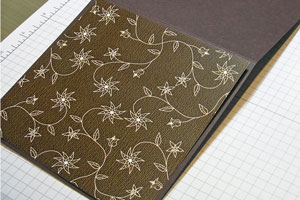
    Trim patterned paper a bit smaller than the front of your card ( here, 5" x 5") and use repositionable adhesive to secure it to the front.

    Note:
    If you don’t have repositionable adhesive or tape, take a piece of regular tape and rub it on your clothes to remove some of the stickiness. Make a loop and use this as your repositionable adhesive.
  8. Step 8

    Flip the project over and use a pencil to trace around the square on the backside of the patterned paper.

    Remove from the front of your card after tracing
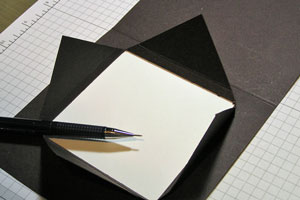
  9. Step 9

    Cut out your square from patterned paper as shown.
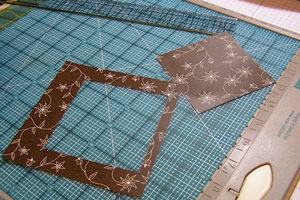
  10. Step 10

    Adhere patterned paper to the front of the project with permanent adhesive.
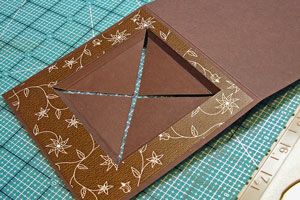
  11. Step 11

    Using the square removed from the patterned paper as your guide, cut TWO pieces of complimentary paper to use for the background of therecessed window and for the backside of the window (on the inside of your card).
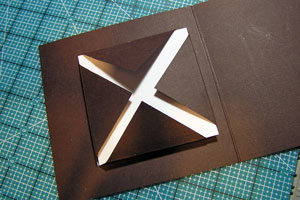
  12. Step 12

    Apply permanent adhesive to the four flaps and press background paper into place.
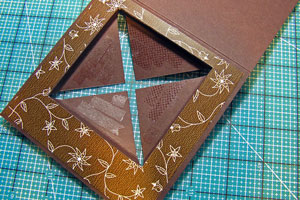
  13. Step 13

    Your project should look like this from the inside of the card.
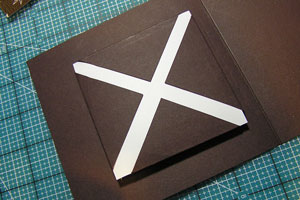
  14. Step 14

    Apply the second piece of complimentary paper from Step 11 to the backside of the recessed window.
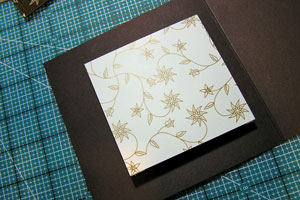
  15. Step 15

    Add a focal image and embellish as desired.
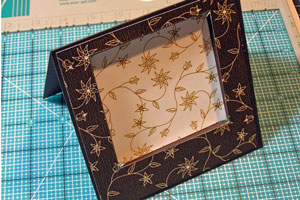
  16. Step 16

    Finished card.

    NOTE:
    The finished card measures 5-1/4" X 5-1/4" and, because of its recessed window, will require special packaging if you intend to mail it. The best way to mail would be to package in an acrylic box or something similar with tissue paper placed around the inside of the card around the recessed window to prevent it being crushed. Better yet, hand-deliver your gift to a friend or family.
Video!

Your Turn

You've seen the tutorial, now you try it! We've got a section of the gallery set aside for Recessed Window. Try this technique, then upload your artwork to the gallery. Show us your creations!

***Please note - Internet Explorer/Edge is not a supported browser, and will not allow you to see the videos. Please use Chrome, Firefox or Safari to view our tutorial videos.

Questions and Comments

We'd love to get your feedback or questions. Leave your comment below.

Thank you for sharing... great technique and beautiful cards !!
Susie  |  Wed Aug 12, 2009 at 7:20 AM
Wow..stunning card! I love the dimension! Thank you so much for sharing your detailed instructional video. I can't wait to try it!
Vina  |  Wed Aug 12, 2009 at 7:26 AM
Hi Lynn, this is fantastic! Your instructional video is very informative! Thank you so much for sharing and I'm off to try and make one myself! smile

{{{HUGS}}} Sue
Sue @ McMahon Five Designs  |  Wed Aug 12, 2009 at 7:29 AM
Wow, Beate, this was great! So clear and helpful...it was so nice to have the video and hear you! Thanks for sharing this wonderful tutorial...you are amazing!
CherylQuilts  |  Wed Aug 12, 2009 at 7:49 AM
Hi Lynn, your card is wonderful and what a great instructional video. Thank you for sharing. Have a great day!!!
Eunice  |  Wed Aug 12, 2009 at 7:55 AM
Thanks so much Beate,
I've never seen this done and I love it!
Peg Smith  |  Wed Aug 12, 2009 at 8:13 AM
That is awesome! So versatil. It could easily be used as a picture frame, a tiny shadow box what ever. Thank you so much for sharing!
I can't wait to make one of these
Wendi  |  Wed Aug 12, 2009 at 8:26 AM
Wonderful tutorial...you made it look so easy. Your card was beautiful!
Nitabug  |  Wed Aug 12, 2009 at 8:33 AM
I cannot believe how easy it seems to create this window card. It is beautiful, thank you Beaty.
Martha.
Martha  |  Wed Aug 12, 2009 at 8:53 AM
Thanks for another great tutorial. I love the written picture instructions and the video - reviewing both of them, I feel better about trying it!
Adriana  |  Wed Aug 12, 2009 at 9:07 AM
i used to make cards when i lived in the uk just the run of the mill type and 3d which i cant seem to buy here,but this is fantastic to have a vidio to follow and amost beautiful card i just love it , thank you
Sheila Bawden  |  Wed Aug 12, 2009 at 9:14 AM
Thanks for the great tutorial. Can't wait to get home to make it. I saw that you used an omnigrid ruler to make your cuts. I quilt so I have them in all diffrent sizes but I find they are also great for making cards. grin
Kendria  |  Wed Aug 12, 2009 at 9:23 AM
Thank you so much for the additional video tutorial - it helped me so much to understand how to make this amazing card! I as so excited to get started on making this!
Kelly  |  Wed Aug 12, 2009 at 10:12 AM
Great video display - I love how it looks like you are creating on a professional drafting table on a slant....but yet the cards don't fall down to the floor! How is that? Great exposure of all angles of the card design (kudos to camera person too)...Thanks Beate and SCS!
Susanne527  |  Wed Aug 12, 2009 at 10:27 AM
Outstanding instructional video. Being a novice at stamping and making cards, I feel like after watching it a couple of times I can make a card. Way to go SCS - video help us a bunch.
Thanks so much.
Bonnie  |  Wed Aug 12, 2009 at 11:12 AM
Loved the video and gave the technique a try. You can see my creation here - http://zacksnanaat.blogspot.com/2009/08/scs-weekly-inkling-thinking-of-you.html

Thanks for the inspiration.
Betty aka ZacksNana  |  Wed Aug 12, 2009 at 11:26 AM
wow, thanks for a wonderful design, i'm off to try it out now. many thanks. Lenore x
Lenore Woodfield  |  Wed Aug 12, 2009 at 12:52 PM
Awesome job of your video. Without it I would not have tried the card. Now I am excited to do it. So kind of you.
Marilyn  |  Wed Aug 12, 2009 at 2:26 PM
Does your creativity have an end? I could watch your YouTube videos all the time. You do such a great job of leading me in the correct directions!

Thanks Beate!
Deebi
Deebi27  |  Wed Aug 12, 2009 at 2:47 PM
Thank you so much for this awesome tutorial! I can't wait to make one of these fabulous cards!
Danielle  |  Wed Aug 12, 2009 at 2:51 PM

Page 1 of 3 pages  1 2 3 >

You need to be logged in to comment

GET OUR NEWSLETTER


Splitcoaststampers's privacy policy