Quilling
by Lydia Fiedler
Learn the basic techniques of paper quilling.
Supplies
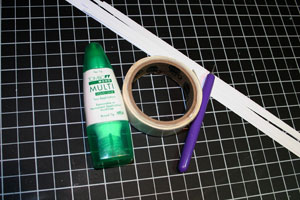
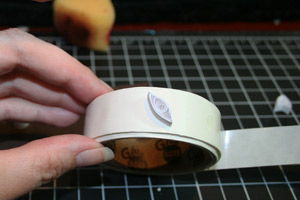
- Quilling tool (Quilled Creations tool used here)
- 1/4" x 11" strips of quilling paper or copy paper
- Mini glue dots
- Liquid glue
- Cardstock and embellishments
Step-by-Step
-
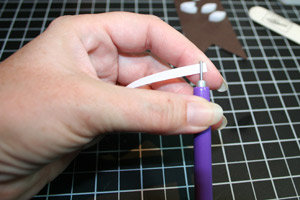
Step 1
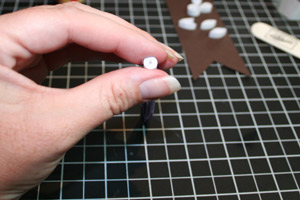
Insert one end of the copy paper or quilling paper into the slot in the quilling tool.
-
Step 2
Slide the tool as close to the end of the paper strip as possible and begin rolling the paper around the tool.
-
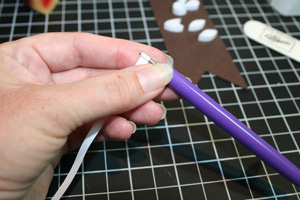
Step 3
Keep pressure on the coil of paper while rolling it to keep the coil tight and even.
-
Step 4
When you come to the end of the paper strip, keep pressure on the coil.
-
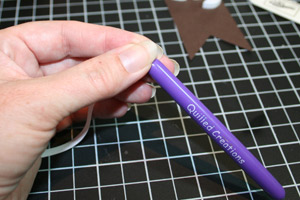
Step 5
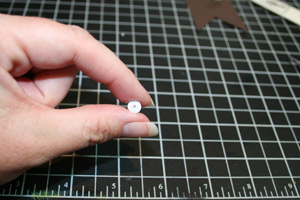
Gently slide the coil off the quilling tool, keeping pressure on the paper.
-
Step 6
Relax your grip a bit to let the coil expand to the size you want.
-
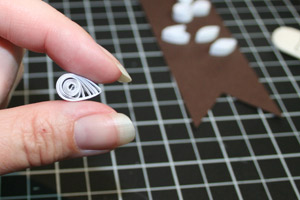
Step 7
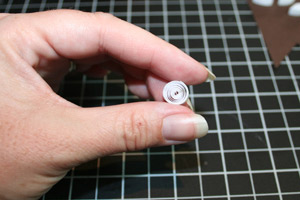
Where the cut tail of the paper is, pinch the shape to form a point. Adjust the "eye" of the coil to the desired position before crimping a point into the paper. Be sure the tail lines up with the point.
-
Step 8
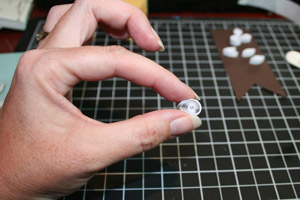
This is what your quilled petal will look like before you glue the tail down.

-
Step 9
Add a little liquid glue to the tail and glue it to the quilled shape, lining up the edges carefully.
-
Step 10
Pick up a mini glue dot with the "eye" portion of the the quilled shape.
-
Step 11
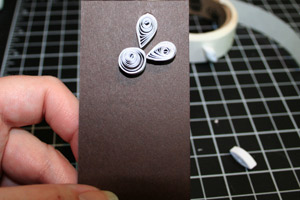
Adhere the quilled shape to cardstock.
-
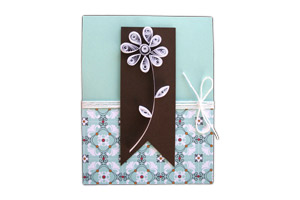
Step 12
Use the quilled shape on a completed card.
Video!
Your Turn
You've seen the tutorial, now you try it! We've got a section of the gallery set aside for Quilling. Try this technique, then upload your artwork to the gallery. Show us your creations!
***Please note - Internet Explorer/Edge is not a supported browser, and will not allow you to see the videos. Please use Chrome, Firefox or Safari to view our tutorial videos.

Questions and Comments
We'd love to get your feedback or questions. Leave your comment below.
How do you attach the stem to the paper without telltale glue marks? Did you use the liquid glue there, and how do you make sure the surrounding area stays clean?
@SanFransister - I put a dot of glue on the top of the stem piece and attached to the left side of that flower petal it's next to. Then I just positioned the bottom part by where I put the leaves! Thank you!
I also use craft glue on the free end of the paper, but make the point of attachment, when it is dry, the end of the petal so it is not so visible.
I would love to see more quilled cards.
Quilling is a technique I have just rediscovered. first time round I didn't enjoy it but now years later I am loving quilling.
Page 1 of 1 pages