Quilled Pumpkin Card
by Debbie Henderson
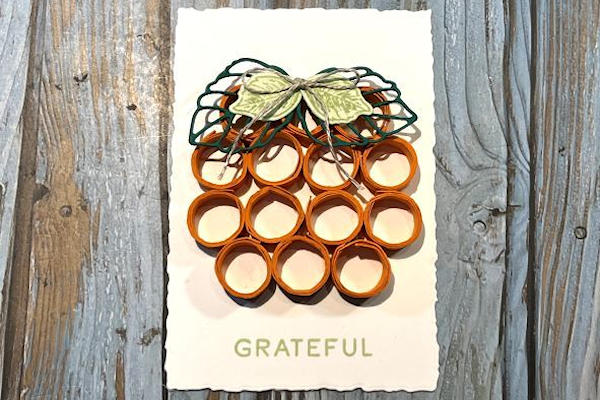
Make a focal pumpkin with rolled paper strips.

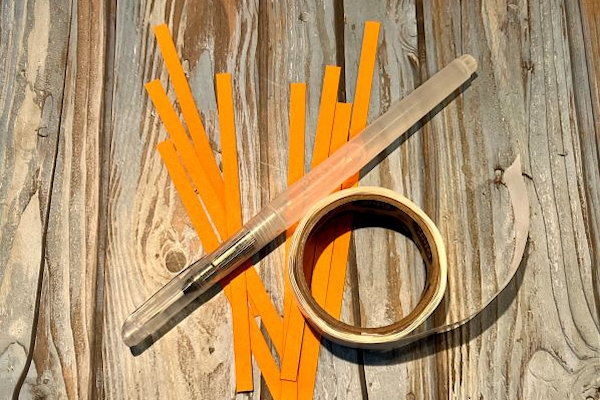
Supplies

- Cardstock (Stampin' Up!® Pumpkin Pie, Soft Sea Foam, Shaded Spruce, Basic White cardstock used here)
- Half-inch roller (SU Water Painter used here, a dowel, pen, or other handled tool would also work)
- Adhesive (glue dots and liquid glue used here)
- Other supplies as needed to complete the project (SU products used here: Celebrate Sunflowers Bundle and Painted Pheasant stamp sets, Soft Sea Foam ink, Butterfly Kisses DSP, Linen Thread, Evening Evergreen Windowpane Check Ribbon, Deckled Rectangles Dies, Sunflowers Dies, Stampin’ Dimensionals)
Step-by-Step
-
Step 1
Cut the pieces needed for the card:
Card base 11” x 4 1/4” scored and folded at 5 1/2”
14 pumpkin strips 5 1/2” x 1/4”
Layering panels, 5 1/4” x 4” and 4 1/4” x 3” here
Die cut leaves
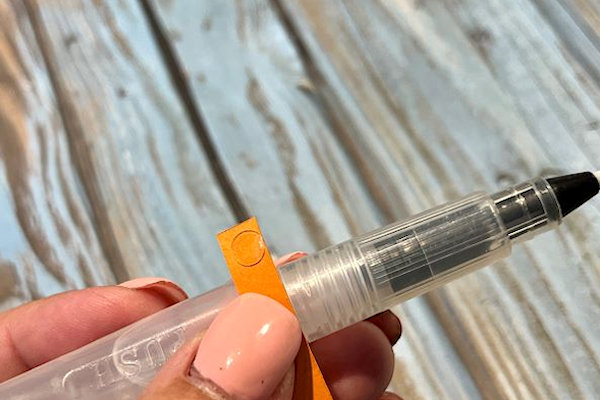
To create the pumpkin pieces you will need the fourteen strips of cardstock, Water Painter and Mini Glue Dots.
-
Add a Mini Glue Dot to one end of the first strip.
-
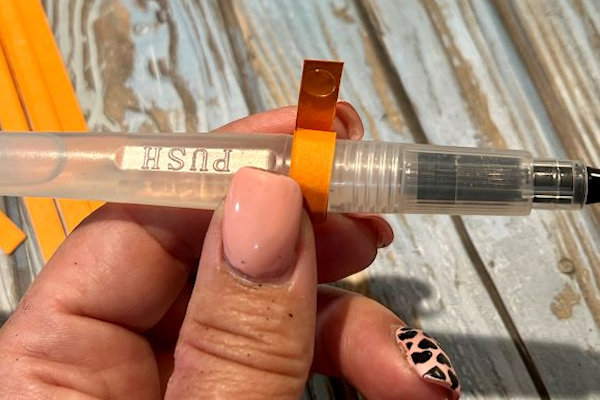
Step 2
Place the end with the Mini Glue Dot facing you and wrap around the Water Painter or something similar to create a circular shape.
-
Add a Mini Glue Dot to the end and press in place. Slide the ring off of the form.
-
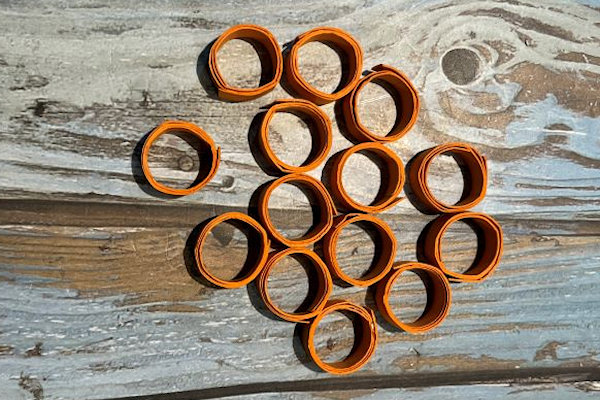
Step 3
Repeat until you have 14 cardstock rings.
-
Step 4
Stamp a sentiment on the pumpkin panel if desired. Add liquid glue to one side of each cardstock ring and glue to the white layer in the shape of a pumpkin starting with the bottom layer with 3 across. Above that glue 2 rows of 4 cardstock rings and the top layer with 3 cardstock rings.
-
Step 5
Complete the pumpkin with leaves and a stem. Add a bow if desired. The stem here is made with a small cut of ribbon.
-
Step 6
Assemble and complete the card.


Video!
Your Turn
You've seen the tutorial, now you try it! We've got a section of the gallery set aside for Quilled Pumpkin Card. Try this technique, then upload your artwork to the gallery. Show us your creations!
***Please note - Internet Explorer/Edge is not a supported browser, and will not allow you to see the videos. Please use Chrome, Firefox or Safari to view our tutorial videos.

Questions and Comments
We'd love to get your feedback or questions. Leave your comment below.
Page 1 of 1 pages