Pumpkin Patch Peeps

by Anna-Marie Still

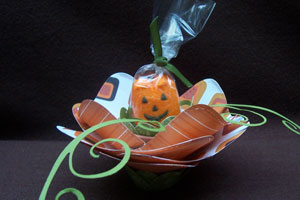
Create an adorable treat holder or place setting for any occasion using Peeps.

Supplies
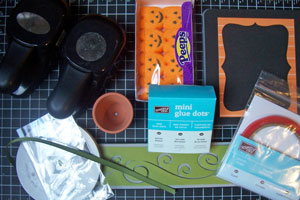
  • Big Shot™, or other die cut machine
  • Top Note Die
  • Swirls Die
  • Small Terra Cotta Pot
  • 1 3/8" Circle Punch
  • Large Oval Punch
  • Peeps
  • Cardstock
  • Patterned Paper
  • Glue Dots
  • Sticky Strip™, or other strong adhesive
  • Small Cellophane Bag

Step-by-Step

  1. Step 1

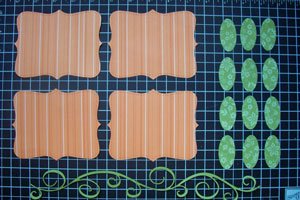
    Using a Big Shot™, cut four Top Note Die shapes and one Swirl shape out of out of patterned paper.

    Punch twelve ovals out of pattterned paper with a large oval punch.
  2. Step 2

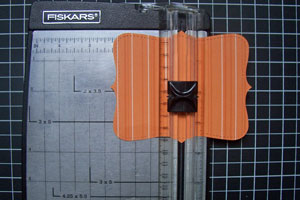
    Score each Top Note in half as shown.
  3. Step 3

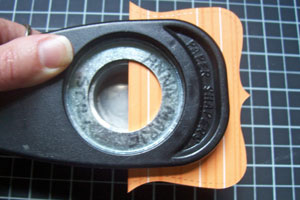
    Use 1 3/8" circle punch to punch a circle from the middle of each Top Note diecut as shown.
  4. Step 4

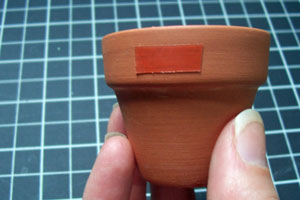
    Place a small bit of Sticky Strip™ on either side of the pot.
  5. Step 5

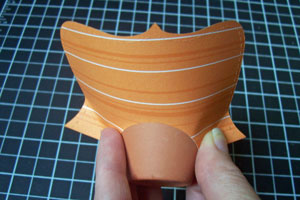
    Place the pot in the hole.

  6. Step 6

    Slide it up to the rim of the pot and pinch sides together simultaneously to keep it even.
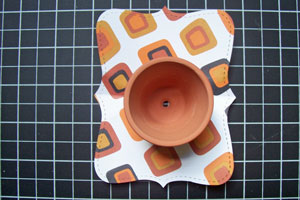
  7. Top View

  8. Step 7

    Use Mini Glue Dots to pin back the flaps. The Sticky Strip™ on the pot "lives" under these seams.
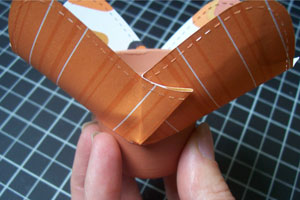
  9. Step 8

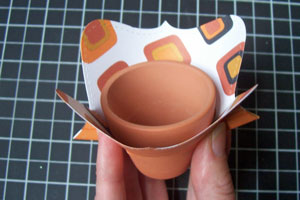
    Repeat with the remaining the Top Note diecuts, alternating the patterns and placement of each diecut to create a petal-like layered effect.
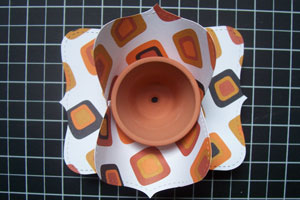
  10. Step 9

    Be sure to pull each layer up as high as it will go...
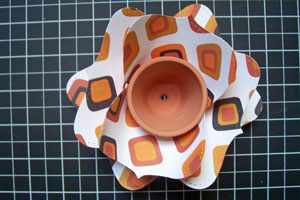
  11. Step 10

    …and make it as tight as possible.
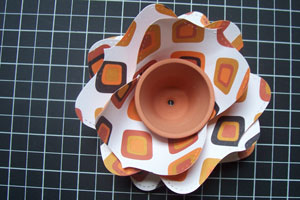
  12. Step 11

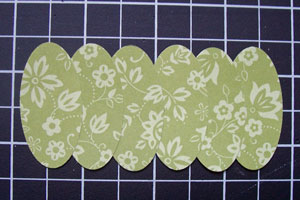
    Using a little adhesive to attach six of the ovals together as shown.
  13. Step 12

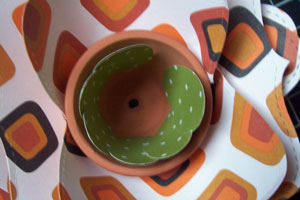
    Place in the pot as shown.

    Hint:
    If there is a gap, just add a seventh oval.
  14. Step 13

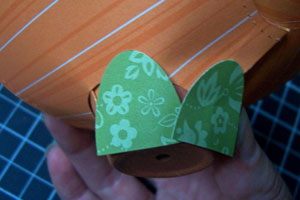
    Cut remaining ovals in half and use mini glue dots to attach to the base of the pot.
  15. Step 14

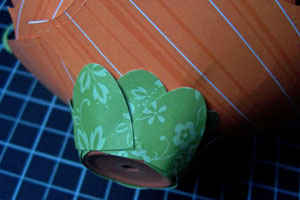
    Continue adhering half ovals around the base, going around twice to cover.
  16. Step 15

    Put a peep in a small cello bag and tie with ribbon. Use a pop-up glue dot to secure the bag to the bottom of the pot, and embellish with the diecut swirl.

    Hint:
    It is a bit tricky to get the Peep in the bag because when you separate the Peeps, their sides are marshmallow-y sticky! You have to hold the bag open enough so it doesn't stick to the edges, leaving the top of the bag sticky with white goo or tap the sticky sides in white granulated or confectioner's sugar first.
Video!

Variations

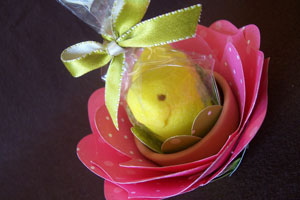
  1. Change the patterned paper to create a whole different look for a different occasion.
Your Turn

You've seen the tutorial, now you try it! We've got a section of the gallery set aside for Pumpkin Patch Peeps. Try this technique, then upload your artwork to the gallery. Show us your creations!

***Please note - Internet Explorer/Edge is not a supported browser, and will not allow you to see the videos. Please use Chrome, Firefox or Safari to view our tutorial videos.

Questions and Comments

We'd love to get your feedback or questions. Leave your comment below.

This is absolutely CUTE!! LOL I LOVE IT!! smile

Could you tell me the approximate dimensions of the Terra Cotta pot you used, so I know what to look for when I stop at Wal-Mart?

Thanks!!
Judy  |  Wed Oct 14, 2009 at 8:32 AM
Sure Judy! I bought the smallest terra cotta pots they had at AC Moore they are referred to as- 1-1/2", however, the bottom is 1" and the top is 1-7/8 from side to side.

Hope that helps! Have fun!
Anna-Marie Still  |  Wed Oct 14, 2009 at 8:56 AM
Awesome!!!!!
Mary Sue  |  Wed Oct 14, 2009 at 9:39 AM
Please send these split coast to my new e-mail and delete my old e-mail.

New: [email protected]

Old: [email protected]
Ellen Mills  |  Wed Oct 14, 2009 at 9:51 AM
I love this, am going to try it today. Thanks for sharing
Sherrye  |  Wed Oct 14, 2009 at 10:09 AM
Love this, but I don't have a top note die---is there a nestability shape that is similar in dimensions. Could someone post the dimension of the top note die for me :o) Thanks for such a great project!

hugz,
Suzanne
Suzanne J Dean  |  Wed Oct 14, 2009 at 10:15 AM
This is terrific I just hope they sell peeps in Canada like those. I think we only get them at Easter. I'll be checking everywhere.
lisa  |  Wed Oct 14, 2009 at 10:26 AM
Here's a hint for the sticky spots on Peeps: I pull them apart and then dip the sticky connection areas in sugar. I use the same color if I have it and if I don't, I just use white sugar. Afterall, the sides are going to be white if you don't dip them at all, right?!?! I seldom have problems bagging peeps after I have done this!!
Lauri
Auntielauri  |  Wed Oct 14, 2009 at 10:57 AM
Suzanne - the Top Note measures approx. 3-3/4" wide by 4-3/4" high. Hope that helps!
Anna-Marie Still  |  Wed Oct 14, 2009 at 11:19 AM
Suzanne- I've seen the second largest nestabilities Labels 8 die used on a card, and it looked close to the same size as the top note die. And it's the same shape. Hope that helps.
Kelly  |  Wed Oct 14, 2009 at 2:49 PM
Well, if that isn't just the cutest thing ever!!! Thanks so much for sharing this wonderful tutorial.
Joanne (sleepyinseattle)  |  Wed Oct 14, 2009 at 5:52 PM
love love love it! you are amaZING!
bettyannmanghi  |  Wed Oct 14, 2009 at 6:39 PM
This is AWESOME!!! I see some wonderful Mothers day Crafts coming!!
Denise Bennett  |  Wed Oct 14, 2009 at 8:57 PM
This is a very cute treat. The only problem is that I HATE Peeps. I think they are the grossest thing on the planet. But I do appreciate the artistry of the project.
Michele  |  Wed Oct 14, 2009 at 11:45 PM
Wonderful tutorial!
Mark Cahill  |  Fri Oct 16, 2009 at 11:47 AM
oh, and BTW, the video is tremendous!
Mark Cahill  |  Fri Oct 16, 2009 at 11:50 AM
Great work
Dennis  |  Fri Oct 16, 2009 at 11:57 AM
These are insanely cute!!!!
Regina Runge  |  Fri Oct 16, 2009 at 1:57 PM
How adorable!!! I don't have the Top Note Die but am going to try the Cricut "Accent Essentials" using #38 which looks a lot like the Top Note. I couldn't find a Nestie that would work. Thanks for such a detailed tute!
neenie  |  Fri Oct 16, 2009 at 2:56 PM
These are soooo cute! I just went out to get the supplies to make both pumpkin and ghost. I love this!! Awsome job!
Patti  |  Sat Oct 17, 2009 at 9:32 PM

Page 1 of 2 pages  1 2 >

You need to be logged in to comment

GET OUR NEWSLETTER


Splitcoaststampers's privacy policy