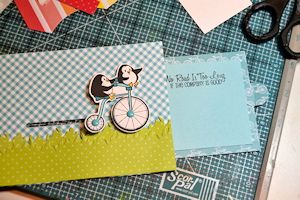
Pull-Tab Slider Card
by Julie Masse
Pull a sliding tab to animate your card and reveal a message.
Supplies
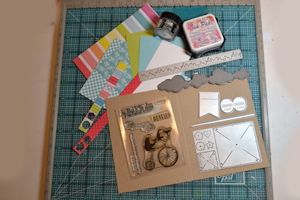
- Cardstock
- Ink
- Stamps – a focal image and sentiment stamp(s) (TCP Besties clear set used here)
- Slot and circle dies, or ruler and craft knife (TCP CutUps Slider die set used here)
- Adhesive (Glue Dots and foam dimensionals used here)
- Other stamps, dies and embellishments as needed to complete the project
Step-by-Step
-
Step 1
To prepare the sliding panel, cut cardstock to 3.25" x 5". Die cut a pull tab from cardstock, then fold the piece in half and adhere the open side to the edge of the panel. Stamp a sentiment on the panel if desired.
Note:
To create a pull tab with a small circle die, fold a small piece of cardstock in half. Position the die so one side slightly overlaps the fold. Cut as usual.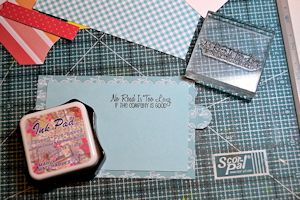
-
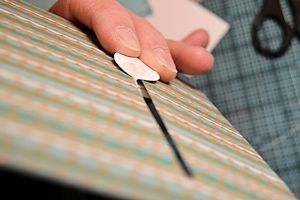
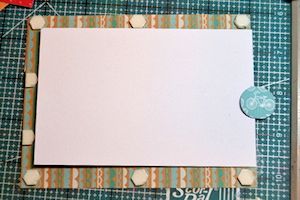
Step 2
Cut a slider slot in the card front. The slot for the sample is approximately 1/4" wide by 3.75" long. The cut can be horizontal or vertical.
Hint:
If using a die, use a bit of low-tack tape to hold it in place for cutting. If you don't have a die, cut the slot with a craft knife.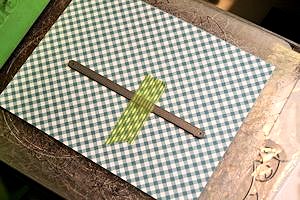
-
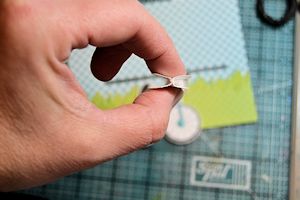
Step 3
Die cut another tab from cardstock. Run a line of adhesive up the center, and fold the tab in half to align the circles. Fold across, then turn the sides back to form an “I” shape.
-
Step 4
Stamp, color, and cut out the focal image of the card. Adhere one side of the tab to the back of the image using a glue dot.
Note:
Be sure that the center of the slider tab is oriented to the direction in which the image should slide.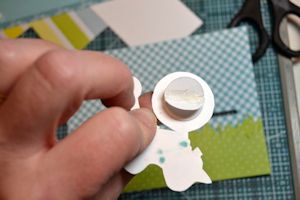
-
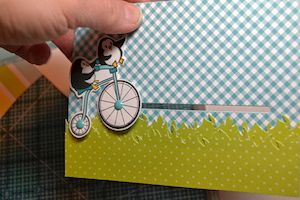
Fold the other side of the tab in to insert it through the slot. Lay the tabs flat.
-
Step 5
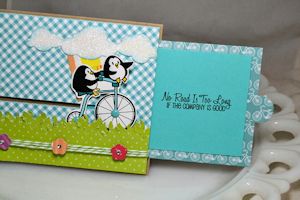
Align the slider and sentiment panels, and adhere the back of the slider tab to the sentiment panel.
-
You will now be able to slide the image back and forth using the pull tab.
-
Step 6
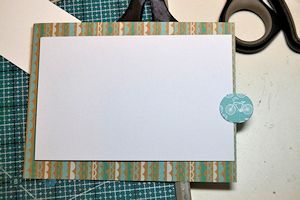
Add foam dimensional adhesive to the back of the card front around 3 sides of the sentiment panel, leaving the end with the tab free of adhesive.
-
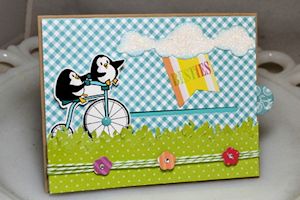
Step 7
Adhere the panels to the card base. Embellish as desired to complete the card.
Video!
Variations
-
Turn the slot to create a vertical slider.

Your Turn
You've seen the tutorial, now you try it! We've got a section of the gallery set aside for Pull-Tab Slider Card. Try this technique, then upload your artwork to the gallery. Show us your creations!
***Please note - Internet Explorer/Edge is not a supported browser, and will not allow you to see the videos. Please use Chrome, Firefox or Safari to view our tutorial videos.

Questions and Comments
We'd love to get your feedback or questions. Leave your comment below.
But I found that the spacer was a bit to high, so I added a strip of foam in between the two round cardstocks. I also made a "garage" (very simple just a paper over the left side) for the movable Picture, in my case a cute ghost, so that when you pulled the tab the ghost appeared. Hope you understand what I mean...
Thanks again for this Lovely technique!
I realy like your card, it's very cute
Page 1 of 1 pages